Mercury Instance Users
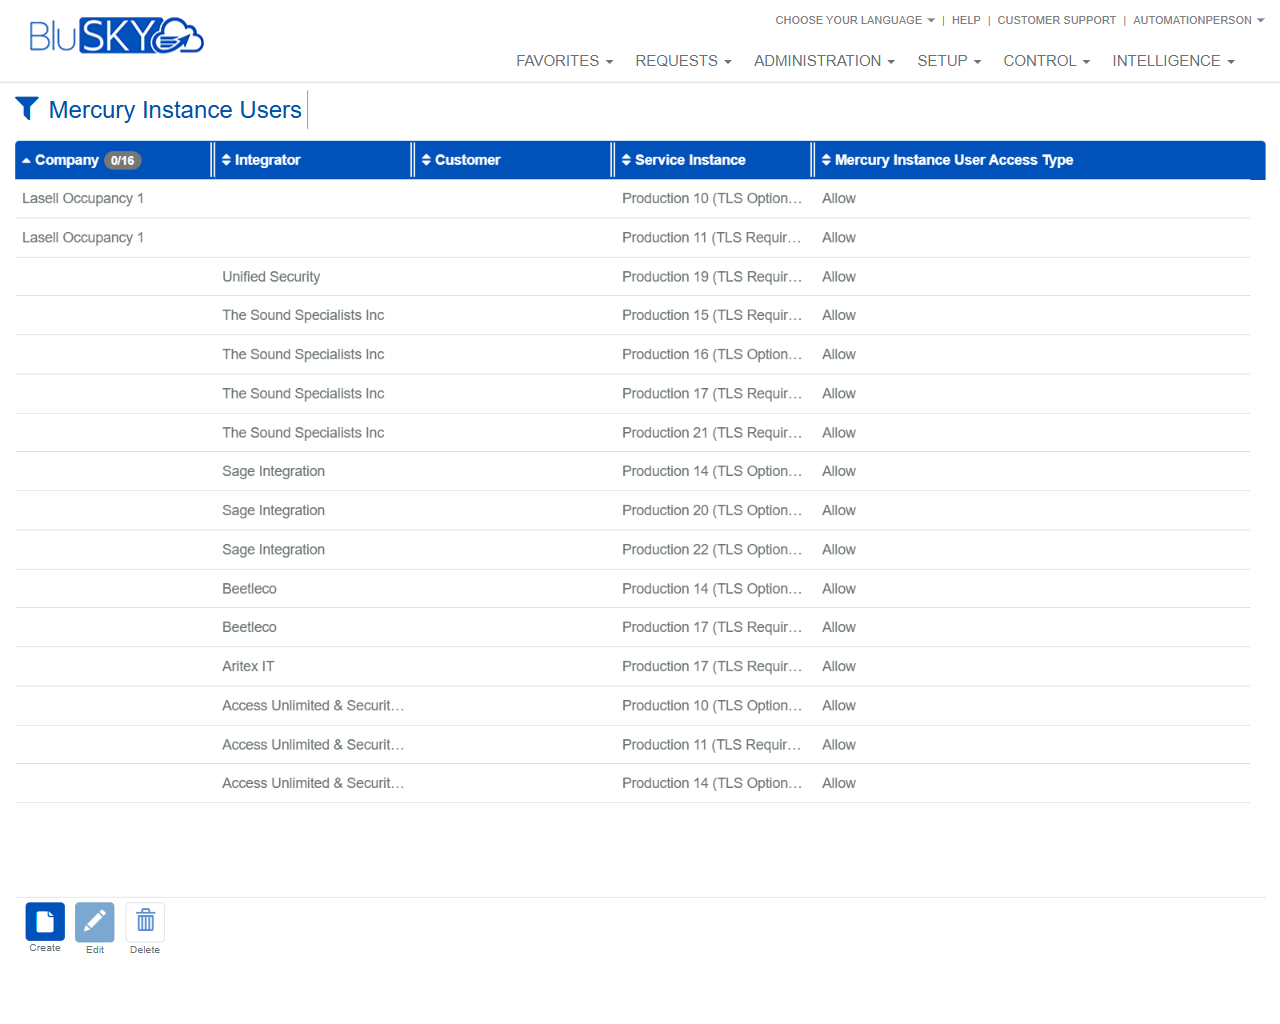
Mercury Instance Users Screen
Screen Overview
The Mercury Instance Users screen allows administrators to view and manage which organizations (Company, Integrator, Customer) have user access to specific Mercury service instances. It provides filtering by organization, a results grid showing existing mappings, and actions to create, edit, or delete access entries.
Field Definitions
| Field Label | Definition | Notes |
|---|---|---|
| Company | The company associated with the access mapping. | Appears as a filter (drop-down) and as a column in the results grid. Refresh icon reloads list. |
| Integrator | The integrator responsible for the deployment or support relationship. | Appears as a filter (drop-down) and as a column in the results grid. Refresh icon reloads list. |
| Customer | The end-customer tied to the access mapping. | Appears as a filter (drop-down) and as a column in the results grid. Refresh icon reloads list. |
| Service Instance | The targeted Mercury service instance to which access is applied. | Grid column; read-only on the list. |
| Mercury Instance User Access Type | Indicates the access type for the mapping (e.g., Allow). | Grid column; values are system-defined. |
Screen Actions and Functions
- Reset – Clears all filter selections back to All.
- Submit – Applies the selected filters and loads the results grid.
- Create – Opens a form to add a new Mercury instance user access mapping.
- Edit – Opens the selected mapping for modification.
- Delete – Removes the selected mapping from the system.
- Refresh picklist (circular arrow next to each filter) – Reloads drop-down values from the server.
- Grid interactions – Click column headers to sort; horizontal scrolling may be available for long lists.
Usage Instructions & Examples
How to find Mercury instance user mappings
- Open Setup > Mercury Instance Users.
- Select values in the Company, Integrator, and/or Customer filters (or leave as All).
- Click Submit to load results.
- Sort by any column header to organize the list. Click a row to highlight it for actions.
How to create a new access mapping
- Click Create.
- In the form, select the appropriate Company, Integrator, Customer, and Service Instance.
- Choose the desired Mercury Instance User Access Type (if available).
- Save. The new mapping appears in the results grid after the list refreshes.
How to modify or remove a mapping
- Select a row in the grid.
- Click Edit to change details, then Save; or click Delete to remove the mapping.
- Re-click Submit to refresh the grid if needed.
System Behaviors and Edge Cases
- Filters default to All. No results display until Submit is clicked.
- The refresh icon beside a filter repopulates its drop-down values from the server without affecting other selections.
- Edit and Delete require exactly one row to be selected.
- The system may prevent creating duplicate mappings for the same Company/Integrator/Customer and Service Instance combination.
- Deleting a mapping removes access associated with that entry; propagation to dependent services may not be instantaneous and can depend on background synchronization.
- If the user lacks required permissions, Create/Edit/Delete controls are hidden.
Permissions
- Accessible to users with administrative permissions in Setup, typically:
- Global Administrators
- Tenant/Customer Administrators
- Integrator Administrators (as configured)
- Create, Edit, and Delete require a specific permission to manage Mercury Instance Users. View-only users can filter and view results but cannot modify records.
Linked Workflows
- Service Instances – Define and maintain Mercury service instances before assigning access.
- Companies / Integrators / Customers – Ensure these organizational records exist and are accurate prior to creating mappings.
- User provisioning – After mappings are in place, proceed with user/account setup aligned to the appropriate organization and instance.
Reference Image Links