Ips Points
IPS Point List
Screen Overview
The IPS Point List screen enables administrators to view, create, and maintain Intrusion (IPS) points that map controller inputs to monitored alarm zones in BluSKY. The page provides filters for rapid narrowing of results, grid actions for viewing/editing/deleting points, and a print-friendly expanded view. A Create IPS Point form is available to define zone type, monitoring/entry delay modes, SIA details, chime behavior, and alarm priority.
Field Definitions
| Field Label | Definition | Notes |
|---|---|---|
| System | Filter limiting results to a specific security system. | Optional; defaults to Any. Affects list only. |
| Controller | Filter by controller hosting the input. | Optional; defaults to Any. Affects list only. |
| IPS Group | Filter and field indicating the logical IPS group/area the point belongs to. | Optional filter on the list. On Create/Edit, selecting a group narrows available Inputs. |
| View | Filter controlling status scope (e.g., All Active). | Use to include deleted/inactive items when needed. |
| IPS Point Count | Displays the number of IPS points returned by the current filters. | Read-only. Updates after Submit. |
| Name | Friendly name for the IPS point as shown in lists and reports. | Required on Create/Edit. Must be unique within context. |
| Include Chime | Enables a chime when the point transitions to alarm or other defined states. | Toggle (Yes/No). Optional. |
| Deleted | Indicates whether the point is soft-deleted. | Read-only in list. Can be restored by editing when allowed. |
| Input | The physical input on the controller that this IPS point represents. | Required. List is filtered by System/Controller/Group. |
| Mercury IPS Point Zone Type | Zone classification (e.g., Perimeter, Interior, 24 Hours Zone). | Required. Determines arming/monitoring rules. |
| IPS Point Monitor Mode | Monitoring mode applied to the point (e.g., Normal Monitoring). | Required. Impacts event handling and supervision. |
| IPS Point Entry Delay Mode | Entry/arming delay behavior (e.g., Instant Arm, No delay). | Required. Controls entry/exit timing. |
| SIA Point Type | SIA-defined point category used for central-station reporting. | Optional; choose when SIA reporting is used. |
| SIA Zone Number | The SIA zone/point number tied to this IPS point. | Optional; numeric. Required only if your SIA integration mandates it. |
| Alarm Priority Level | Severity level used for UI color and optional sound. | Required. Drives alert color; can define sound behavior. |
| Retain (per field) | Checkbox beside many Create fields to keep the current value for subsequent records. | Useful for rapid multi-point entry with Save + New. |
| Color (preview) | Shows the color associated with the selected Alarm Priority Level. | Read-only preview on Create/Edit. |
| Sound (preview) | Shows the tone associated with the selected Alarm Priority Level. | Read-only preview on Create/Edit. |
| Date Inserted | When the point was created. | Read-only; appears in Expanded/Print view. |
| Inserted By | User who created the point. | Read-only; audit trail column. |
| Date Updated | Last modification date/time. | Read-only; audit trail column. |
| Updated By | User who last modified the point. | Read-only; audit trail column. |
| Date Deleted | When the point was marked deleted. | Read-only; audit trail column. |
| Deleted By | User who deleted the point. | Read-only; audit trail column. |
Screen Actions and Functions
- Submit – Applies current filters and refreshes the list.
- Reset – Clears filters back to defaults.
- Create – Opens the Create IPS Point form.
- View – Opens the selected IPS point in read-only view. Appears after selecting a row.
- Edit – Opens the selected IPS point for editing. Appears after selecting a row.
- Delete – Soft-deletes the selected IPS point. Appears after selecting a row.
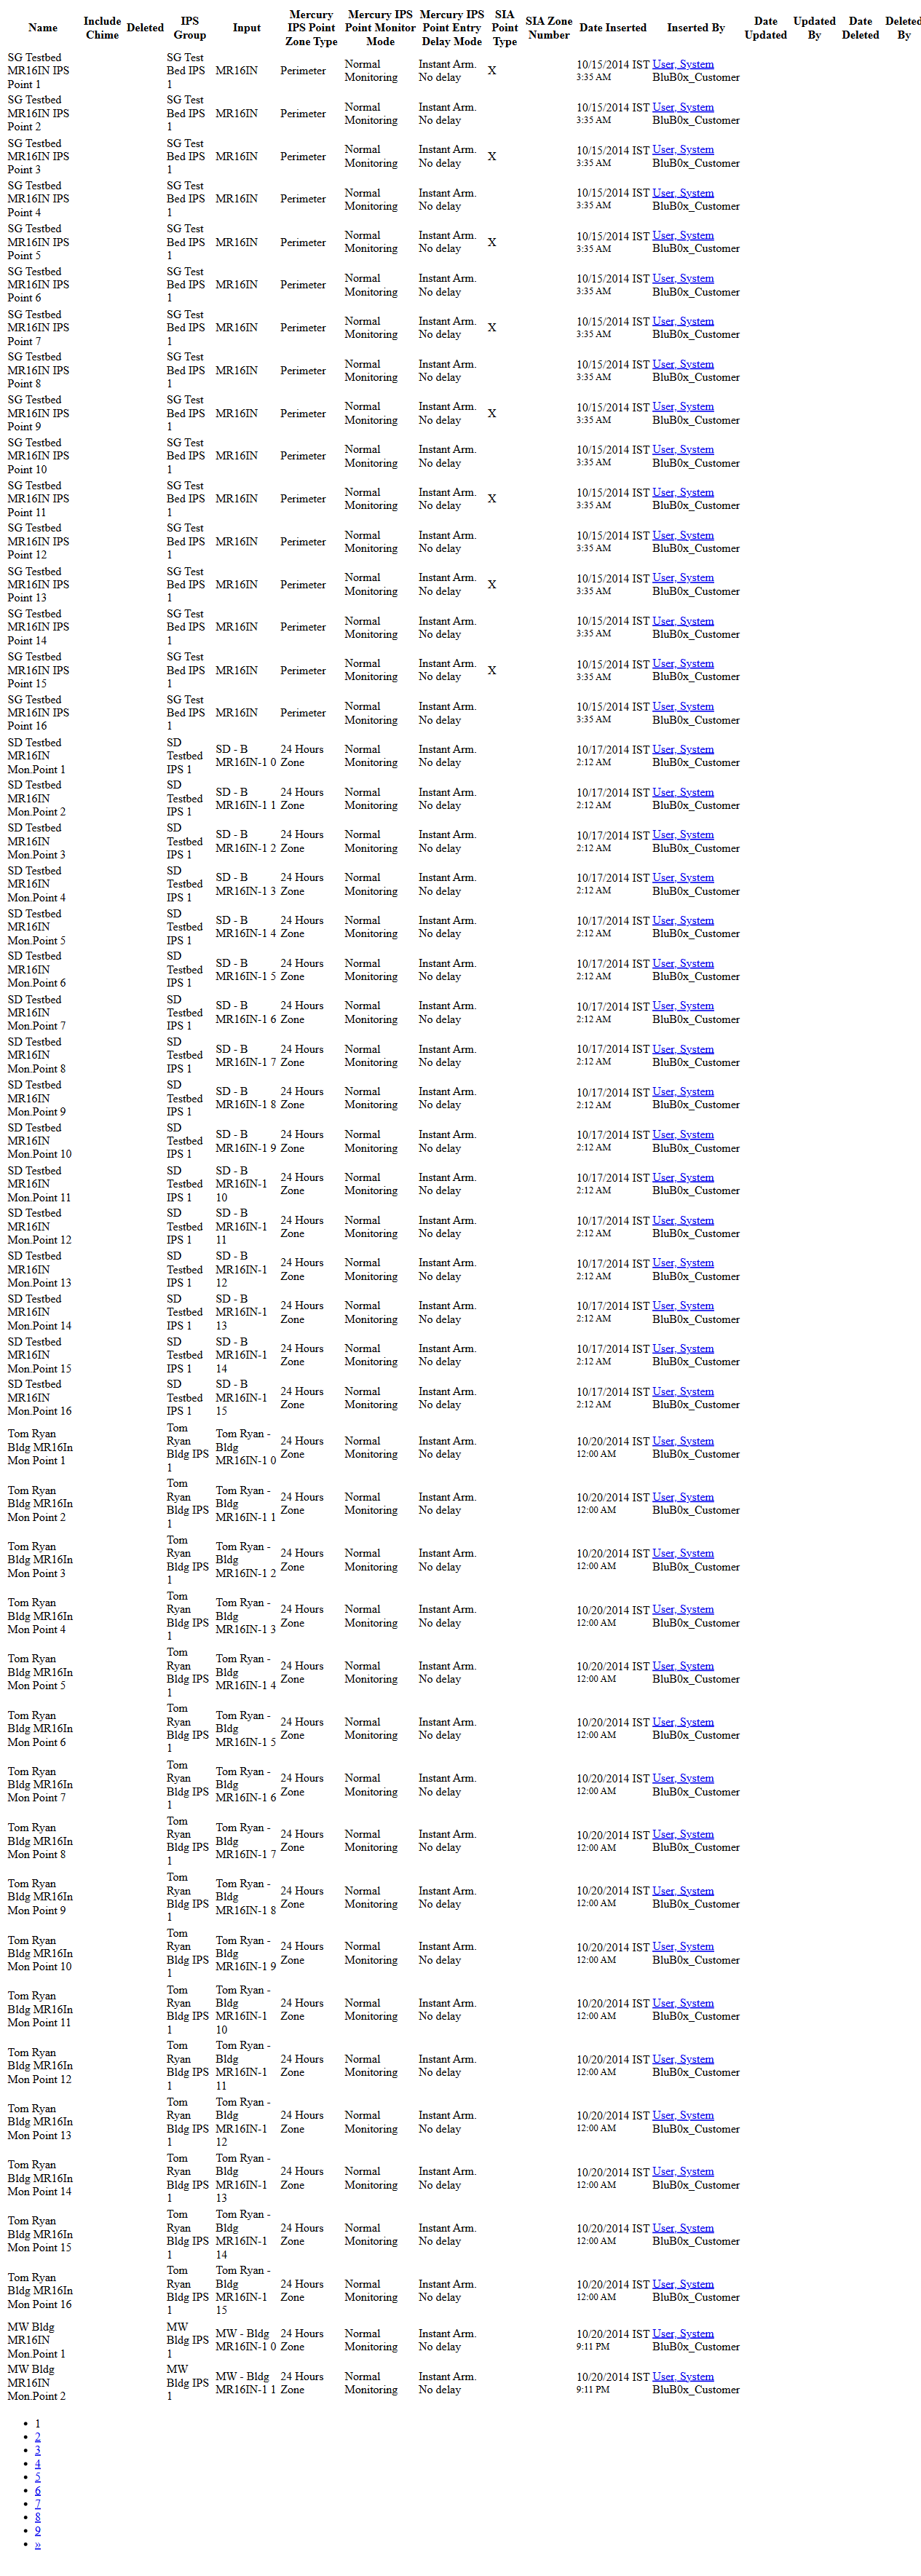
- Expand – Opens a wide, print-friendly list including additional audit columns.
- Save (Create/Edit) – Saves changes and returns to the list.
- Save + New (Create) – Saves and opens a fresh Create form. Works with Retain to speed entry.
- Back To List / Back To Filter – Navigation back to the list or filter view from detail pages.
Usage Instructions & Examples
How to filter and find IPS points
- Select System, Controller, IPS Group, and View as needed.
- Click Submit to refresh the grid.
- Review IPS Point Count and the returned rows. Click a row to select it and reveal row actions.
How to create a new IPS point
- Click Create.
- Select IPS Group and Input.
- Enter a descriptive Name.
- Choose IPS Point Zone Type.
- Set IPS Point Monitor Mode and IPS Point Entry Delay Mode.
- (Optional) Turn Include Chime to Yes.
- (Optional) Select SIA Point Type and enter SIA Zone Number if required by your monitoring.
- Choose an Alarm Priority Level and verify the Color/Sound preview.
- Click Save. The new point appears in the list.
How to rapidly add multiple similar points
- Click Create.
- Fill in the fields that stay the same across points (e.g., IPS Group, Zone Type, Monitor/Entry Delay Mode).
- Check Retain next to those fields.
- Enter the first point’s unique fields (Input, Name) and click Save + New.
- Repeat step 4 for each additional point; retained fields persist.
How to print/export-style review
- From the list, click Expand.
- Use your browser’s print command to print or save to PDF.
- Navigate pages via the pager links at the bottom of the expanded view.
How to edit or delete a point
- Select a row in the grid.
- Click Edit to modify fields, then Save; or click Delete to soft-delete the record.
System Behaviors and Edge Cases
- Required fields are enforced on Save; missing required entries are highlighted and the record is not saved.
- Selecting a row reveals View, Edit, and Delete actions; without selection only Create and Expand are shown.
- Delete performs a soft-delete; the record remains available in View filters and appears with Deleted indicated.
- Expand shows additional audit columns (SIA fields, monitor/entry modes, and full audit trail) in a print-friendly layout.
- Retain preserves only the fields where it is checked and only for the current session/tab.
- Available Inputs are filtered by the selected System/Controller/Group; unavailable or already-mapped inputs do not appear in the dropdown.
- Alarm Priority Level drives UI color and optional audible behavior; the preview reflects the selected level immediately.
- SIA fields are optional unless your integration or central-station setup requires them; invalid SIA Zone values are rejected.
- Concurrent edits: the last saved change wins; audit columns (Updated By/Date Updated) reflect the final save.
Permissions
- Visible to users with setup/maintenance rights for Intrusion/IPS configuration.
- Create/Edit/Delete require elevated privileges (e.g., Global Administrator, System Administrator, or Tenant Administrator with IPS management rights).
- View-only access may be granted to operators without edit permissions.
- Delete action may be restricted to users with specific delete privileges.
Linked Workflows
- IPS Groups – Define and maintain the groups/areas referenced by IPS points.
- Controllers/Inputs – Ensure hardware inputs are configured before creating points.
- Alarm Routing/Notifications – Use the point’s Alarm Priority Level and SIA details in routing rules and notification policies.
- Monitoring and Arming – Points participate in arming profiles and live alarm handling in Control modules.
- Intelligence/Reports – Use the expanded view or reporting to audit IPS point definitions and changes.
Reference Image Links