Creating a Controller in BluSKY
Overview
The Controller serves as the brain of the access control system and is also how BluSKY is able to make the connection to the physical world from the cloud. In this lesson we discuss how to create and configure a controller in BluSKY.
Instructions
- Log in and navigate to Controller. Main Menu-> Setup-> System Setup-> Controllers
- Use the
 icon on the lower left side to create a new Controller.
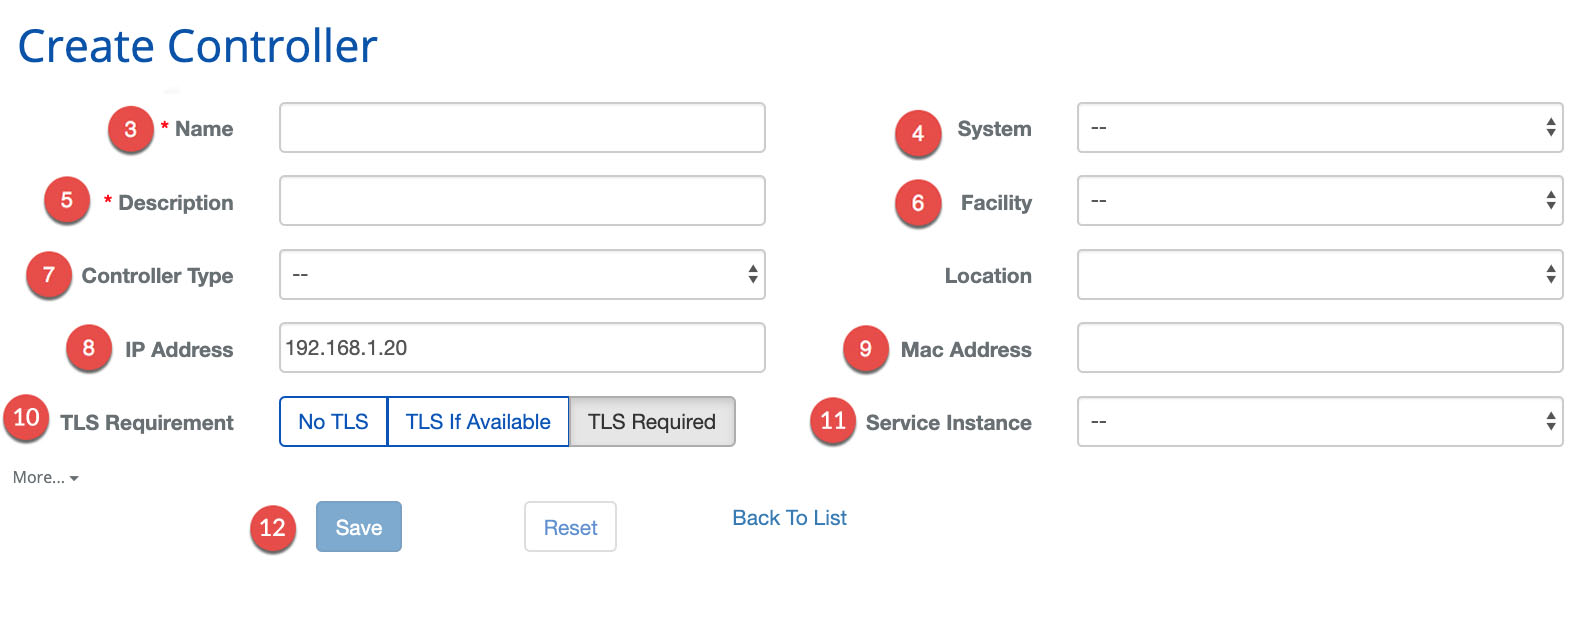
 - Enter the Name of the Controller.
- Assign the Controller to a System using the drop down menu.
- Enter a Description for the Controller.
- Assign the Controller to a Facility.
- Specify a Controller Type.
- Add the IP Address.
- ***Note:***The IP address is not used by BluSKY but can be useful for maintenance in the future.
- Enter the MAC Address of the Controller. 'MAC' must be followed by 12 hexadecimal digits (0-9, A,B,C,D,E,F)
- ***Note:***This address must begin with "MAC".
- Specify the TLS Requirement.
- Specify Service Instance
- When finished use the Save button to finish.
- ***Note:***There are many more ways to configure a Controller the More...
 option will expand these options.