Creating and Configuring a Person
Overview
People are the ones that utilize the access control system on a regular basis. One of the most powerful features of BluSKY is its ability to manage and control the various aspects of any Person in the system.
Creating a Person
- Log in and navigate to People. Main Menu-> Administration-> People
- In the lower left-hand side of the view list, click the
 icon.
icon. - Select the type of entity this newly-created Person will belong to. (Integrator, Customer,Vendor or Occupancy).
- Based on the previous choice, select the Integrator, Customer,Vendor or Occupancy using the correspondingly-labeled field.
- Enter personal information about the Person.
- Enter a First Name and Last Name.
- Optionally, enter a Middle Initial and/or Nick Name.
- Optionally, select a Gender and/or Pronounsusing the dropdown fields.
- Select the home Floor of the Person.
- Note: the list of available Floor options is limited to Floors that the entity (Integrator, Customer, Vendor or Occupancy) belongs to in its Facility.
- Optionally, enter department/job information about the Person.
- Enter a Job Title, Employee #, Department Code, Department Name, and/or Office/Desk Location.
- Select a Work Environment, Employment Term,and/or Worker Typeusing the dropdown fields.
- If applicable, use the Start Date and End Date fields to specify a delayed profile activation date or a profile expiration date.
- ***Note:***By default, People are created with a Start Date equal to the current time and a blank End Date. This means their Person profile is immediately active and does not expire.
- Optionally, enter emergency contact information for the Person.
- Enter an Emergency Contact Name, Emergency Contact Relationship, Emergency Contact Home Phone, Emergency Contact Work Phone, and/or Emergency Contact Mobile Phone.
- If applicable, enter contact information for the Person.
- If this Person intends to receive SMS/text Notifications from BluSKY, enter their Phone number and select its type (Work, Home, Mobile, Call Tree, or Fax) using the adjacent dropdown field.
- If this Person intends to receive email Notifications from BluSKY or log in to BluSKY, enter their Email addressand select its type (Work, Occupancy, or Personal) using the adjacent dropdown field.
- If this Person intends to receive Intercom calls through BluSKY, select the PortSIP option from the dropdown field. After the text box turns gray, click on the gear button to automatically generate a PortSIP extension for this Person profile.
- Note: Multiple phone numbers or email addresses can be added using the green add buttons.
- If multiple phone numbers or email addresses exist for a single Person profile, using the Default radio button to indicate which contact information is the default.

- If applicable, set the BluB0X Login toggle to 'Yes' to reveal the login information fields.
- Note: The User Name field cannot be edited and automatically uses the value of the default email address.
- Enter a Password for this Person profile.
- Note: Passwords must be at least 8 characters long and include uppercase, lowercase, and special characters.
- Note: If desired, use the shuffle button to generate a random password.
- Re-enter the same value in the Confirm Password field that is in the Password field.
- ***Note:***The eye button can be used to toggle both Password fields' displays between secured text or normal text.

- When finished, use the
 button to create the Person profile.
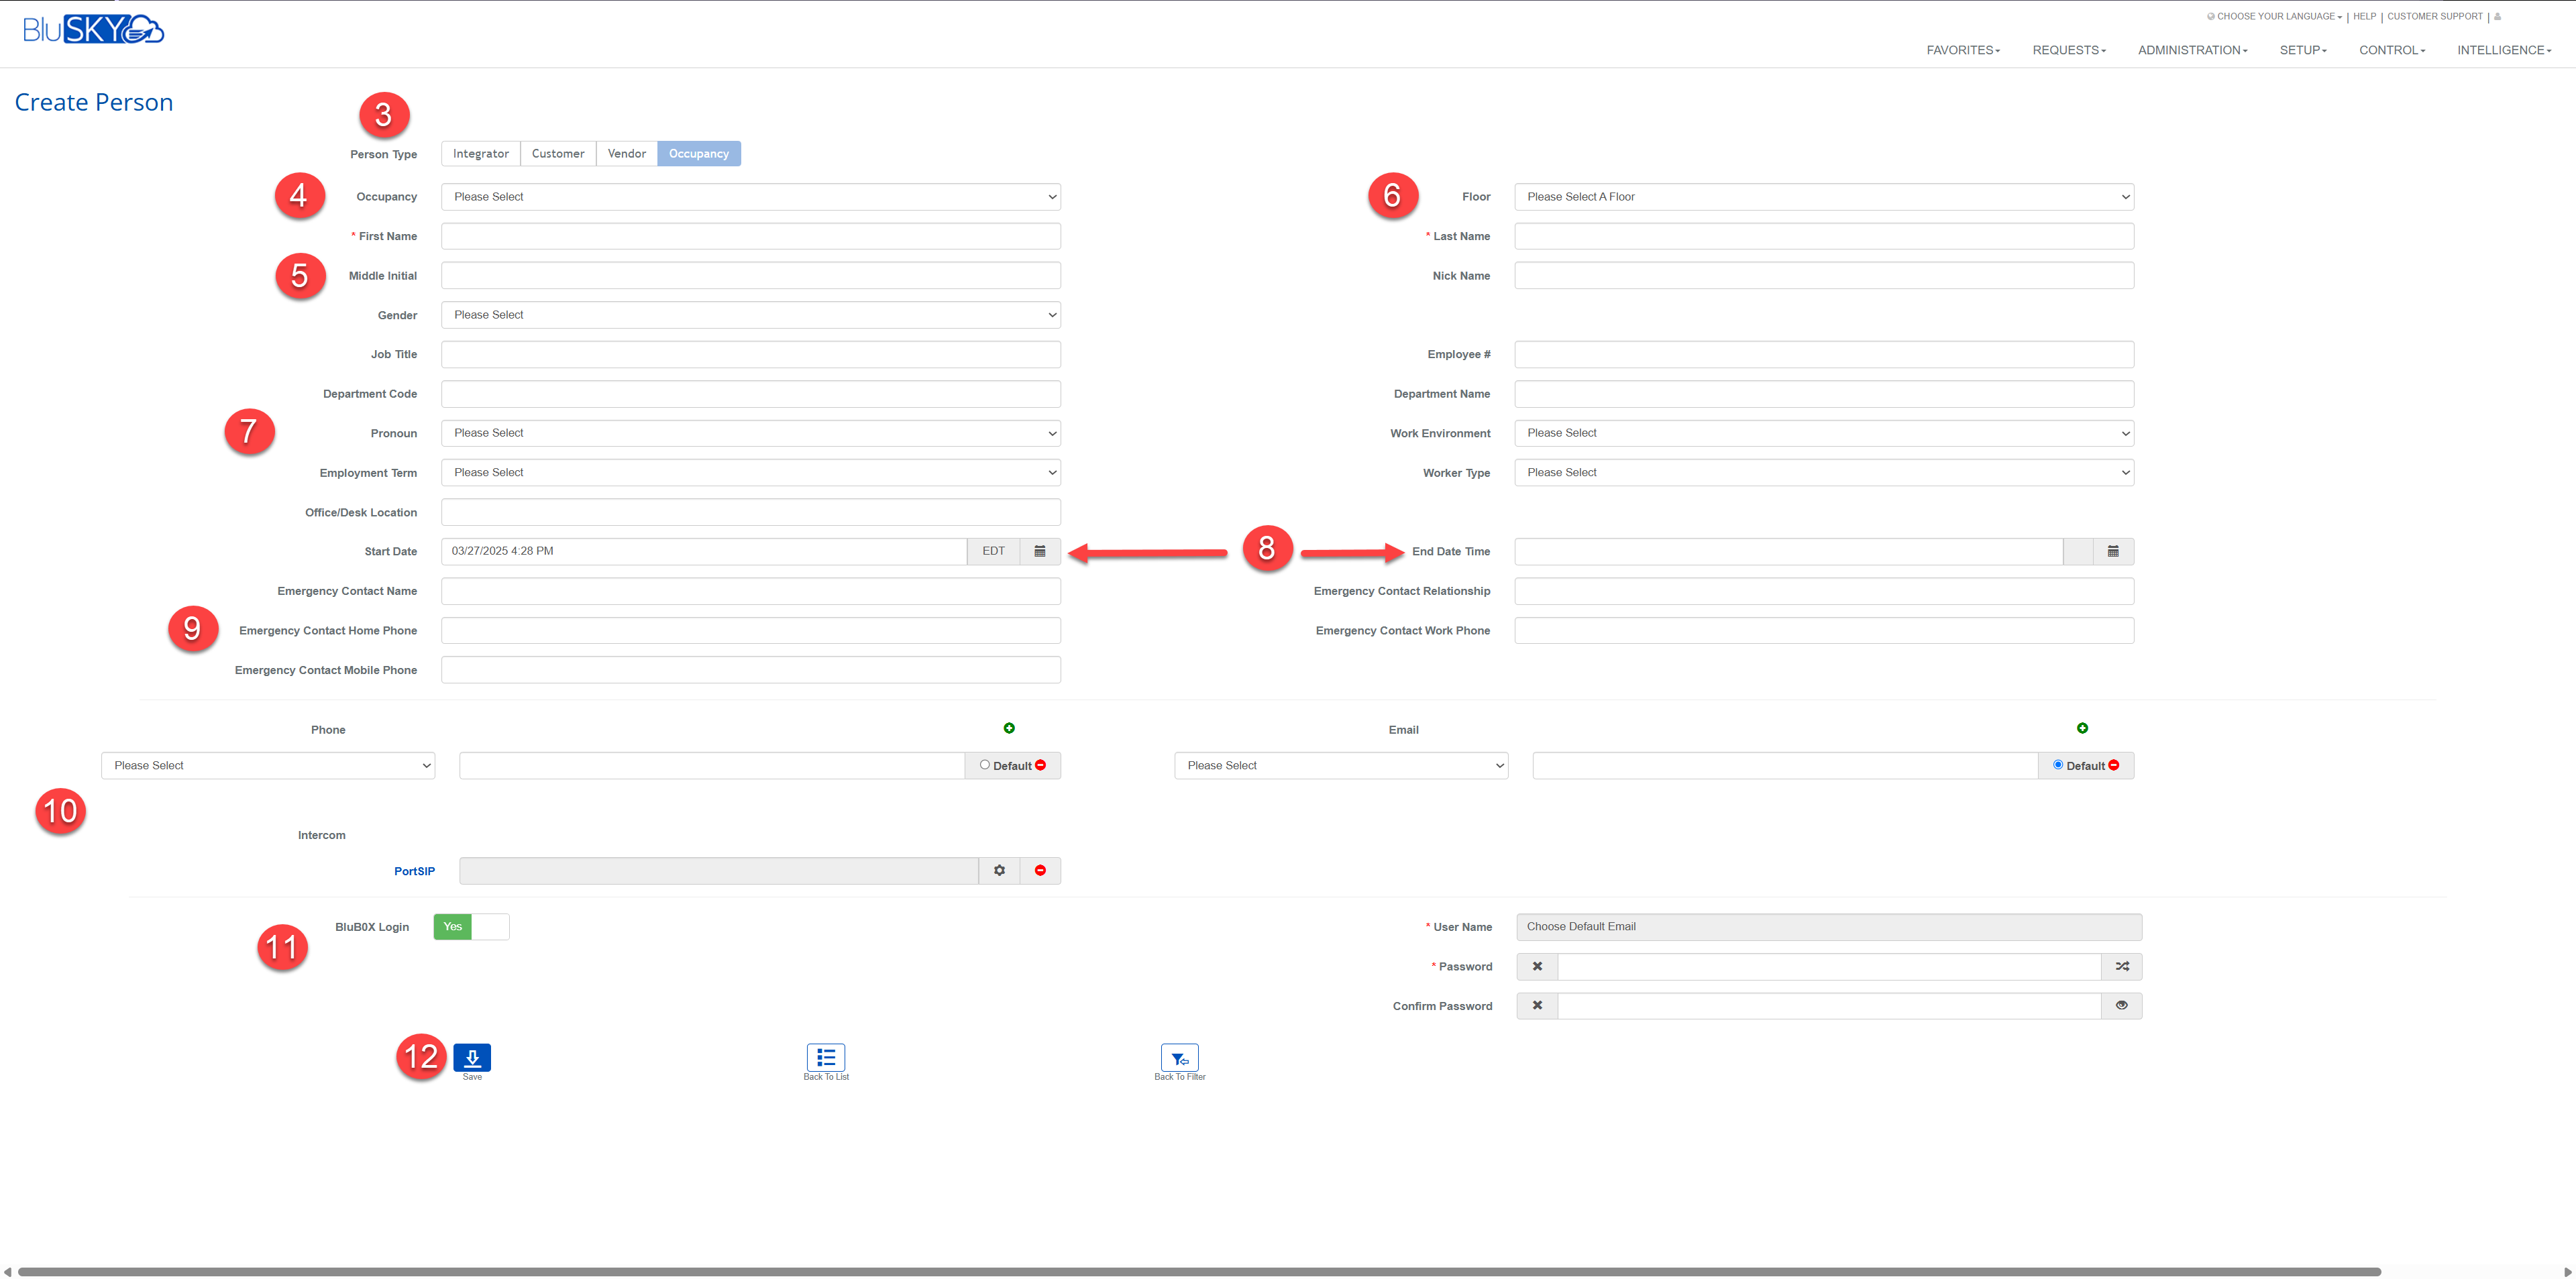
Add an Access Level to a Person
- Log in and navigate to People. Main Menu->Administration->People
- Use the search criteria feature, then select the entry you wish to edit from the list.
- Click the
 button in the lower left-hand side to open the Person Edit screen.
- Note: If the edit button is not available, ensure that only one entry has been highlighted.
- Use the tabs to select Access if not already on the correct page.
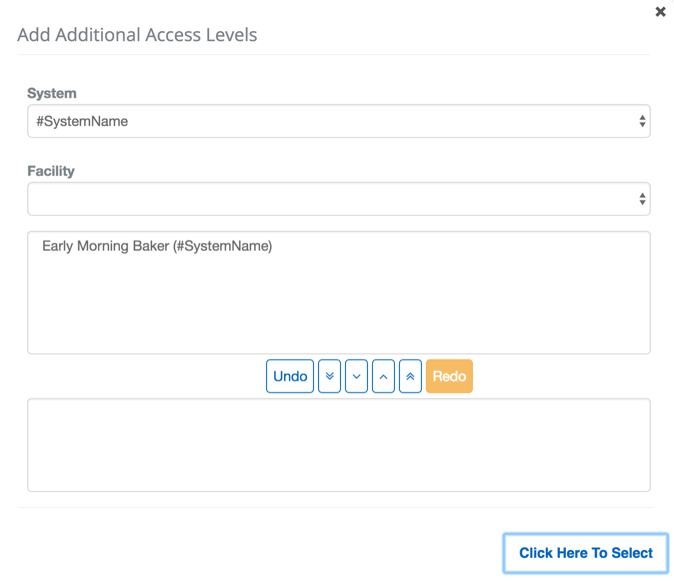
- Use the Add Access Level button below the list to add an Access Level**.**
![]()
- In the new popup menu, click all of the Access Levels you want to assign.
- Use the
 button to move them to the assign section of the menu. All Access Levels in the lower section field will be added to the Person.
- Note: If you have an Access Level assigned mistakenly use the
 button to move it to the unassigned section again.
- Add the selected Access Levels to the Person by clicking the
 button.
 - Commit changes with the button.
Add a Role to a Person
- Log in and navigate to People. Main Menu-> Administration-> People
- Use the search criteria feature, then select the entry you wish to edit from the list.
- Use the icon in the lower left hand side.
- Note: If the edit button is not available ensure that only one entry has been highlighted.
- Use the tab at the top to select Roles.
- Click
 Add Roles button.
- ***Note:***You may want to use the View button to view the permissions you are granting.
- Select the Role you wish to grant to the user.
- Click here for more information on Roles.
- Select the Role Scope.
- ***Note:***Role Scope refers to where in the System hierarchy the Role is valid. The higher up the hierarchy the more places the Role is applied.
- Confirm changes with the button.