Personnel Import Beta Tutorial
Overview
The Personnel Import beta feature is a powerful tool which quickly uploads the personnel information of a single Facility, Occupancy or Vendor from an Excel spreadsheet. This article helps understand how to use this tool and provides helpful tips for making the process as seamless as possible.
Note: This tool is currently released as a beta version**.** Please contact support@blub0x.com if you encounter any issues while using it.
Instructions
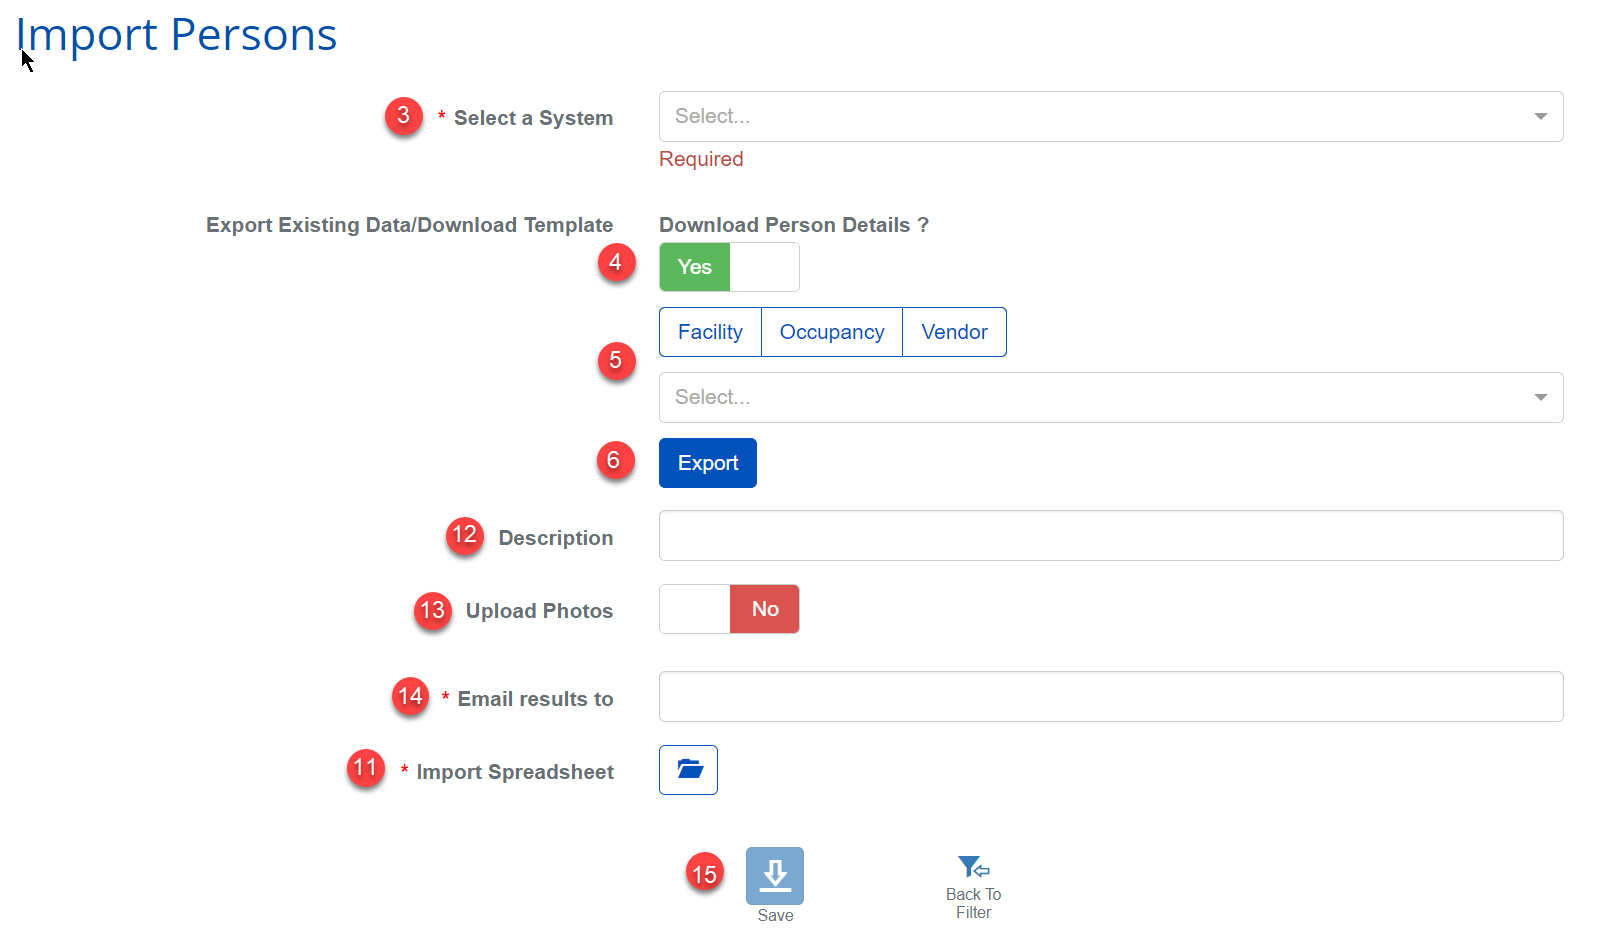
- From BluSKY, Navigate to Administration > Personnel Import - Beta
- Click the
 button
 - Select a System from the dropdown menu
- Toggle "Download Person Details ?" to

- Choose Facility, Occupancy, or Vendor and then select from the drop-down menu
- Hit
 to start the query, the file download starts when it completes. Note: This may take additional time based on amount of data being generated.
 - Once downloaded, open spreadsheet and navigate to the green EmployeeInfo tab - this is where changes can be made to personnel data
- Use the beige Action columns to declare any changes to an entry's information
- For changes to basic info (name, floor, company), column C must equal column B. If the changes being made do not pertain to basic info, leave an I in column C for the entry
- Abbreviation guide for B and C columns (master and basic info Action columns)
- Add a new entry by marking it with an A
- Update an existing entry by marking it with a U
- Delete an existing entry by marking it with a D
- Leave the I in any entries that are not being changes
- Abbreviation guide for other Action columns
- Assign a new credential or level by marking it with an A
- Un-assign a credential or level by marking it with a U or D (different per column, text is in column to guide)
- Leave the I in any credentials that are being unchanged
- Make changes to any information needed after using the Action column
- If updating an existing entry, any blank fields will overwrite existing data in BluSKY. Ensure the fields are not blank to preserve existing data if known
- Any section ignored (I) can be deleted without affecting the import
- Save the file when done
- Go back to BluSKY and select the file to be imported using the
 icon next to Import Spreadsheet
 - Add a Description if desired
- Toggle Upload Photos to if photos are being uploaded with the import
- Click the icon that appears to select all photos for upload. Only JPEG files are supported
- Any photos that fail to upload will show an error message next to the thumbnail placeholder
- Type in the email address of the recipient of the import report in the "Email results to" field
- Click the
 button when done