Schedules
Overview
Schedules are a collection of time intervals used to control access to Portals or Floor Stops. Schedules provide an easily managed mechanism to manage the access control system based off timing needs.
Schedules
Access Schedules are used together with Access Levels to determine an individual's access to Portals or Floor Stops of relay Elevators. For example, Linda needs access to every door in a Facility during normal business hours but she does not need to access the building after hours. An Access Schedule for business hours would allow her to only use her Card or Credentials during the specified time.
Device Schedules determine when a device should remain energized. Device Schedules describe the times when a Portal or DDE Floor Stop should remain locked. For example, Corputech wants to keep the front door unlocked during business hours. A Device Schedule would be used to keep the lock engaged during non-business hours.
Creating a Device Schedule
- Log in and navigate to Schedules. Main Menu-> Administration -> Schedules
- On the lower left-hand side click the
 icon.
icon. - Select the System you are making a schedule for.
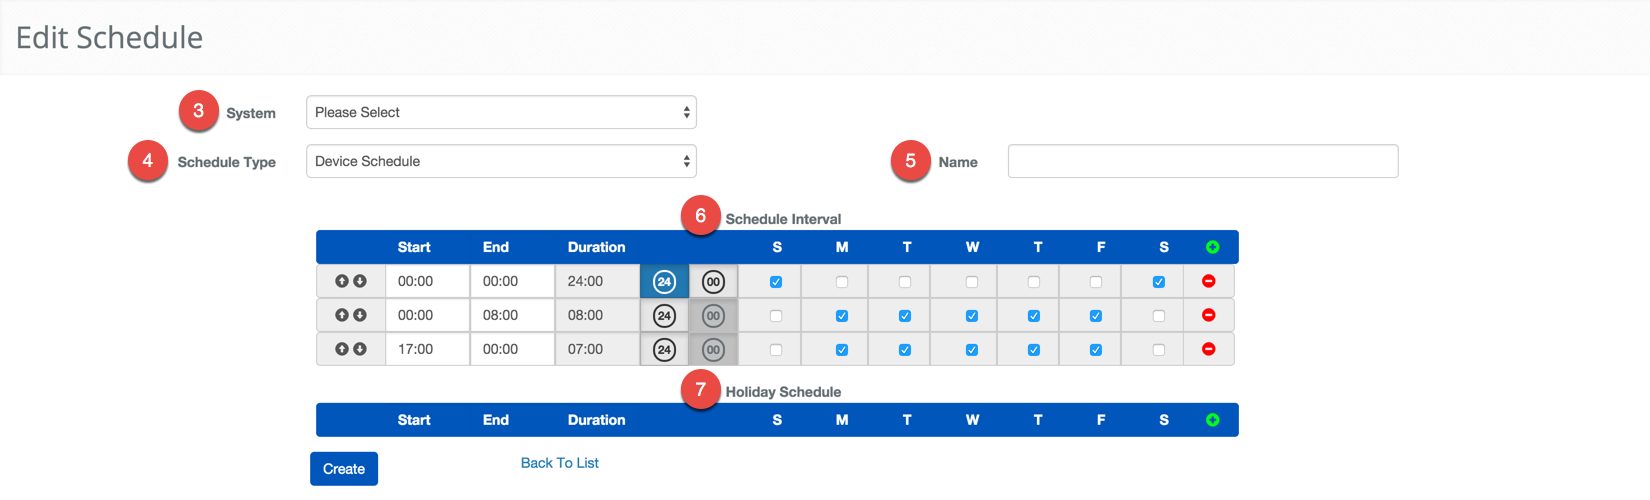
- It is important to verify that the Schedule Type is set to Device Schedule.
- Give the Schedule a name using the Name text field.
- Using the Schedule Interval, select the time you want the device to be secure and require credentials to access.
- ***Note:***If necessary use the
 icon to add another row for more complex timing.
 - *Note:*If there is a period where you wish to secure the device, you must use the first interval up until the time where access should be allowed then use another interval when the Device schedule should go into effect and lock.
- The example shown would keep the device engaged or locked all weekend, from midnight to 8:00am, and from 5:00pm until midnight on the weekdays.
- If needed, include a Holiday Schedule to be applied on the defined Holidays.
- When finished use the
 button to finish.
Creating an Access Schedule
- Log in and navigate to Schedules. Main Menu-> Administration-> Schedules
- In the lower left-hand side click the icon.
- Select System the Schedule will be used with.
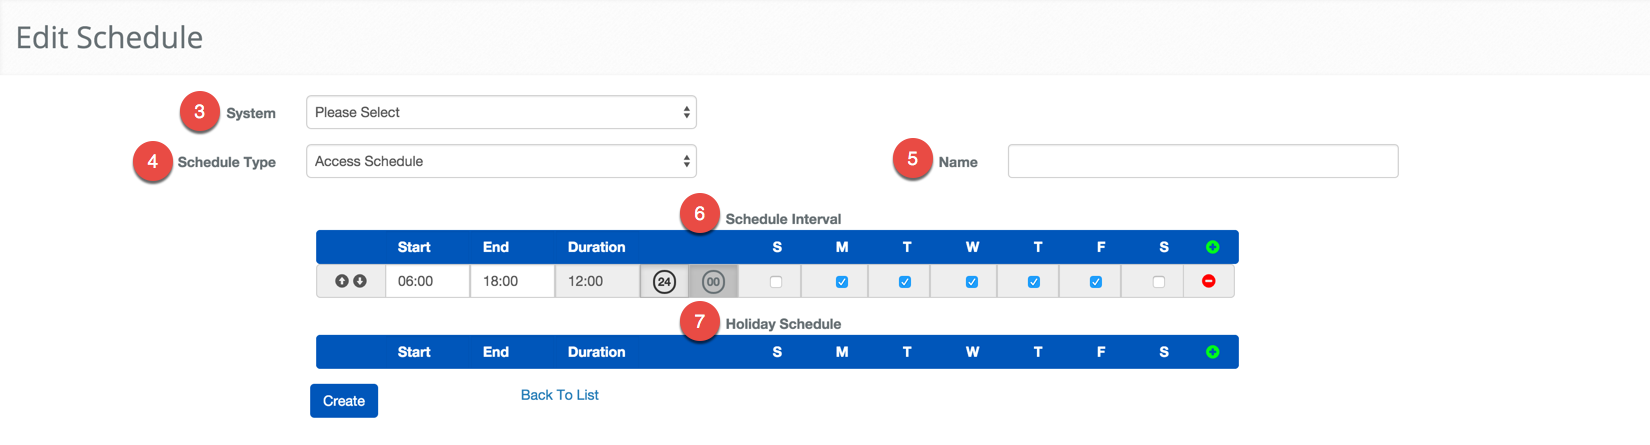
- It is important to verify that the Schedule Type is set to Access Schedule.
- Give the Schedule a name using he Name text field.
- Using the Schedule Interval, select the time you want to allow Access.
- ***Note:***If necessary use the icon to add another row for more complex timing.
- *Note:*If there is a period where you wish to disallow access you must use the first interval up until the time where access should be suspended then use another interval when the Access schedule should go into effect again.
- This Schedule would be used to allow a person to use their credential to gain access from 6:00am to 6:00pm.
- Define the Schedule to be applied for Holidays.
- ***Note:***If the schedule is not going to change on a holiday, i.e. normal workday schedule, then you would leave this field blank. If you want to prevent people who are assigned this schedule from entering the building on a holiday then select the , but leave the S-S check boxes empty.
- When finished, use the button to finish.