Portals Old
Portals Screen
Screen Overview
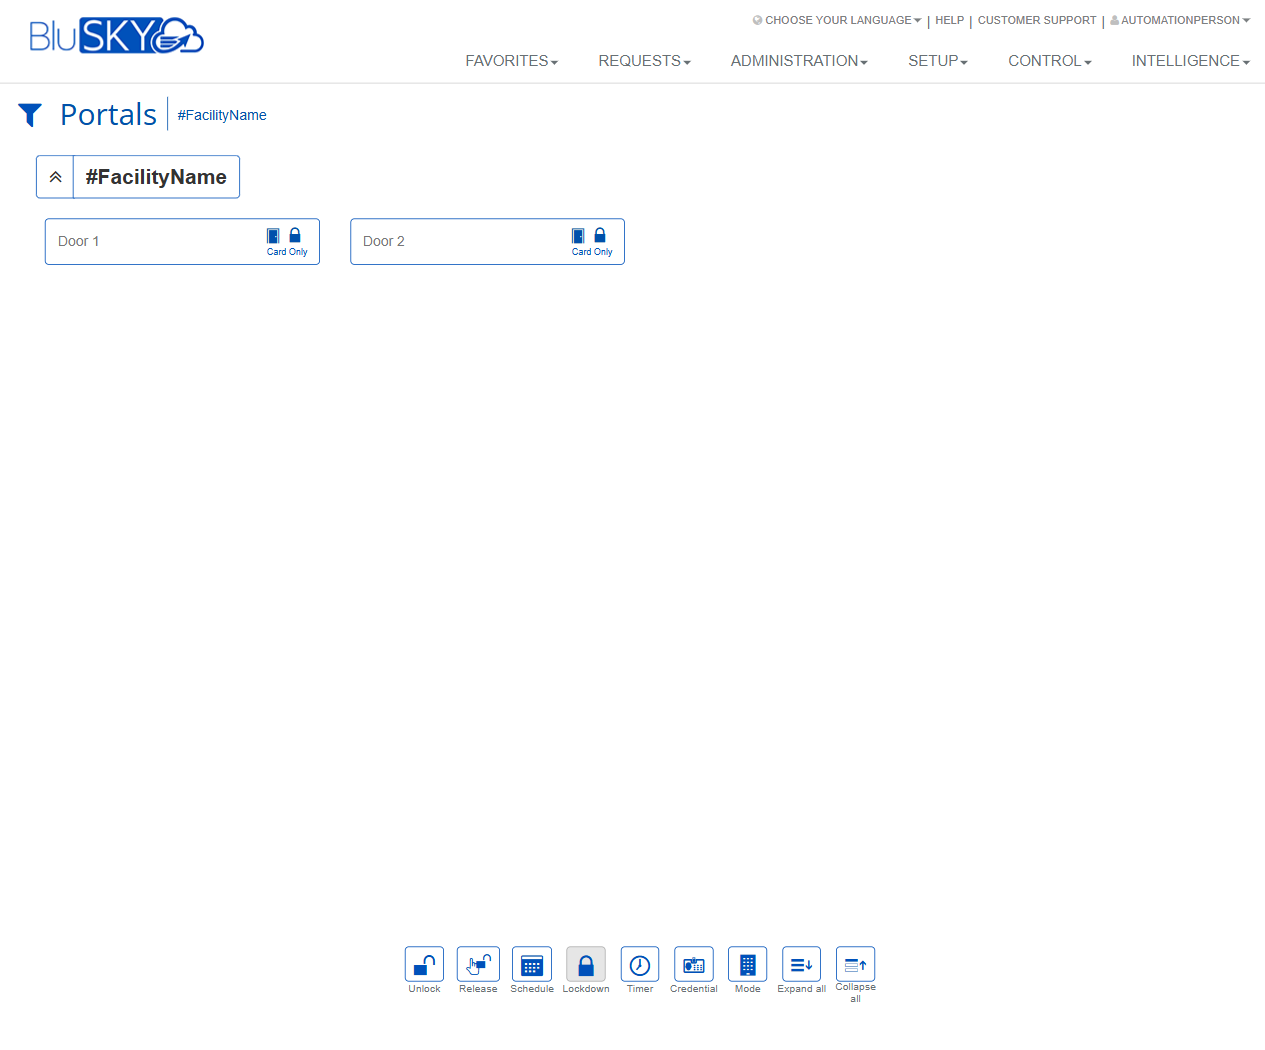
The Portals screen provides a live, card-based view of doors/portals within a selected facility. Operators can view each portal’s current access mode and status, select one or more portals, and issue real-time control commands (e.g., Unlock, Lockdown, Change Mode) from the action bar. This screen is used for day-to-day door operations and incident response in BluSKY.
Field Definitions
| Field Label | Definition | Notes |
|---|---|---|
| Screen Title: Portals | Identifies the current application page. | Read-only. Appears at the top-left. |
| Facility Breadcrumb | Path text showing the currently selected facility (e.g., #FacilityName). | Clicking the breadcrumb (when enabled) navigates up the facility hierarchy. |
| Facility Group Toggle | Expand/collapse chevron next to the facility header to show or hide its portals. | Affects on-screen visibility only; no operational impact. |
| Portal Tile: Name | The display name of the portal/door (e.g., Door 1, Door 2). | Click to select the portal for an action. Multiple tiles can typically be selected. |
| Portal Status Icon | A lock icon indicating the secure/locked state of the portal at a glance. | Icon appearance may change based on state (e.g., locked, unlocked, in lockdown). |
| Access Mode Badge | Text on the tile indicating the current access mode (e.g., Card Only). | Mode determines how entry is granted (such as Card Only, Card+PIN, Free Access). |
| Selection Highlight | Visual indication that a portal tile is selected and will receive actions. | If none are selected, most actions prompt you to select at least one portal. |
| Action Bar | Row of command buttons at the bottom of the screen. | Buttons execute immediate or scheduled operations on the selected portals. |
Screen Actions and Functions
- Unlock – Issues an immediate unlock command for selected portals.
- Release – Clears active manual overrides and returns portals to their normal (scheduled) behavior.
- Schedule – Opens scheduling options to view or apply a schedule that governs portal behavior.
- Lockdown – Places selected portals into lockdown, restricting entry per site policy.
- Timer – Applies a timed override (e.g., unlock/hold-open for a specified duration).
- Credential – Opens a dialog to look up or apply credential-based exceptions/authorizations relevant to the selected portals.
- Mode – Changes the access mode (e.g., Card Only, Card+PIN, Free Access) for selected portals.
- Expand all – Expands all facility groups to show their portals.
- Collapse all – Collapses all facility groups to hide their portals.
Usage Instructions & Examples
-
Select portals to control
- Locate the facility group and expand it if needed.
- Click each portal tile (e.g., Door 1, Door 2) to select. Confirm selection highlight appears.
-
Unlock doors immediately
- Select one or more portal tiles.
- Click Unlock.
- Confirm the action in the prompt (if shown). The status icon updates when the command is applied.
-
Return doors to normal behavior
- Select the affected portals.
- Click Release to clear any manual overrides.
- Verify the tiles reflect the scheduled or default mode.
-
Change access mode
- Select one or more portal tiles.
- Click Mode and choose the desired mode (e.g., Card Only).
- Save/Apply. The Access Mode Badge on each tile updates accordingly.
-
Apply a timed unlock (hold-open)
- Select the portal(s).
- Click Timer, enter a duration, and confirm.
- After the timer expires, the portal returns to its prior state or schedule.
-
Initiate lockdown
- Select the portal(s) to secure.
- Click Lockdown and confirm.
- To exit lockdown for those portals, select them and click Release (or change Mode as permitted).
-
Expand or collapse groups
- Use Expand all to display all portals across groups.
- Use Collapse all to condense the view.
System Behaviors and Edge Cases
- Command scope: Actions apply only to the currently selected portal tiles. If none are selected, the system prompts you to select at least one.
- Command confirmation: Certain actions (e.g., Lockdown, Mode change) may require confirmation to prevent accidental activation.
- Scheduling precedence: Active schedules can reassert control after a manual action ends (e.g., after a timed override). Release forces a return to scheduled behavior immediately.
- Lockdown hierarchy: Site-level or area-level lockdowns can supersede individual portal commands. Some portals may not exit lockdown until the higher-level lockdown is cleared.
- Controller connectivity: If a door controller is offline, commands are queued or may fail with an error. Status icons may not update until communication is restored.
- Permissions filtering: Users without sufficient privileges will not see some buttons or will receive an access denied message when attempting restricted actions.
- Multi-select limits: Very large selections can increase command execution time; the UI may display progress or partial results as devices respond.
- Visual feedback: Access Mode Badge (e.g., Card Only) and Status Icon update when the system receives confirmation from the controller; brief delays are normal in large systems.
Permissions
- Access to the Portals screen requires the Control/Operate Portals permission at the applicable facility.
- Lockdown and Mode changes generally require elevated roles (e.g., Security Operator, Administrator) with explicit lockdown/mode-change rights.
- Scheduling changes require permissions to view/edit Schedules for the facility.
- Credential action requires permission to view credentials and apply portal-specific exceptions.
- Users without the necessary rights can view tiles but cannot execute restricted commands.
Linked Workflows
- Portal Details – View hardware configuration and history for a selected portal.
- Schedules – Create or edit schedules that govern portal locking/unlocking.
- Access Modes – Define and manage available modes (e.g., Card Only, Card+PIN).
- Lockdown Policies – Configure lockdown levels, scope, and exceptions.
- People/Credentials – Manage user credentials that grant access through portals.
- Activity/Events – Review recent portal events and command audit logs.
Reference Image Links