Open A Door
Portals Screen
Screen Overview
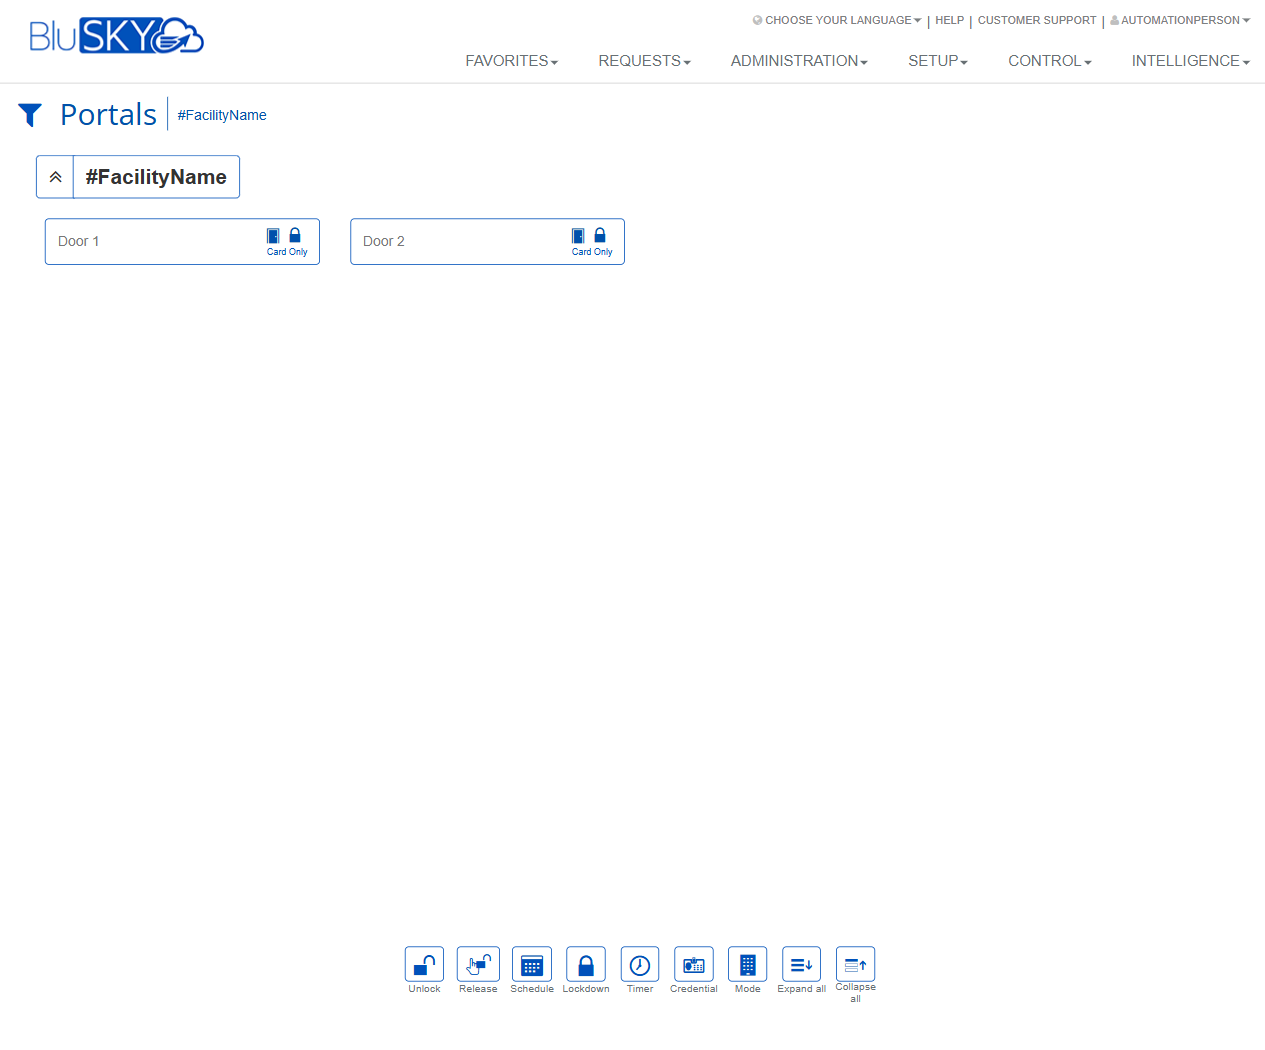
The Portals screen provides a live, operator-focused view of doors/portals grouped by facility. Each portal appears as a card showing its name and current access mode (e.g., Card Only). From this screen, authorized users can issue real-time commands such as momentary release, unlock/lock, lockdown, temporary timers, and mode or schedule changes.
Field Definitions
| Field Label | Definition | Notes |
|---|---|---|
| Portals (Page Title) | Identifies the current module and view. | Read-only. Appears at the top left. |
| Facility Context | Breadcrumb showing the active facility (e.g., #FacilityName). | Helps scope which portals are displayed. |
| Filter Toggle | Funnel icon next to the title to expose filtering options (if configured). | Availability depends on system configuration. |
| Facility Group Header | Collapsible header that groups portal cards for the selected facility. | Displays the facility name; groups can be expanded/collapsed. |
| Group Expand/Collapse Arrow | Chevron on the facility header to show or hide all portals in that group. | Affects visibility only; no impact on portal state. |
| Portal Card – Name | The user-friendly name of the portal (e.g., Door 1, Door 2). | Click to select a portal for commands. |
| Portal Card – Access Mode Label | Text describing the current access mode (e.g., Card Only). | Reflects commanded mode, not the door’s physical open/closed state. |
| Portal Card – Mode Icon | Padlock or similar icon next to the mode label indicating lock/mode state. | Iconography varies by mode and theme. |
| Workspace Canvas | Main area where portal cards are displayed. | Supports single or multi-portal selection (where enabled). |
| Command Bar (Footer) | Docked toolbar containing operational commands (Unlock, Release, Schedule, Lockdown, Timer, Credential, Mode, Expand all, Collapse all). | Buttons enable/disable based on selection, configuration, and permissions. |
Screen Actions and Functions
- Select portal(s) – Click one or more portal cards to target commands.
- Unlock – Sets selected portal(s) to unlocked until changed or superseded by policy/schedule.
- Release – Issues a momentary door release (pulse) using the controller’s configured duration.
- Schedule – Opens a dialog to assign or change the portal’s schedule (e.g., unlock/lock windows).
- Lockdown – Applies or clears lockdown for the selected portal(s)/facility as permitted.
- Timer – Temporarily changes state (e.g., unlock) for a specified duration; auto-reverts when the timer ends.
- Credential – Opens a dialog to view or manage credentials relevant to the selected portal(s) (e.g., grant/issue as allowed by configuration).
- Mode – Changes the access mode (e.g., Card Only, Card+PIN, PIN Only, Unlocked, Locked Out). Available options depend on hardware and setup.
- Expand all – Expands all facility groups to show all portal cards.
- Collapse all – Collapses all facility groups to reduce visual clutter.
- Global navigation – Access Favorites, Requests, Administration, Setup, Control, and Intelligence from the top nav bar.
Usage Instructions & Examples
How to Momentarily Release a Door
- Expand the relevant facility group.
- Click the target portal card (e.g., Door 1).
- Click Release on the footer command bar.
- Confirm if prompted. The door energizes for the controller’s configured pulse time.
How to Place a Portal in Lockdown and Clear It
- Select one or more portal cards.
- Click Lockdown.
- Choose Apply Lockdown and confirm.
- To clear, reselect the same portals, click Lockdown, and choose Clear Lockdown.
How to Change a Portal to Card Only Mode
- Select the portal card.
- Click Mode.
- Choose Card Only and confirm. The portal card updates to show Card Only.
How to Schedule an Unlock Period
- Select the portal.
- Click Schedule.
- Pick an existing schedule or create a new one per policy.
- Save. The portal will follow the defined schedule going forward.
How to Temporarily Unlock Using a Timer
- Select the portal.
- Click Timer.
- Enter the duration (e.g., 30 minutes) and desired temporary state (e.g., Unlocked).
- Start the timer. The portal reverts automatically when the timer ends.
System Behaviors and Edge Cases
- Command precedence: Lockdown overrides schedules, modes, and timers. Clearing lockdown restores the prior state if still valid.
- Manual vs schedule: A manual mode change may hold until the next scheduled event or until the operator changes it, depending on site configuration.
- Timer reversion: When a timer expires, the portal returns to the previously active state (mode/schedule), if still applicable.
- Controller connectivity: If a controller is offline, commands are queued or rejected based on configuration; success status may be delayed.
- Permissions gating: Buttons are hidden or disabled if the user lacks rights for the selected action.
- Partial success: When issuing commands to multiple portals, the system reports per-portal results if some succeed and others fail.
- Visual updates: The access mode label/icon reflects the commanded mode, not live door position (door open/closed sensors are not shown on this view).
- Hardware limits: Release or mode changes may be unavailable for portals lacking compatible hardware or wiring.
- Expand/Collapse actions only affect visibility; they do not change portal behavior.
Permissions
- View Portals – Required to access the Portals screen.
- Control Portals – Required for Release and Unlock actions.
- Change Portal Mode – Required to modify access modes.
- Manage Portal Schedules – Required to create/assign schedules.
- Execute Lockdown – Required to apply or clear lockdown.
- Manage Credentials (Portal Context) – Required to open/use the Credential action.
- Permissions are typically granted to roles such as Global Administrator, Tenant Administrator, and Security Operator per site policy.
Linked Workflows
- People > Credentials – Issue or manage credentials that grant access through selected portals.
- Setup > Schedules – Create or edit schedules used by the Schedule action.
- Control > Events/Alarms – Monitor command results, door-related events, and lockdown activity.
- Setup > Modes/Rules – Configure available access modes and site policies.
- Intelligence/Reports – Audit portal commands and state changes.
Reference Image Links