Control Points Old
Control Points Screen
Screen Overview
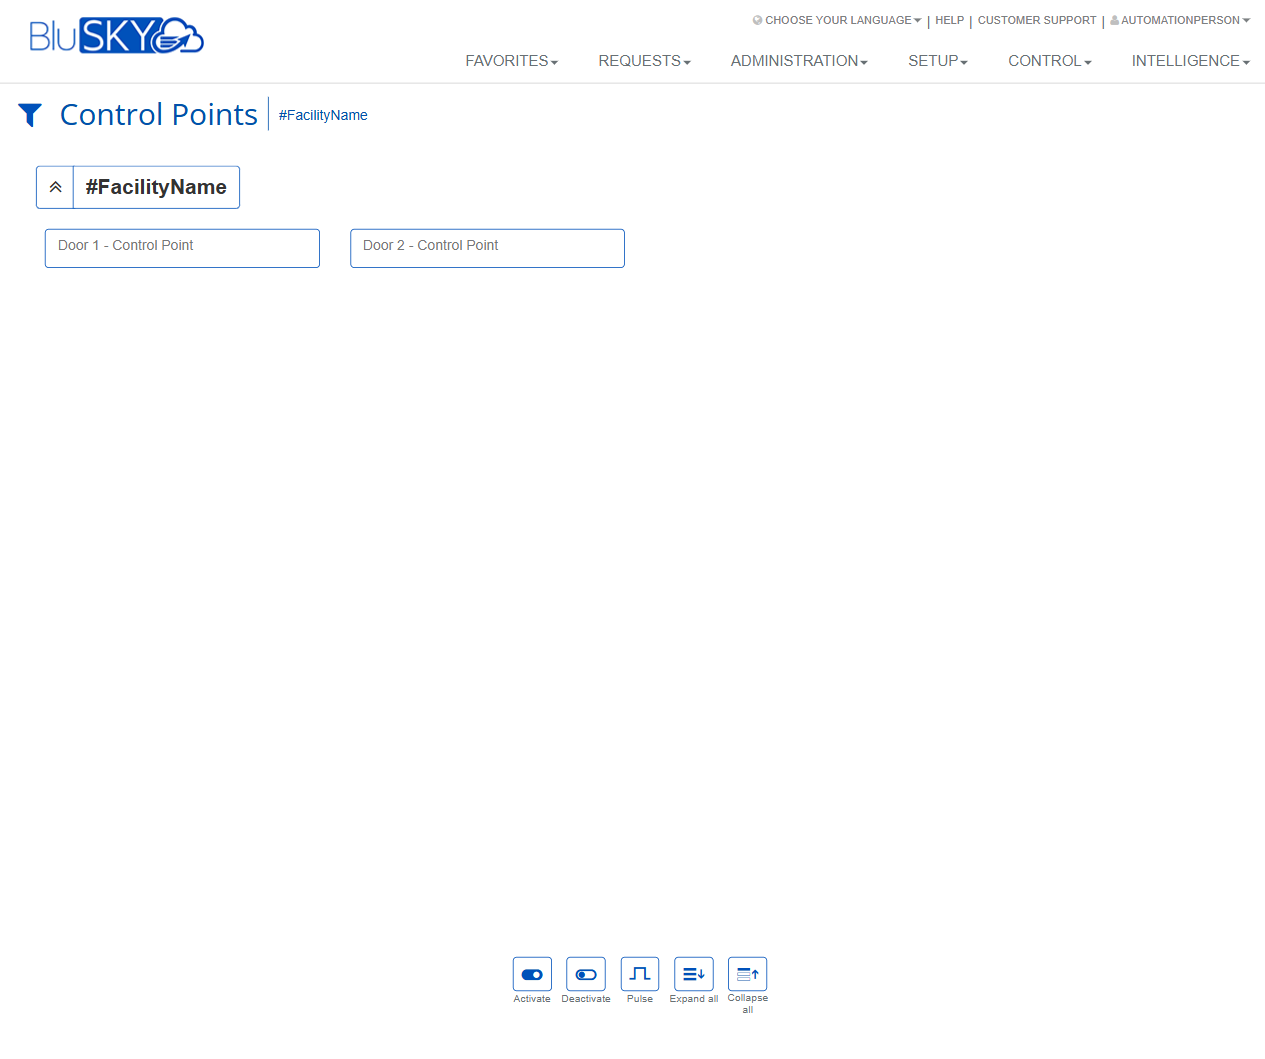
The Control Points screen allows authorized operators to view and control hardware outputs such as door relays and other control points by facility. Operators can select one or more control points and issue Activate, Deactivate, or Pulse commands. The page groups control points by facility and provides quick expand/collapse options for navigation.
Field Definitions
| Field Label | Definition | Notes |
|---|---|---|
| Filter Icon | Opens the filter panel to apply or modify filters for the list of control points. | Common filters include Facility; applied filters appear as chips near the title. |
| Active Filter Chip (#FacilityName) | Visual token showing the currently applied filter value(s). | Click the filter icon to change or clear; chips reflect active filtering only. |
| Facility Group Header (#FacilityName) | Collapsible section header that groups control points for a specific facility. | The left chevron toggles the group open/closed. |
| Group Toggle (Chevron) | Arrow icon to expand or collapse the corresponding facility group. | State persists while you remain on the page. |
| Control Point Card | A clickable tile representing an individual control point (e.g., “Door 1 - Control Point”). | Select a card to target it with actions. Text shows the control point name. |
| Selection Highlight | Visual indicator that a control point card is selected. | Actions operate only on selected items. |
| Footer Action Bar | Fixed bar at the bottom containing operational buttons (Activate, Deactivate, Pulse, Expand all, Collapse all). | Buttons enable/disable based on selection and permissions. |
Screen Actions and Functions
- Activate – Sends an ON command to the selected control point(s) until turned off or overridden by system logic.
- Deactivate – Sends an OFF command to the selected control point(s).
- Pulse – Sends a momentary ON command for the configured pulse duration, then automatically returns to OFF.
- Expand all – Expands all facility groups to show their control points.
- Collapse all – Collapses all facility groups for a compact view.
- Select Control Point – Click a control point card to select it; repeat to change selection.
Usage Instructions & Examples
How to Pulse a Door Relay
- Use the filter icon and choose the desired Facility if needed.
- Expand the facility group.
- Click the target control point card (e.g., “Door 1 - Control Point”) to select it.
- Click Pulse. Confirm if prompted. The relay will activate for the configured pulse duration and then turn off.
How to Activate a Control Point Until Further Notice
- Navigate to Control Points and locate the desired facility group.
- Select the appropriate control point card.
- Click Activate. Verify the command was accepted (status/confirmation message).
- When ready to stop, select the same control point and click Deactivate.
How to Navigate Large Lists
- Click Expand all to open every facility group.
- Use the filter icon to limit by Facility.
- Click Collapse all to return to a concise view.
System Behaviors and Edge Cases
- Action buttons remain disabled until at least one control point is selected and the user has permission.
- Pulse duration is determined by device or system configuration; the control point automatically returns to OFF after the interval.
- If the underlying controller is offline or unreachable, commands may fail and the UI will display an error or warning.
- Rapidly issuing conflicting commands (e.g., Activate then immediate Deactivate) applies the last accepted command by the controller.
- Filters apply to the current session context; clearing filters restores the full list (subject to user scope).
- Expand/Collapse state affects visibility only and does not change selection.
Permissions
- Access is limited to users with rights to view and operate control points (e.g., Security Operators, Tenant/Building Administrators, or equivalent roles).
- Operate commands (Activate, Deactivate, Pulse) require an “operate control points” permission; users without it can view but cannot execute commands.
- Some facilities or control points may be further restricted by scope or partition assignments.
Linked Workflows
- Setup > Control Points: Create and configure control points, names, and pulse durations.
- Control > Live Events/Alarms: Monitor results of issued commands and device state changes.
- Doors/Hardware Configuration: Map door hardware to control points used on this screen.
Reference Image Links