Create a Simple Rule
Overview
Rules are used to automate certain functions in BluSKY. Simple Rules are used to join a triggering event to an action to be taken. Once created, a Simple Rule can also be used to create Complex Rules. This article provides detailed instruction on how to create a Simple Rule.
Instructions
Rules by nature are dynamic. They can come in many different variation and will require different processes depending on the intended goal. This example is meant to illustrate the power of Rules. For more specific information about some of the most common Rules, please see our documentation of Simple Rules Examples.
- Log in and navigate to Rules. Main Menu-> Administration-> Rules
- Click the
 button to create a new Simple Rule.
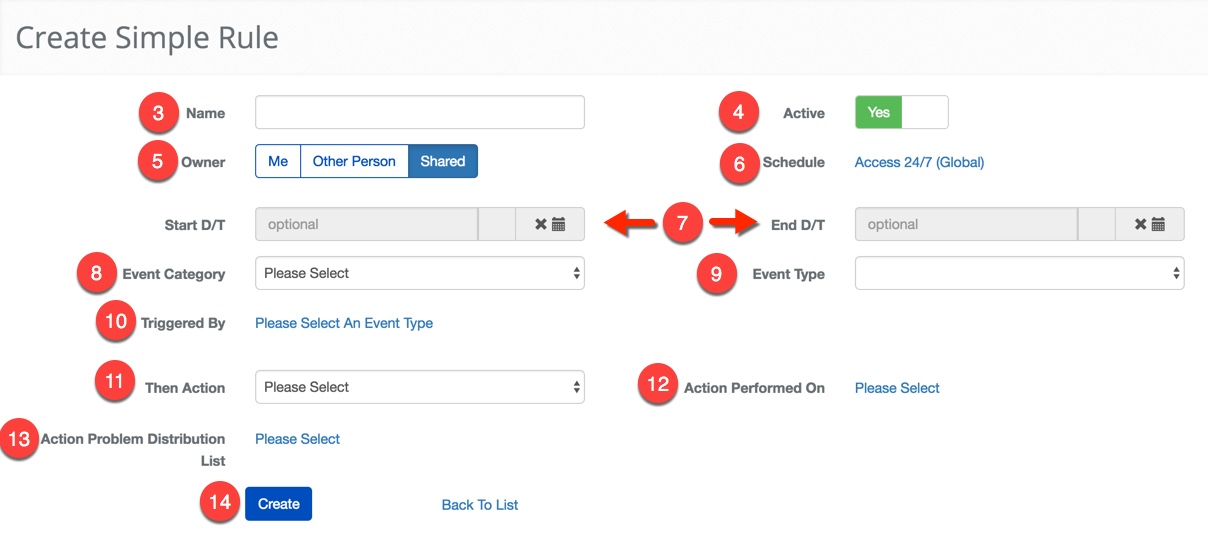
- Name the Rule in the name text field. Using a descriptive name can make the Rules easier to manage in the future.
- If you are creating a Rule that will be used in the future set the Active toggle to "No".
- Note: This toggle can be used to activate and deactivated the Rule when needed.
- Select the owner of the Rule.
- Me - Only the Person creating will be able to view and edit the Rule.
- Other Person - Only the Person you are creating the Rule for will be able to view and edit the Rule.
- Shared - Anyone with the proper hardware permissions and who is part of the same System will be able to view and edit.
- Select a Schedule to indicate the days of the week and the time of day when the Rule should be used.
- **Optional:**If the Rule should only be active during a certain period of time, set the Start Date/Time and End Date/Time.
- Note: You are never required to specify a Start Date and Time if you wish the entry to be active immediately.
- Select the Event Category. This field determines the type of action that will initiate a Rule.
- Select the Event Type. This field determines the specific type of action that will initiate the Rule.
- Note: This selection is entirely dependent on the choice made in the Event Category drop down.
- Select the specific device or condition that will trigger the Rule to begin. This selection will be dynamic based on the previous two choices.
- Select the "Then Action". This field will determine the Output of the Rule.
- Click the "Please Select" link to load the appropriate picker to select the desired entry for the Then Action. The picker will dynamically change depending on which Then Action is selected.
- **Optional:**Use the Action Problem Distribution List to select a Person or group of People to be notified if something prevents the Rule from taking effect.
- When finished click the
 button to create the new Rule.