Creating Monitoring Points
Overview
Monitoring Points are used to add an application layer to an Input. Once configured the Monitoring Point can be configured to provide information to the System.
How To Create a Monitoring Point
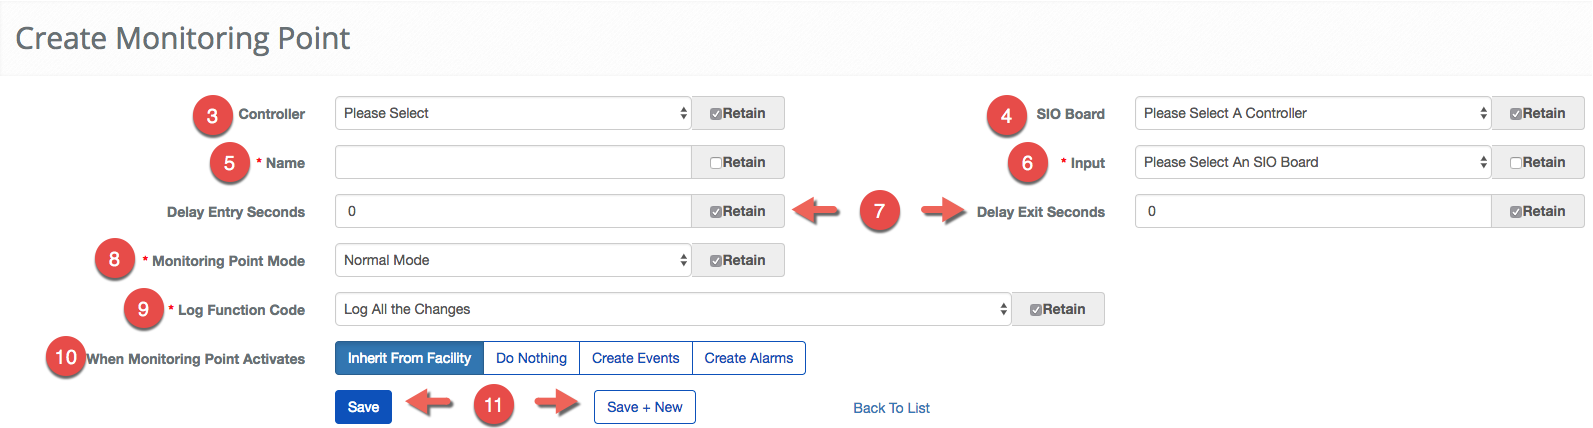
- Log in and navigate to Monitoring Points. Main Menu-> Setup-> System Setup-> Monitoring Points-> Create
- Use the
 icon in the lower-left side to create a new Monitoring Points.
 - Next, the the Controller managing the Input.
- ***Note:***Using Retain checkbox will keep the field the same for subsequent configurations
- Then, select the SIO Board the Input is connected.
- ***Note:***In some case, the Controller and the SIO Board may be the same.
- Give the Monitoring Point a Name.
- Select the Input from the Input drop-down menu.
- ***Note:***If the entry does not appear, recheck that the SIO Board and Controller are correct.
- Set the entry and exit delay using the Delay Entry Seconds and Delay Exit Seconds fields.
- Select the Monitoring Point Mode from the drop-down menu.
- Next, choose the Log Function Code from the drop down menu.

- Select the Monitoring Point activation behavior. You have four options, Create an Alarm that must be cleared from the System, Create an Event that can be used for a Rule, Do Nothing or inherit from the Facility. For more see our guide on Inherited Monitoring Point Behavior.
- When finished use the
 button to finish or the
  to continue configuring Monitoring Points.