Elevator Configuration - Setting up the Facility
Overview
The first step to creating an Elevator System is adding the Floor, Elevator Bank and Elevator Card attributes. BluSKY does not require these entries for more simple systems without elevators but for us, it will be required. This process is not overly complicated but needs to be followed in the correct order.
Add Floors to the Facility
- Navigate to Facility, Main Menu-> Setup-> Facilities and Customers-> Facility
- Use the search feature and select the entry you wish to edit from the list.
- Click the on the
 button in the lower left hand side.
!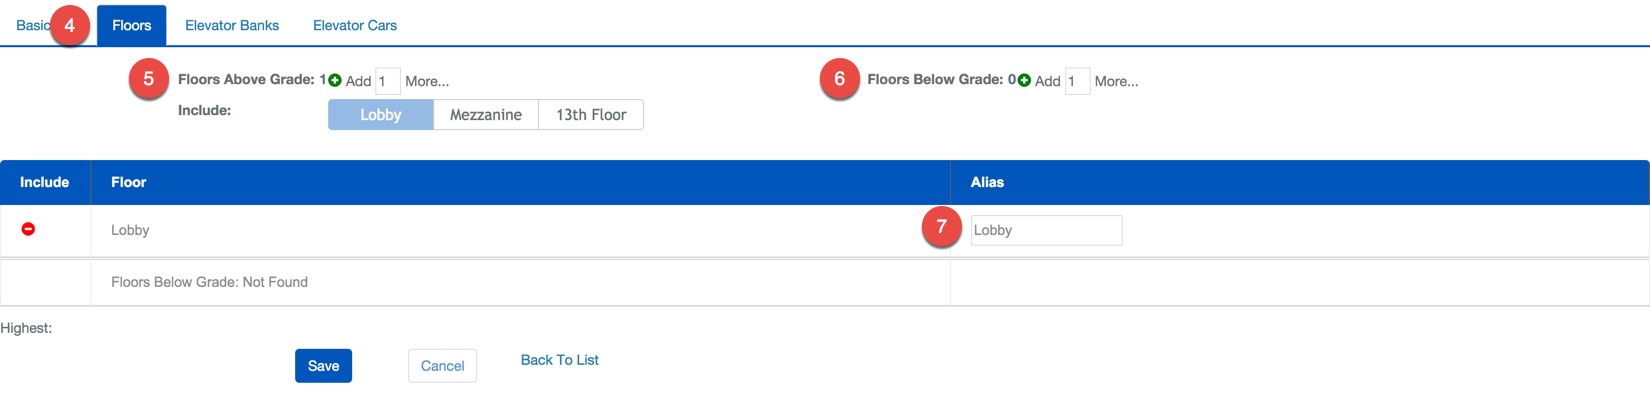
- Use the tabs at the top of the screen to select Floors.
- Select how manyFloors Above Ground and commit changes with the
 icon.
icon. - Select how manyFloors Below Ground and commit changes with the icon.
- ***Note:***It is important to properly add the floors to above or below ground.
- If you wish you may designate an Alias to each floor.
- Confirm changes with the
 button.
Add Elevator Bank to the Facility
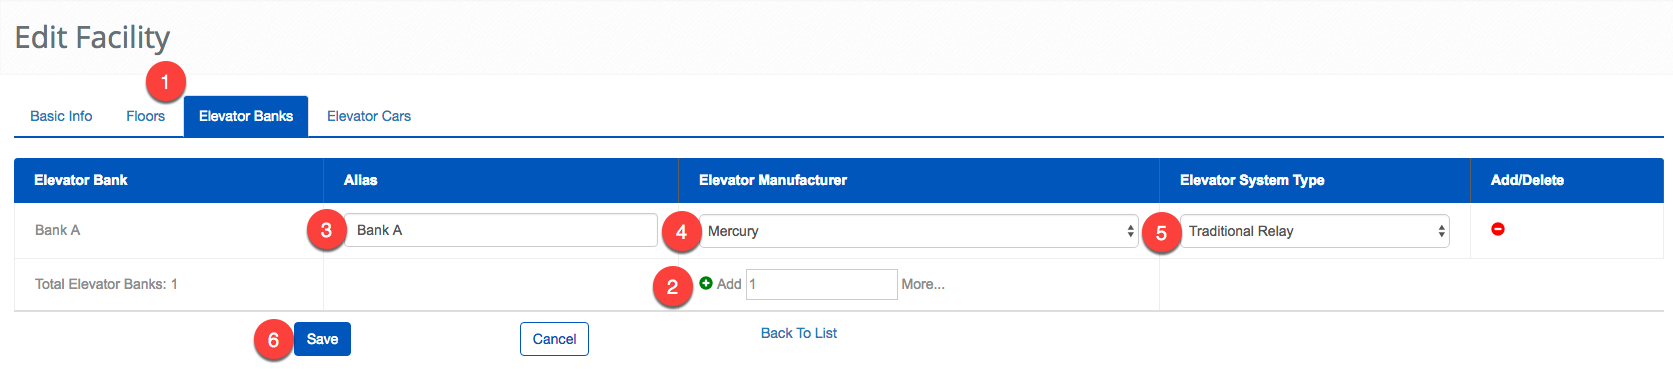
- Use the tabs at the top of the screen to select Elevator Banks.
- Select how many Elevator Banks you would like to add the press the icon.
- If needed add an Alias to the Elevator Bank. In many cases, using an alias like "North Elevator Bank" will be helpful.
- Select Mercury as the Elevator Manufacturer.
- Select Traditional Relay as the Elevator System Type.
- Confirm changes with the button.
Add Elevator Cars to the Facility
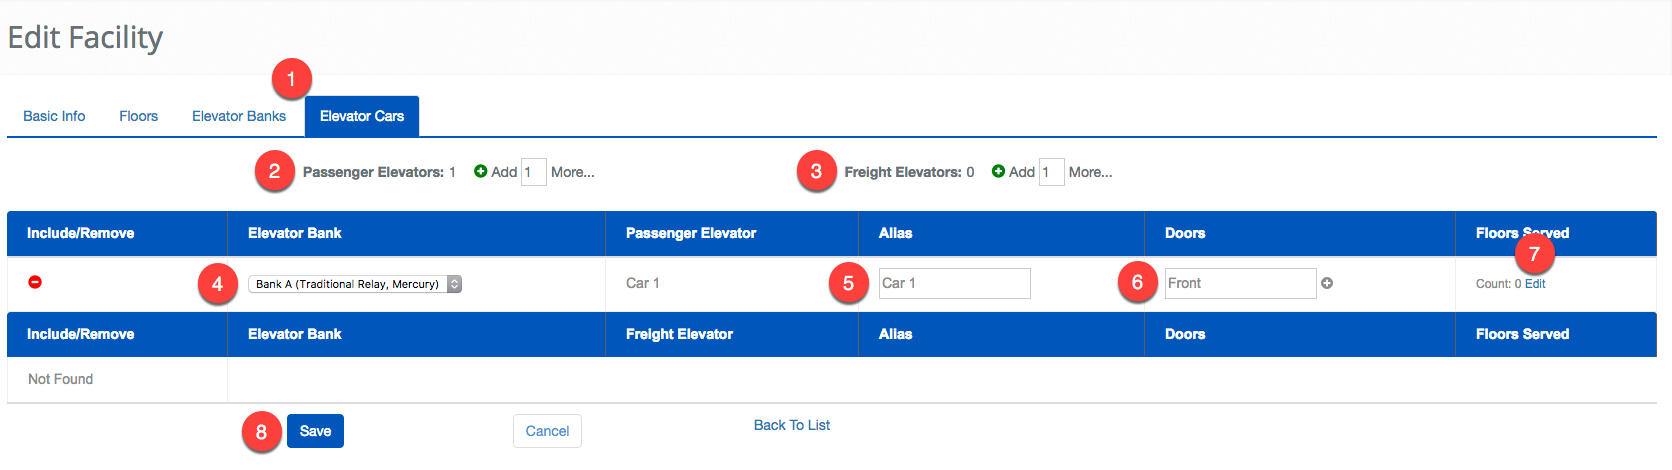
- Use the tabs at the top of the screen to select Elevator Cars.
- Enter how many Passenger Elevator you would like to add, then create them using the icon.
- Enter how many Freight Elevator you would like to add, then create them using the icon.
- Next, use the Elevator Bankdrop down menu to assign the Elevator Car to the proper Elevator Bank.
- You may also assign an Alias to the Elevator Car.
- If the Elevator Car has two doors use the icon to add the second door .
- Click Edit text to show the Floor Assignment window.
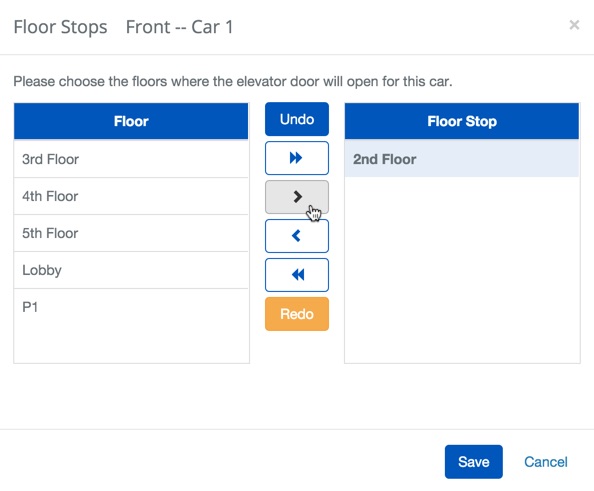
- Select the Floor from the Floor column that are to be serviced by this Elevator Car.
- Use the arrows to place the appropriate Floors in the Floor Stop column.
- Confirm changes with the button
Summary
You will need to describe how many Floors, Elevator Banks and Elevator Cars - these parameters are important for automating some of the subsequent steps. Remember, this process needs to be done in the same order we have laid out here. Next, we will take a look at how we configure the Outputs, Control Points and Readers. We will also discuss how to configure a relay-based system with selection feedback.