Visitor Request Training
Pre-register your expected visitors when possible by creating a Visitor Invitation for each of them: this reduces processing time in the lobby from several minutes, to just 20 or 30 seconds. Doing this is a welcoming gesture that the visitor will surely appreciate - and it takes only a few clicks from you in BluSKY. Pre-registration is also supportive to all of the Facility's visitors because processing moves much faster if most of the arriving visitors are pre-announced.
Logging In
If this is your first time logging into BluSKY, check your inbox for an email from BluSKY. This email will provide information on how to verify the account and create a password.
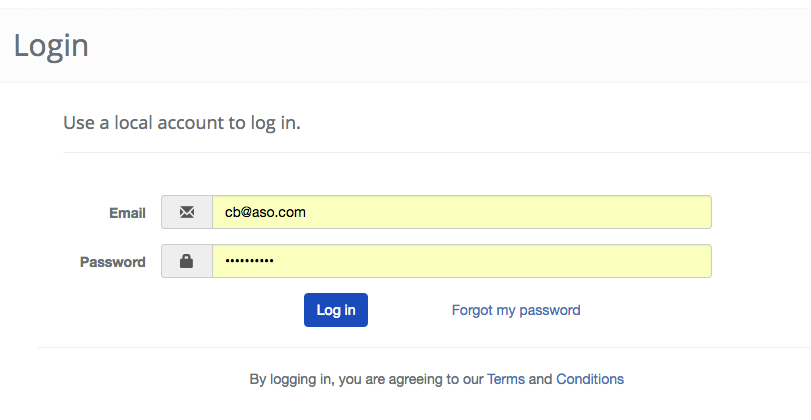
Once you have completed this step return to the BluSKY login page, https://blusky.blub0x.com and enter your login credentials.
Getting to Visitor Invitations
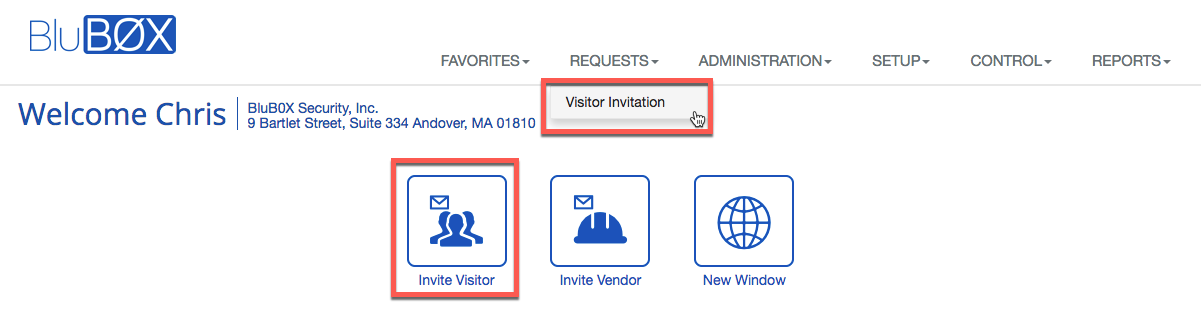
If you have permission to create Visitor Invitations, you will be able to select this option right from the Home Screen. You may also access this screen via the Requests drop down menu.
Making the Invitation
The Visitor Invitation consists a few important parts. We have labeled the required fields below but as a general rule the more information you can provide while making the request the smoother the check in process is. For the complete documentation regarding creating a Visitor, please consult our official documentation found here, or through contextual help found on the top-right portion of each page.
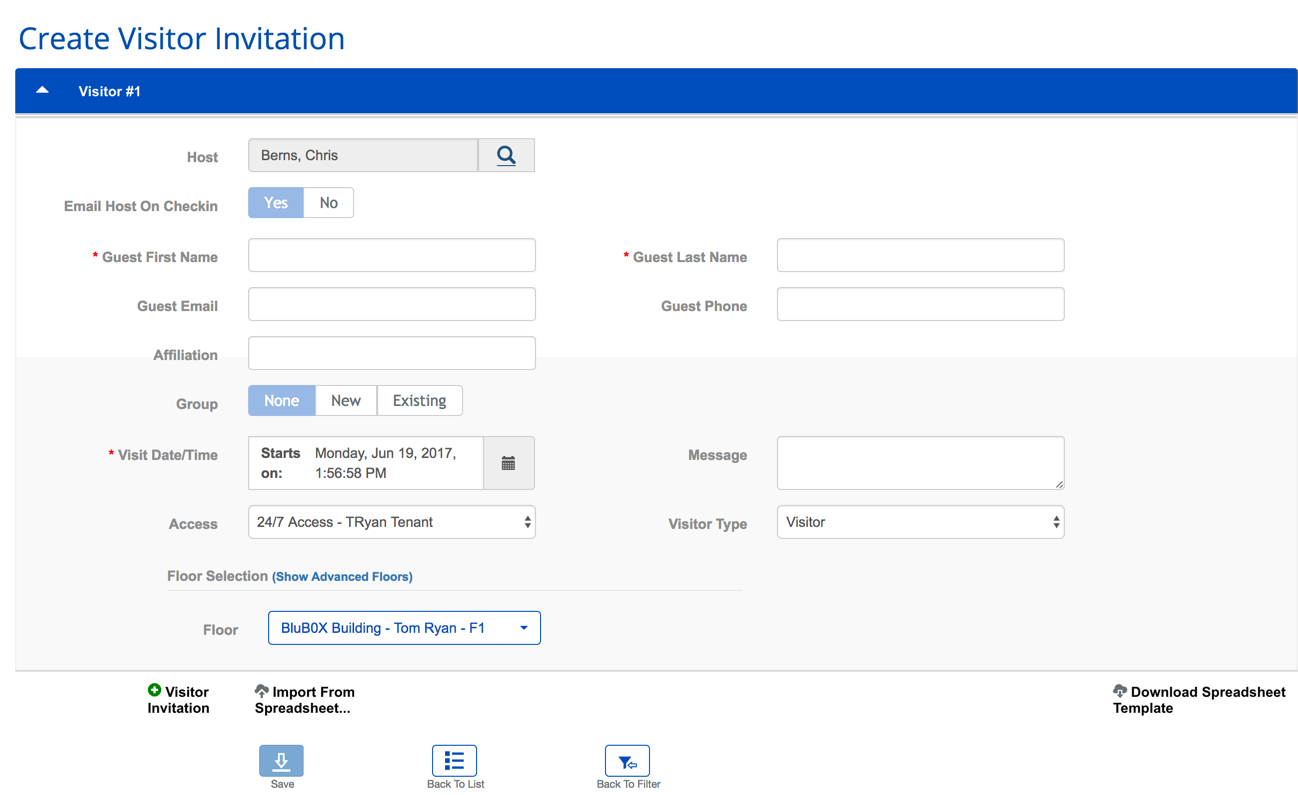
This article deals with the quick creation of a Visitor Invitation. The next article, provides an explanation for every field of the Invitation.
- First and Last Names (Mandatory) **-**Enter the visitor’s names.
- Visit Date/Time. (is pre-populated with the current date and time). You can change this if necessary: Click the
 calendar icon. Also, check out the guide for creating recurring Visitor Invitations here.
- ***Time Zones:***The time zone of the request is always based on the location of the Facility being visited. So, if you are on the east coast, and you are creating an invitation to a west coast property, you need to express the expected time of arrival in Pacific Time (i.e. 3 hours earlier than your local time).
- The following fields appear only if your Facility's system supports the corresponding function:
- Access (it is pre-populated with the default Access Level for your visitors). Specifies the Access Level that shall be granted to your visitor. You can change this if more than one is available. See the detailed instructions below.
- Note: An Access Level is a list of doors or turnstiles that shall be accessible with the credential that is issued to your visitor.
- Floor Access (also pre-populated with the floor(s) to which your visitors normally come). Specifies the Floor(s) that can be accessed by your visitor. You can change this if necessary. See the detailed instructions below.
- Click
 at the bottom of the screen to save your new invitation.
More than one visitor? You can save work by clicking ![]() Visitor Invitation and adding the next visitor before you click Save. Proceed as follows:
Visitor Invitation and adding the next visitor before you click Save. Proceed as follows:
- Click
 Visitor Invitation to**open a new Invitation Form. Its fields shall be pre-populated to match the previous Invitation: simply enter your second visitor's First and Last Name. Make any other desired field edits. Then click to save both invitations at once, OR
 - ClickVisitor Invitation again to add a third Invitation. fill in that invitation form, AND
- Repeat until you have created an invitation form for all your visitors, then clickto save all the invitations at once.
Note: Security Officers can complete Visitor Invitation Forms from the Visitor Administration window, usually when an arriving visitor has not been pre-registered). If the expected Date/Time of the visit is within one hour, the Visitor Edit screen will be automatically displayed after the Invitation Form is completd so the visitor can be checked-in on the spot. Otherwise, the system returns to the Visitor Administration page.
More Details
Detailed Explanation of the Visitor Invitation Fields
Many fields of the Visitor Information form are pre-populated so you don't have to deal with them; others are optional. This article describes each field so you can use it properly if you have to.
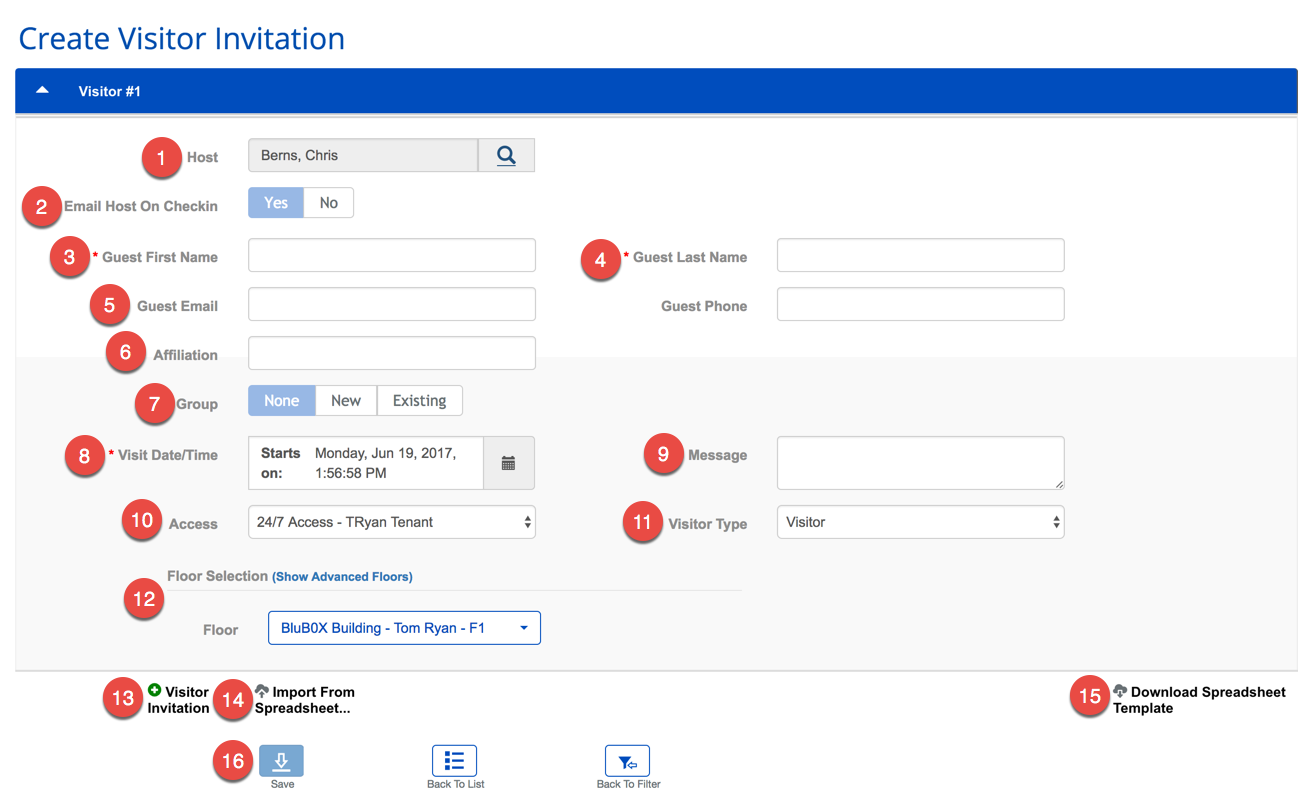
- Host (Pre-populated) - The user, if he/she has the proper permission, can name a "Host" other than him/herself for the visitor. Click the looking glass
 to see a list of potential hosts. Click to see information on the Person Picker
- Enter search criteria as needed.
- Select each Person and click the
 button to move them from the unselected list to the selected list or use the
  button to move everyone from the unselected list ot the selected list.
 - ***Note:***Some features will only allow you to select a single Person.
- The
 button will deselect everyone selected so far and the
  button allows you to deselect them individually.
 - The
 button will undo your last action and the
  button will reverse the undo action.
 - When finished, click the
 button to select the People and close the Person selector.
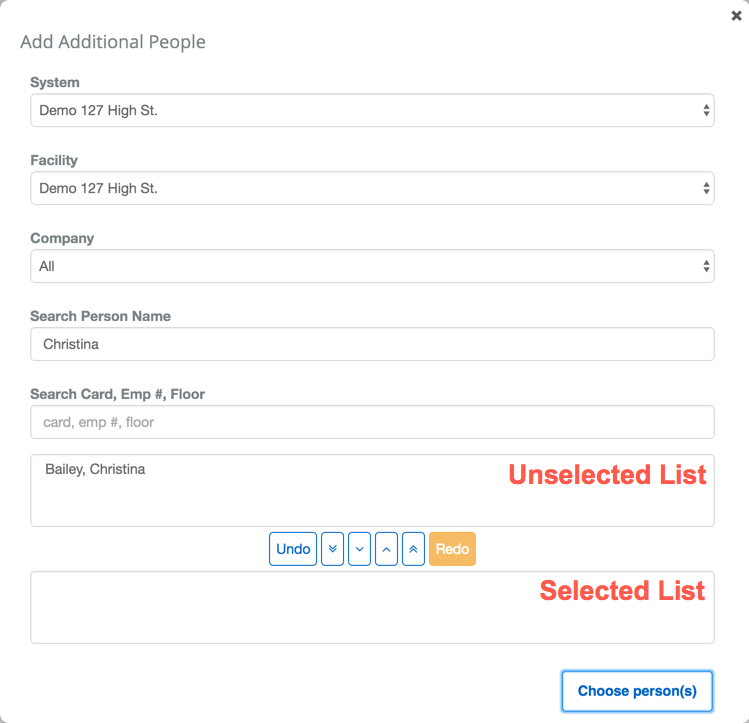
- Notification Toggle - This field determines whether a notification should be sent to the Host at Check-In.
- Guest First Name (Mandatory) - This field captures the Visitor's first name. It can be entered manually or if you have a license scanner will populated when the license is scanned.
- Guest Last Names (Mandatory) - These fields capture the Visitor's last name. It can be entered manually or if you have a license scanner will populated when the license is scanned.
- Guest Email / Guest Phone (Optional) - Some systems are programmed to send an e-mail or a text message to the Guest if a valid e-mail address or phone number is entered. The message is sent immediately after the invitation is completed; it confirms the invitation and provides instructions on how to proceed upon arrival.
- Affiliation (Optional) - This field records the Visitor’s Company Affiliation.
- Group (Optional) - It is sometimes practical to associate visitors with a certain Group. The default is NONE. You can click New to enter a new Group Name (like “Sales Seminar”). You can click Existing to associate this visitor with a Group that has already been defined.
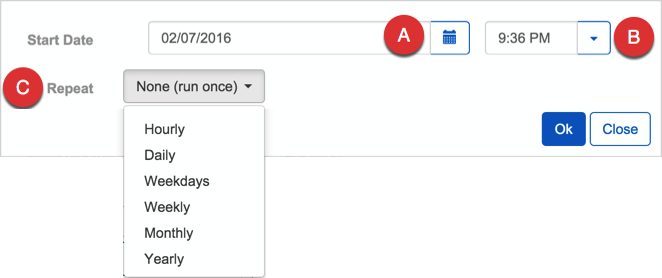
- Visit Date/Time(Pre-populated) specifies the anticipated date/time of arrival of the visitor. By default, this is set to NOW. The content can be modified by clicking the calendar icon if the visitor is anticipated at a later date/time. If you click the calendar item:
- Start Date (Pre-populated with today's date) - Is the visitor's expected date of arrival. The date can be modified by clicking the calendar icon.
- Time (Pre-populated with the current time) - Choose a time from the pull-down menu. The arrival time does not need to be exact.
- Repeat (Pre-populated with None) - This pull-down menu gives you a recurrence option: when you choose one, a window appears with a series of questions that must be answered to specify the recurrence. This allows you to create more than one invitation at once for your visitor. We have put together an entire article on the Visitor Repeat Options.
***TIP:***The policy in some Facilities is that the visitor must obtain a new credential for every visit that you have specified (because credentials are valid only for the day of the visit). In other Facilities, the credential that is issued on the first visit is valid for all the visits that you have specified in the invitation. Check with your Administrator if you need to know your Facility's policy on this matter.
- Message (Optional) - Any text that you enter into this field will be shown to the Visitor Admissions Staff in the lobby when the invitation is pulled onto their screen.
- Access (Appears only in systems that feature access control for visitors) - (Pre-populated with the "default access level" that is specified for your visitors) - An "Access Level" indicates what doors or turnstiles can be accessed with a credential and at what time of day. Some organizations define more than one such access level for their visitors. If such is the this case, you can replace the pre-populated default access level with another from the pull down menu.
- Visitor Type (Pre-Populated with "Visitor") - It is desirable to indicate the type of visitor being invited. Common types are: “Visitor”, “Vendor/Contractor”, "Delivery", Visitor VIP, or “Visiting Employee”...
- Floor Assignments - Basic / Advanced- (appears only in systems that feature floor access control for visitors)
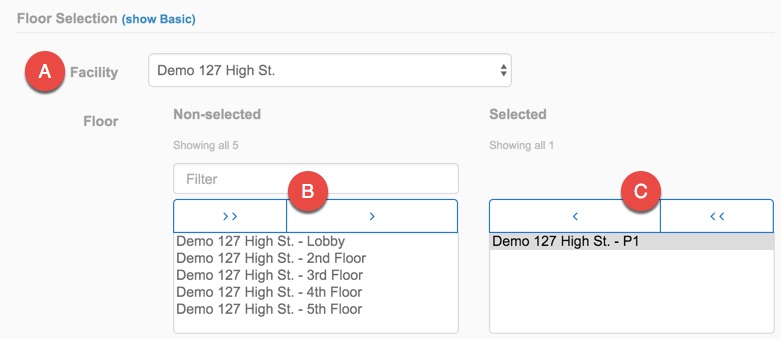
- Basic - Simply select the Floor for the Visitor from the Floor drop down menu.
- Advanced - Click the (Show Advanced) to expand the Floor options.
-
Select the Facility from the Floor drop down menu to populate the Floor options.
-
Click the Floors and assign them using the selection commands.
-
Un-select unneeded Floors using the deselect commands.
-
Visitor Invitation (Optional) - This option will create another Visitor information form on the current screen.
-
Import from Spreadsheet (Optional) - See the article below.
-
Download Spreadsheet template(Optional) - See the article below.
-
- Clicking the button will save the Visitor Request. You can click Cancel or Back to Listinstead, but will discard all your current work.