Create a Monitoring Point
BluSKY URL:https://blusky.blub0x.com/en-US/MercuryMonitoringPoint/Create
Overview
Monitoring Points are used to configure constant monitoring of specific Input. These Monitoring Points can then be used as a part of a Trigger to cause an event in the system. This article provides instructions on How to Create Monitoring Points in System Setup.
Instructions
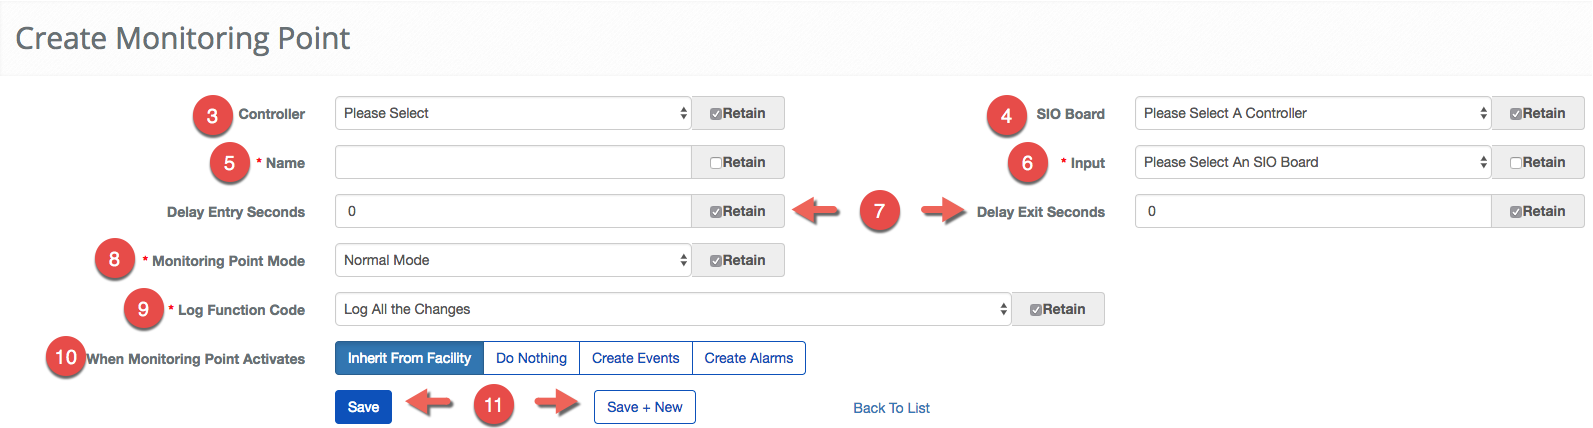
- Log in and navigate to Monitoring Points. Main Menu-> Setup-> System Setup-> Monitoring Points-> Create
- Use the
 icon in the lower-left side to create a new Monitoring Points.
 - Next, the the Controller managing the Input.
- ***Note:***Using Retain checkbox will keep the field the same for subsequent configurations
- Then, select the SIO Board the Input is connected.
- ***Note:***In some case, the Controller and the SIO Board may be the same.
- Give the Monitoring Point a Name.
- Select the Input from the Input drop-down menu.
- ***Note:***If the entry does not appear, recheck that the SIO Board and Controller are correct.
- Set the entry and exit delay using the Delay Entry Seconds and Delay Exit Seconds fields.
- Select the Monitoring Point Mode from the drop-down menu.
- Next, choose the Log Function Code from the drop down menu.

- Select the Monitoring Point activation behavior. You have four options, Create an Alarm that must be cleared from the System, Create an Event that can be used for a Rule, Do Nothing or inherit from the Facility. For more see our guide on Inherited Monitoring Point Behavior.
- When finished use the
 button to finish or the
  to continue configuring Monitoring Points.