How to add cameras to BluSKY from Milestone
Overview
How to add cameras to BluSKY from Milestone
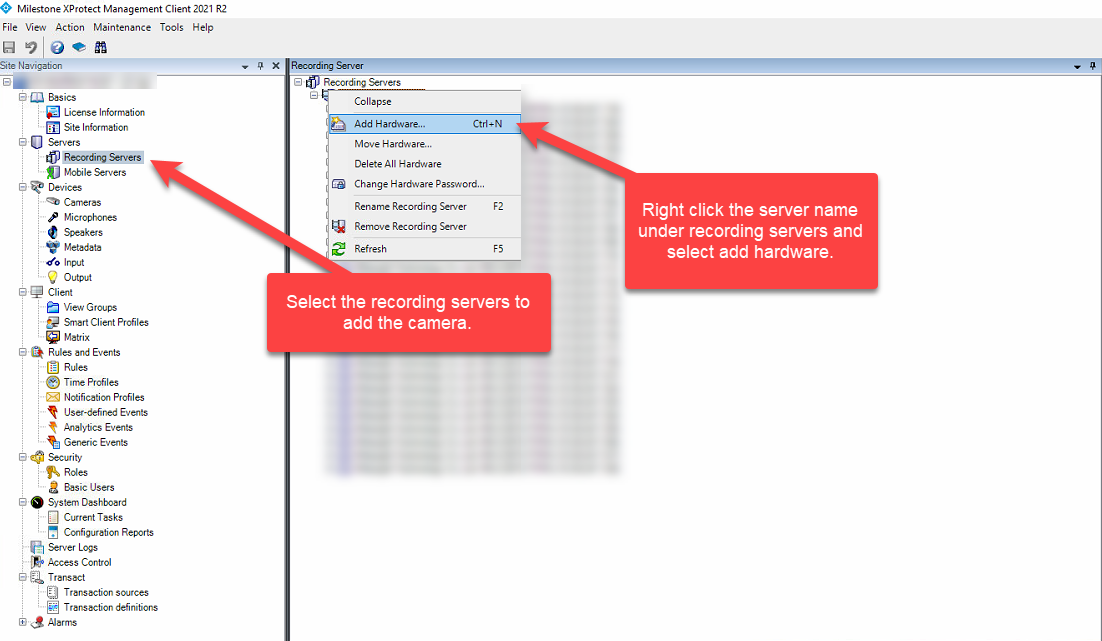
Step 1a - Adding cameras to Milestone
Select the recording servers and right click on the NVR name below the recording servers and select add hardware.
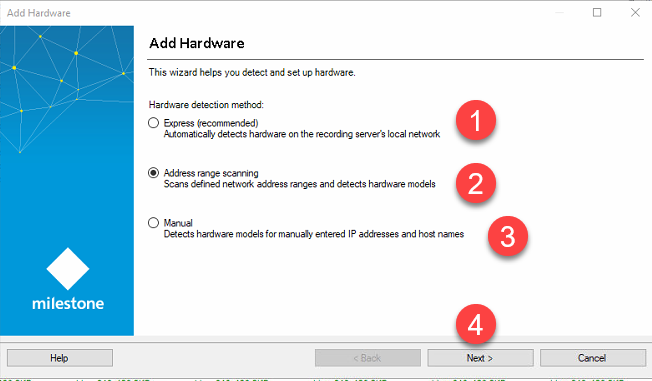
- The Express method is used for having the milestone to automatically detect the IP address and add the cameras to the milestone software.
- The address range scanning allows the user to search the cameras with an IP range where it will detect the cameras.
- The manual field allows the user to enter the IP address individually to add a camera one at a time.
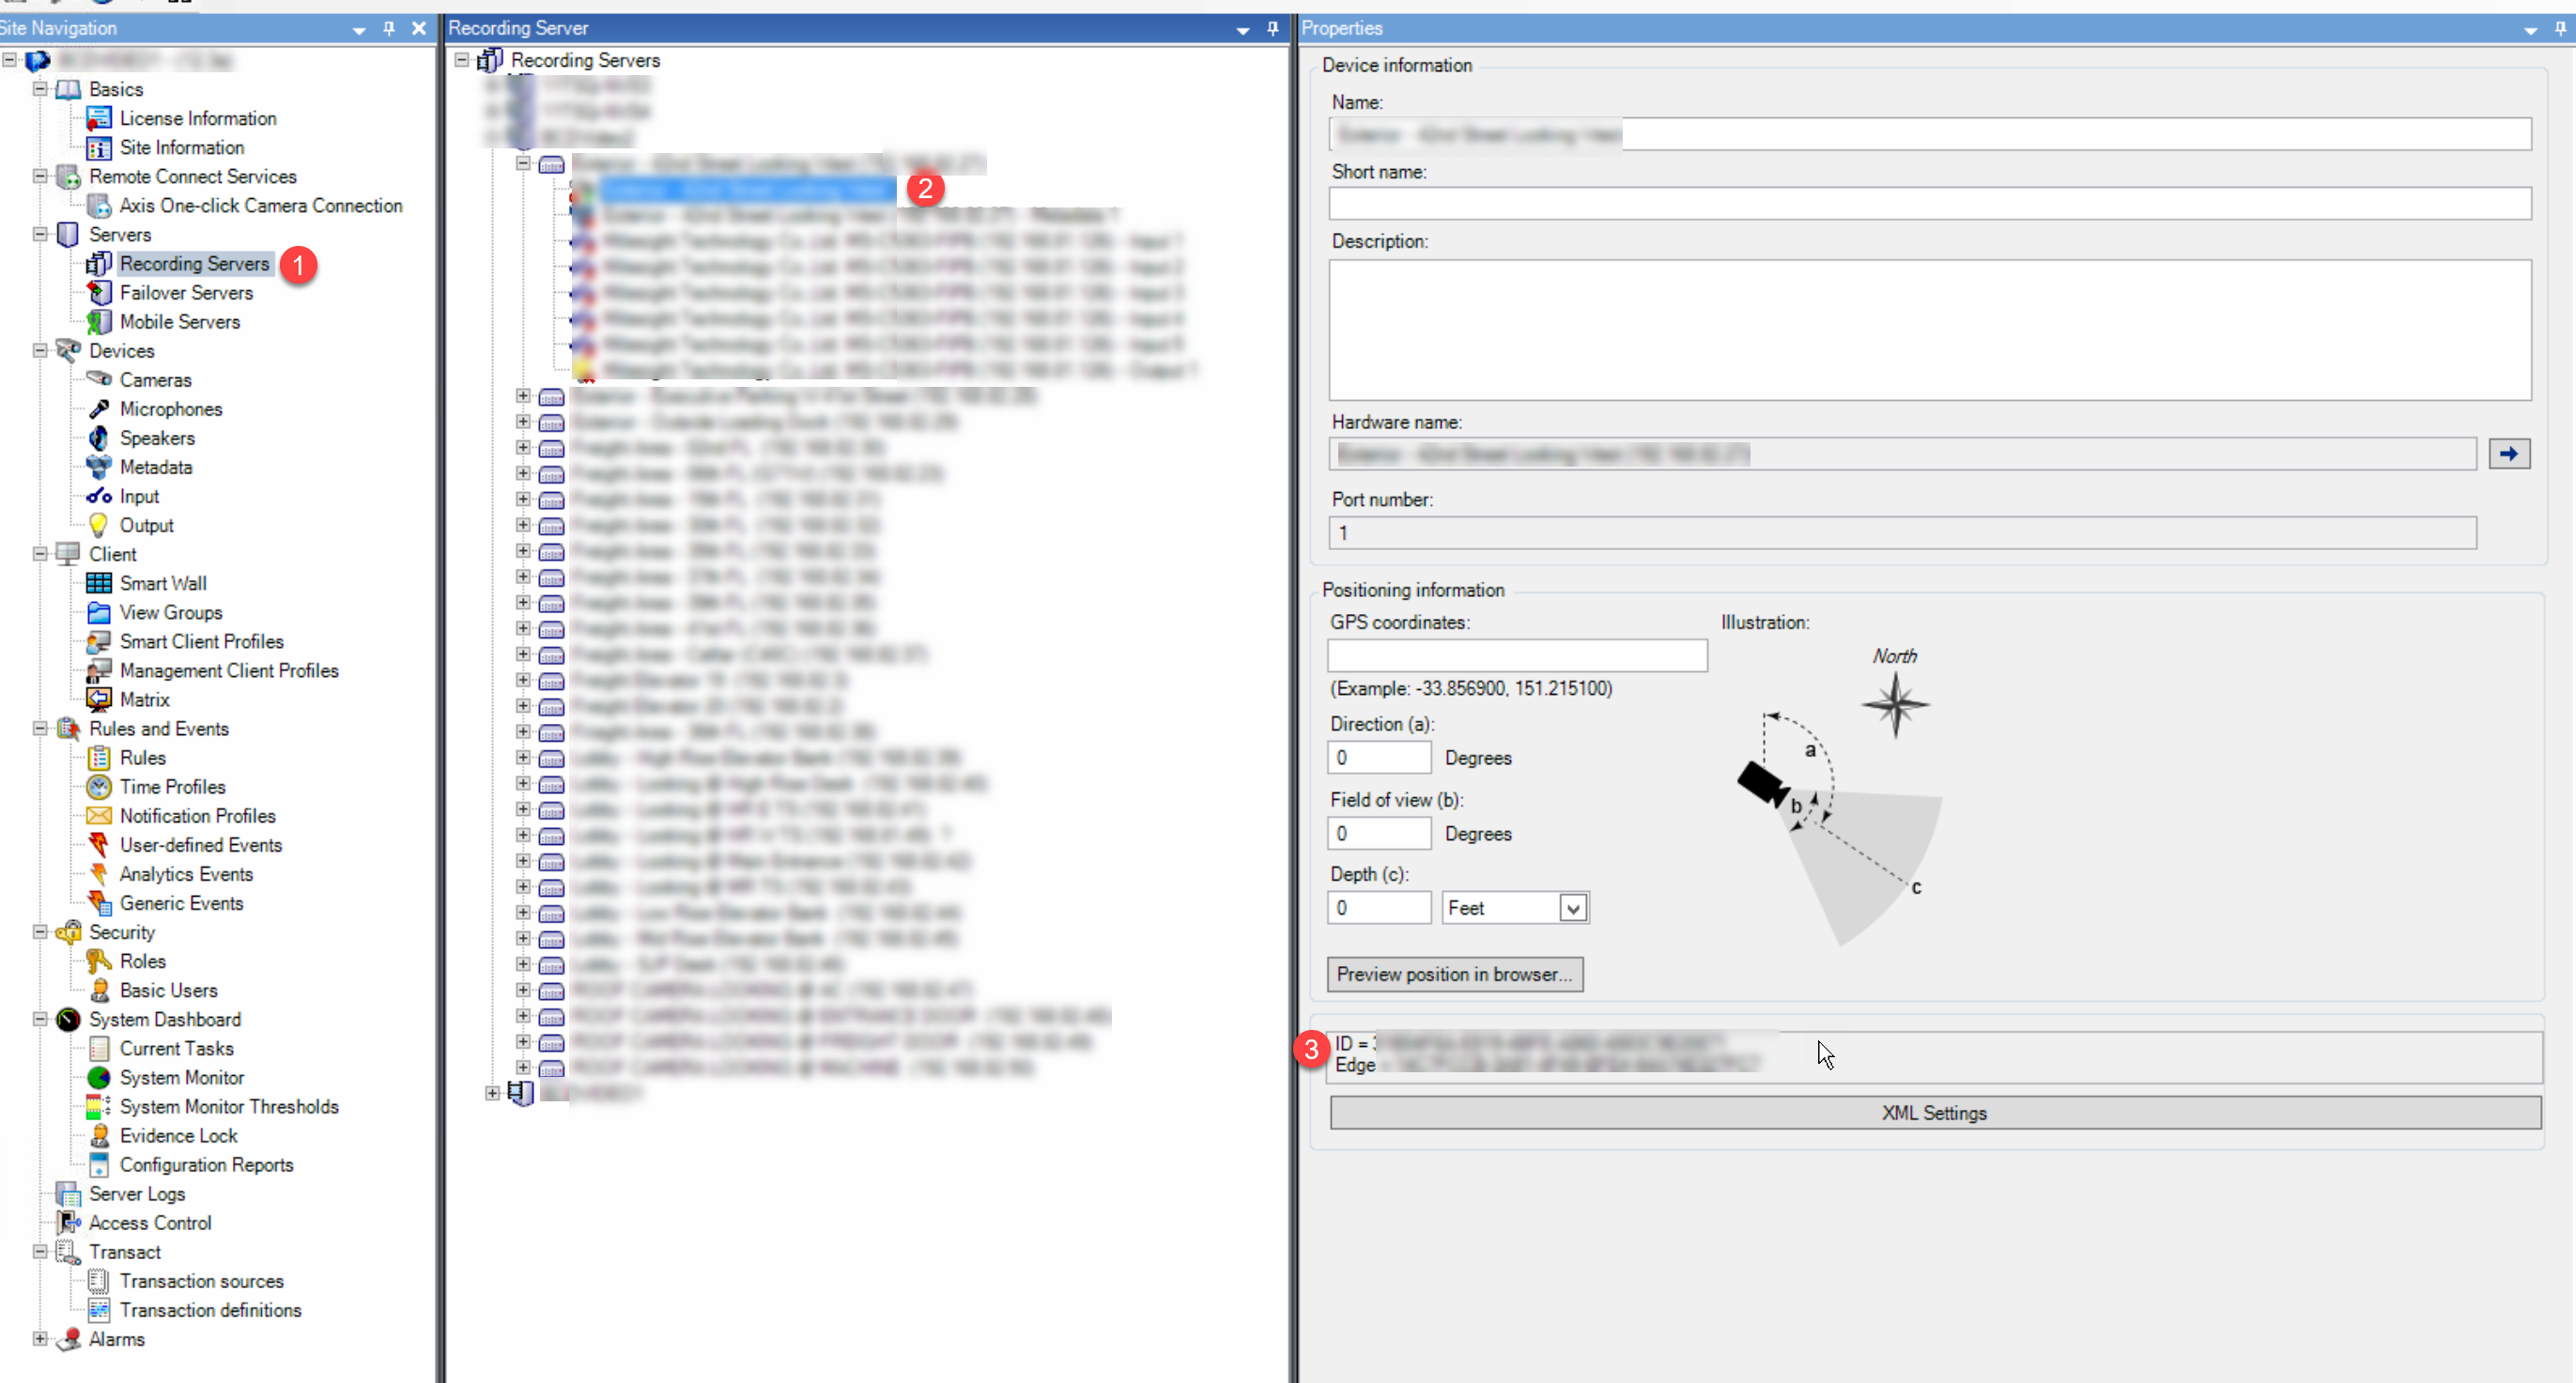
Step 1b - Copying External Camera ID
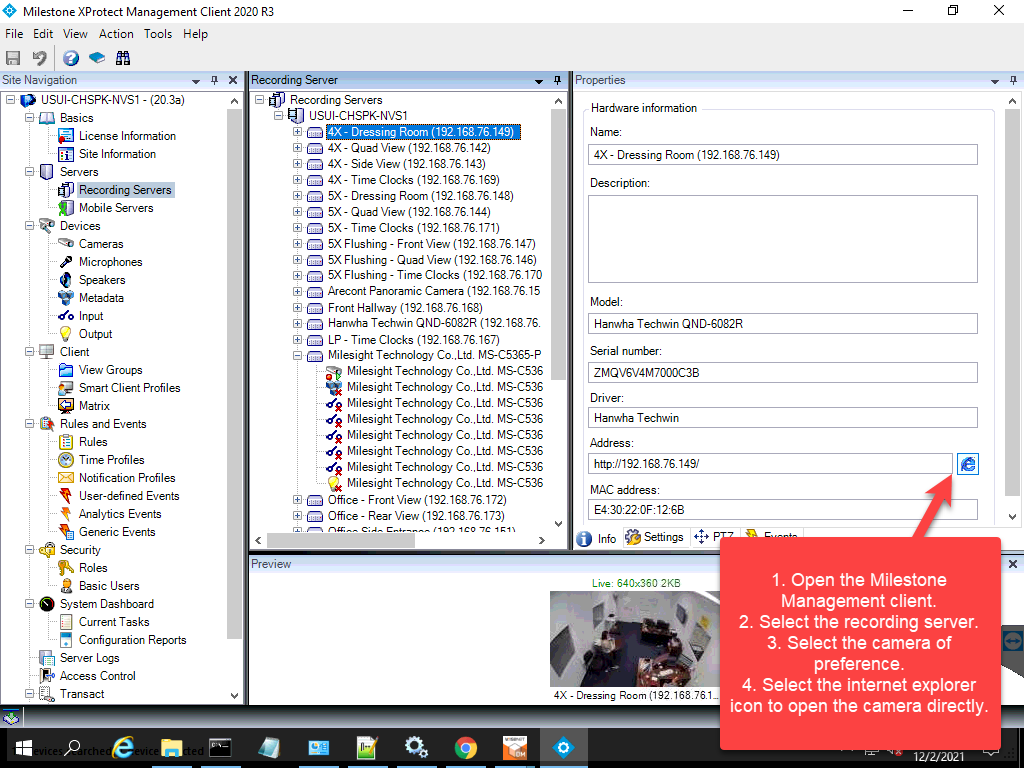
- Open the milestone application and select the recording server button under servers on the left of the screen.
- Open the camera folder and hold the control button and select the camera for the remote camera ID to appear on the Info Page.
- Copy the remote ID and paste in the camera creation page in BluSKY.
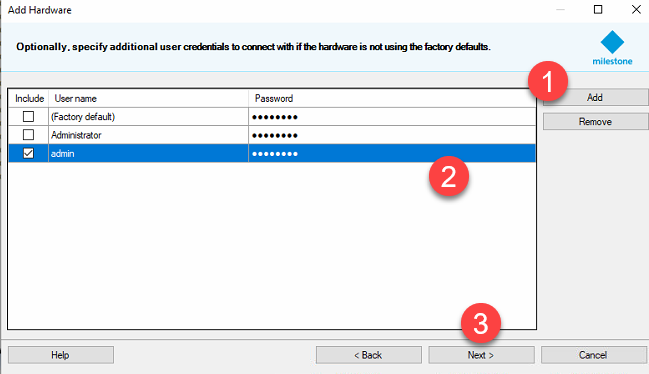
- Upon selecting next, the user is taken to the login authentication page.
##
- By default the factory login & password will be present. Either it can be edited or a new login can be added. Select the add button to add a new login.
- Enter the Camera login/passwords.
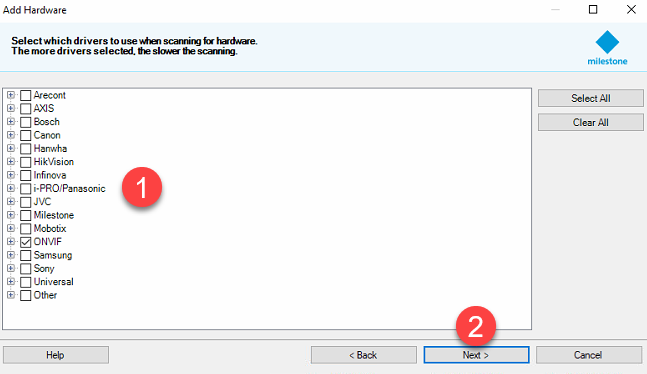
- Select the next button.for hardware selection page.
- Here the user can select the camera hardware to narrow down the search list.
- Select the next button, once the hardware has been selected.
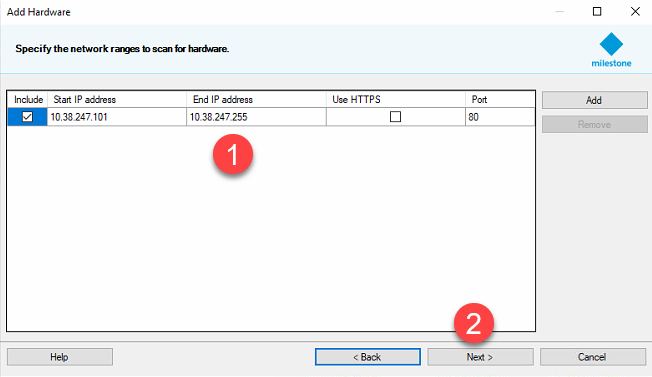
- Here the user can enter the IP range to identify the cameras.
- Select the next button once the IP has been added.
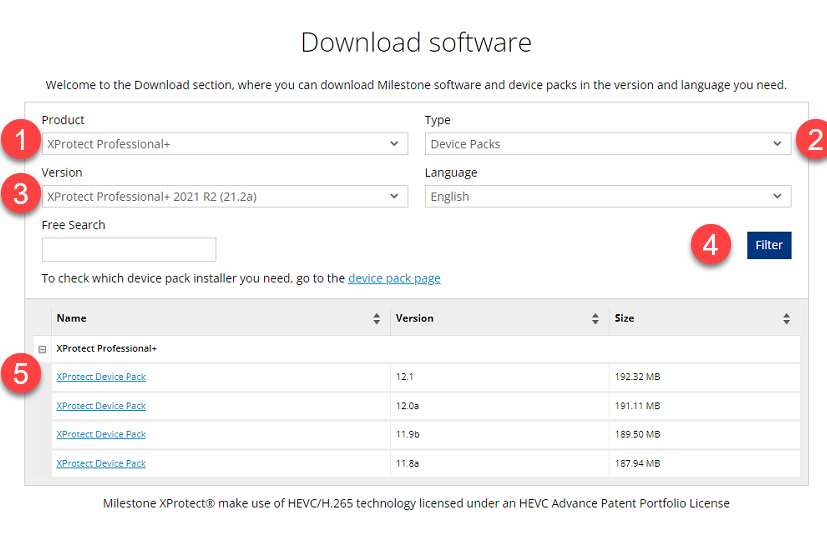
When a camera is being detected but is not being added, it could be because the device pack may have not been updated to the latest version for milestone. To download this go to this link.
- Select the product version. (Should match the installed version)
- Set the type to device packs.
- Select the version for which the device pack is needed.
- Select the filter to narrow down the search.
- Download the device pack and install.
Step 2 - Camera Creation
Log in and navigate to #. Main Menu-> Setup -> Cameras
Use the ![]() button in the lower left side to create a new Camera.
button in the lower left side to create a new Camera.
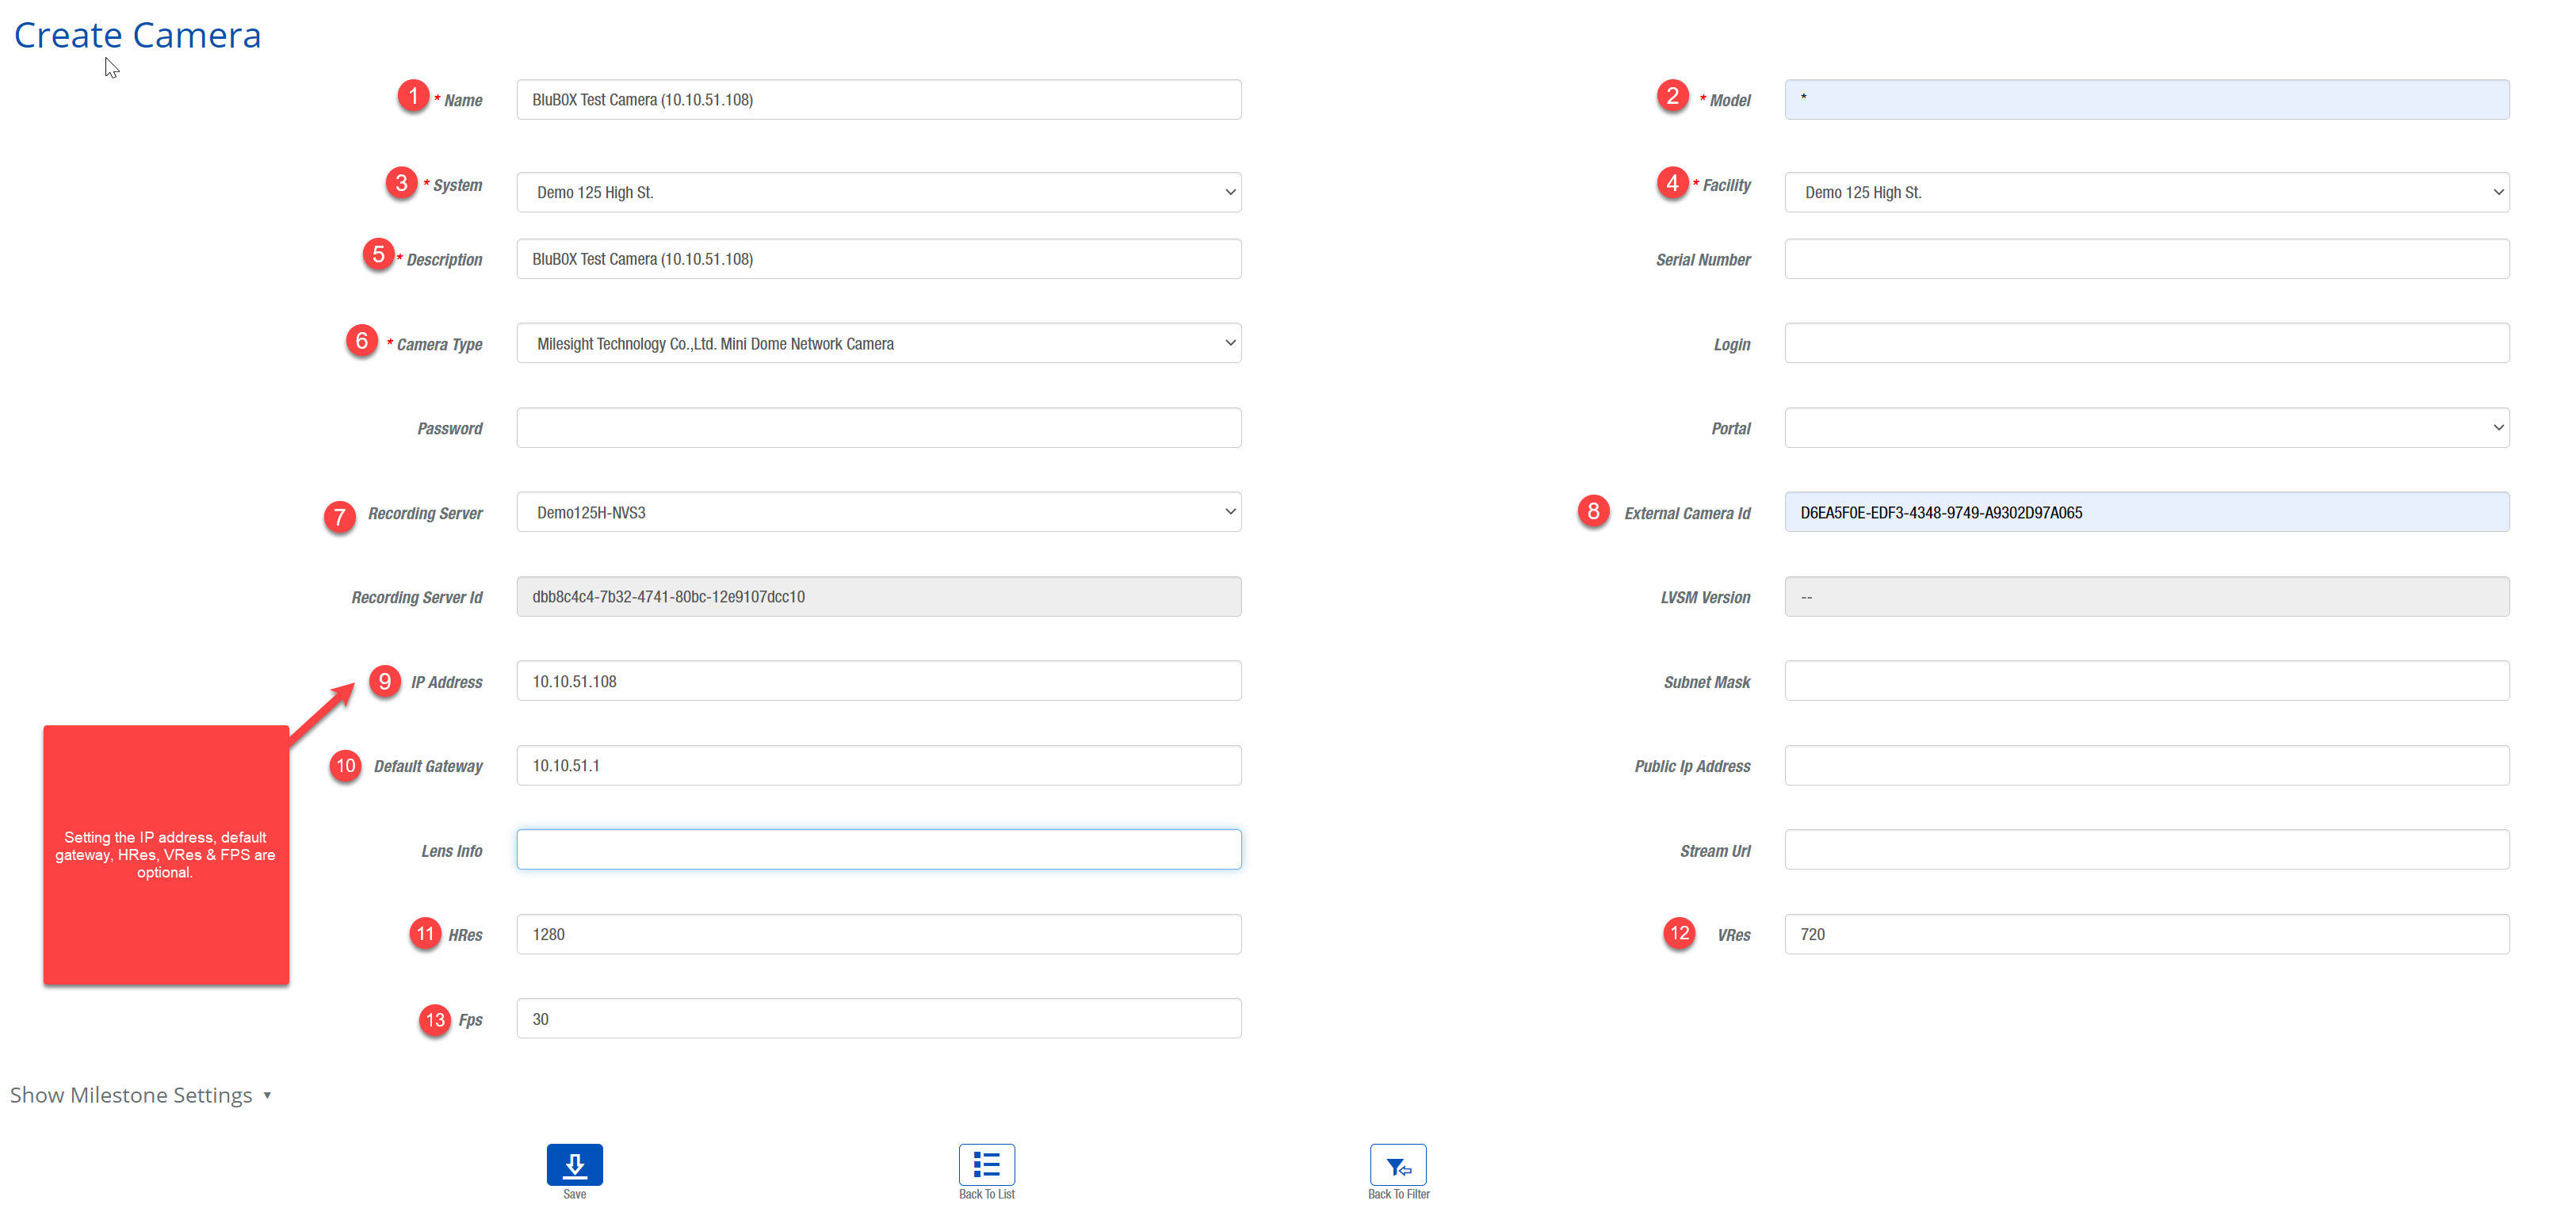
- Enter the name of the camera.
- Enter the model number. (If not available, just leave a text)
- Enter the system in which the camera is created.
- Enter the facility in which the camera is created.
- Enter the description of the camera. (The same information can be used from milestone)
- Select a camera type. (Only 2 available currently)
- Select the recording server in which the camera is selected. (Should have the same or similar name as the system)
- Copy and paste the external camera ID from the milestone NVR. The steps below are optional but can be added for camera information.
- Add the camera IP address.
- Add the default gateway.
- Add the HRes.
- Add the VRes.
- Add the FPS.
 When finished use the
 ![]() button to finish.
button to finish.
Step 3 - Viewing Camera
Select the camera button in the home screen or go to Control -> Video.
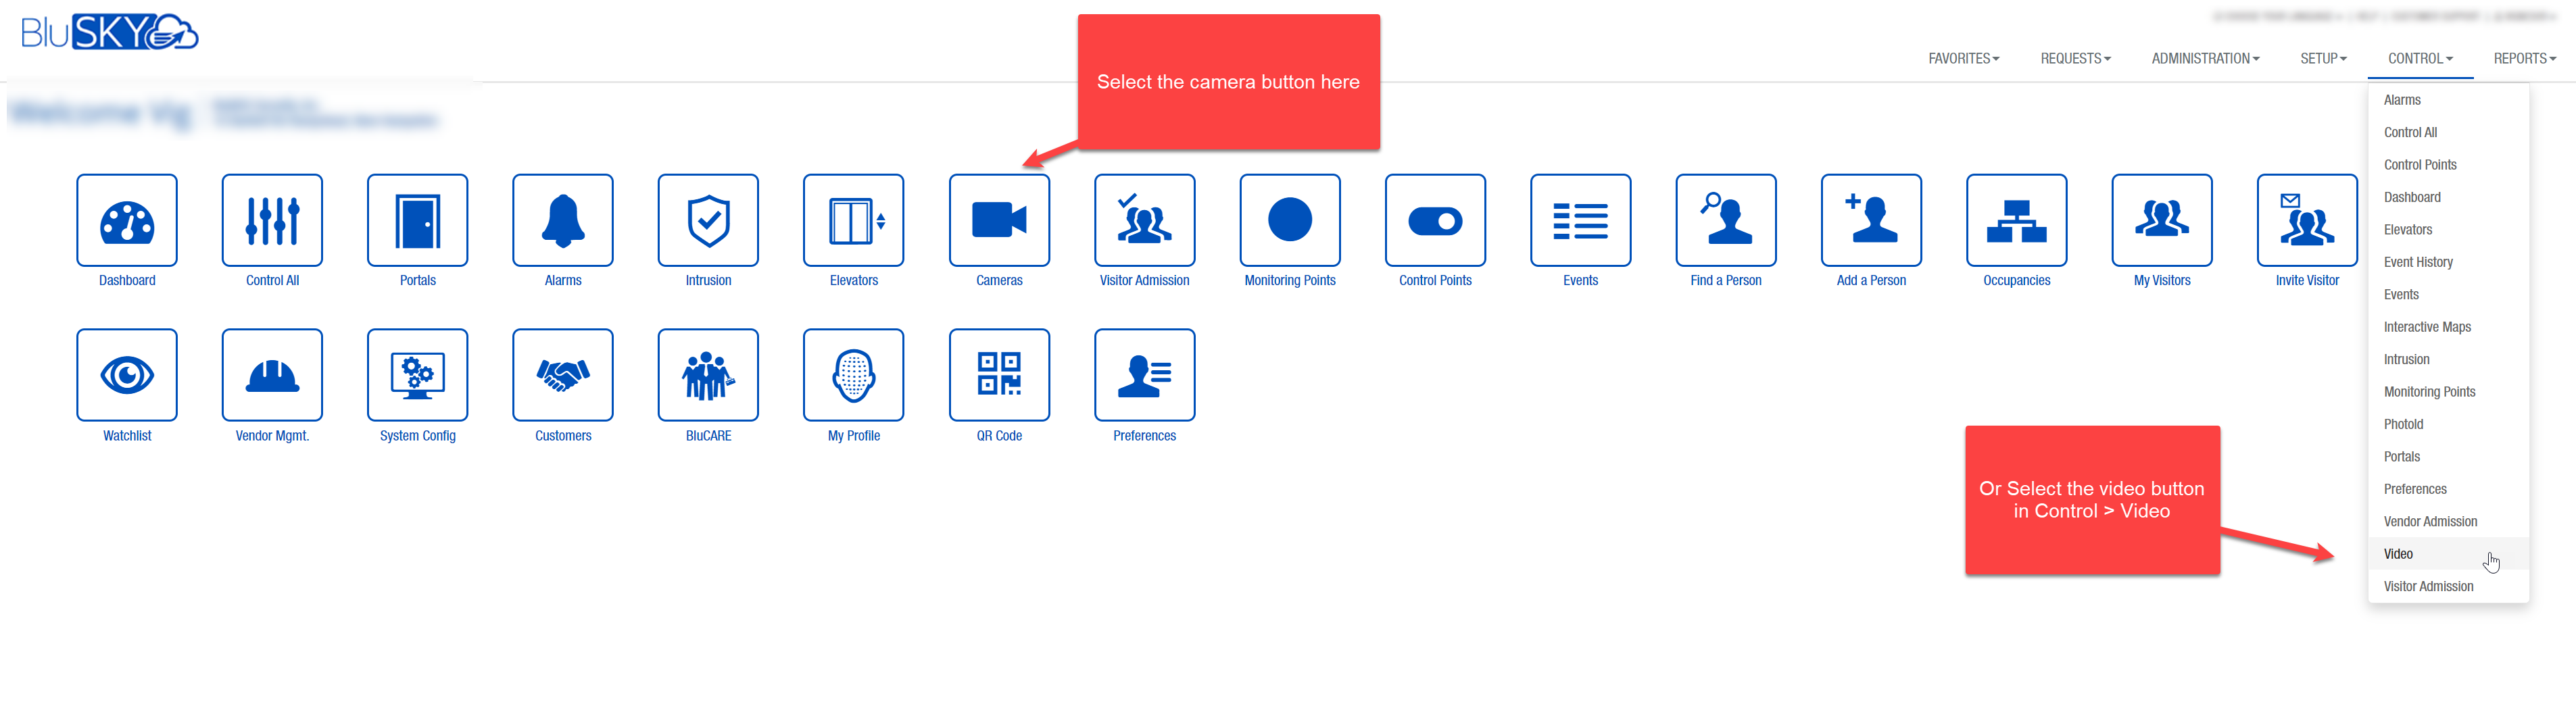
- Search for the camera in Facilities & Camera.
- Select the camera drop down.
- Choose the camera and drag & drop it in the UI to view it.
Hanwa Wisenet Firmware
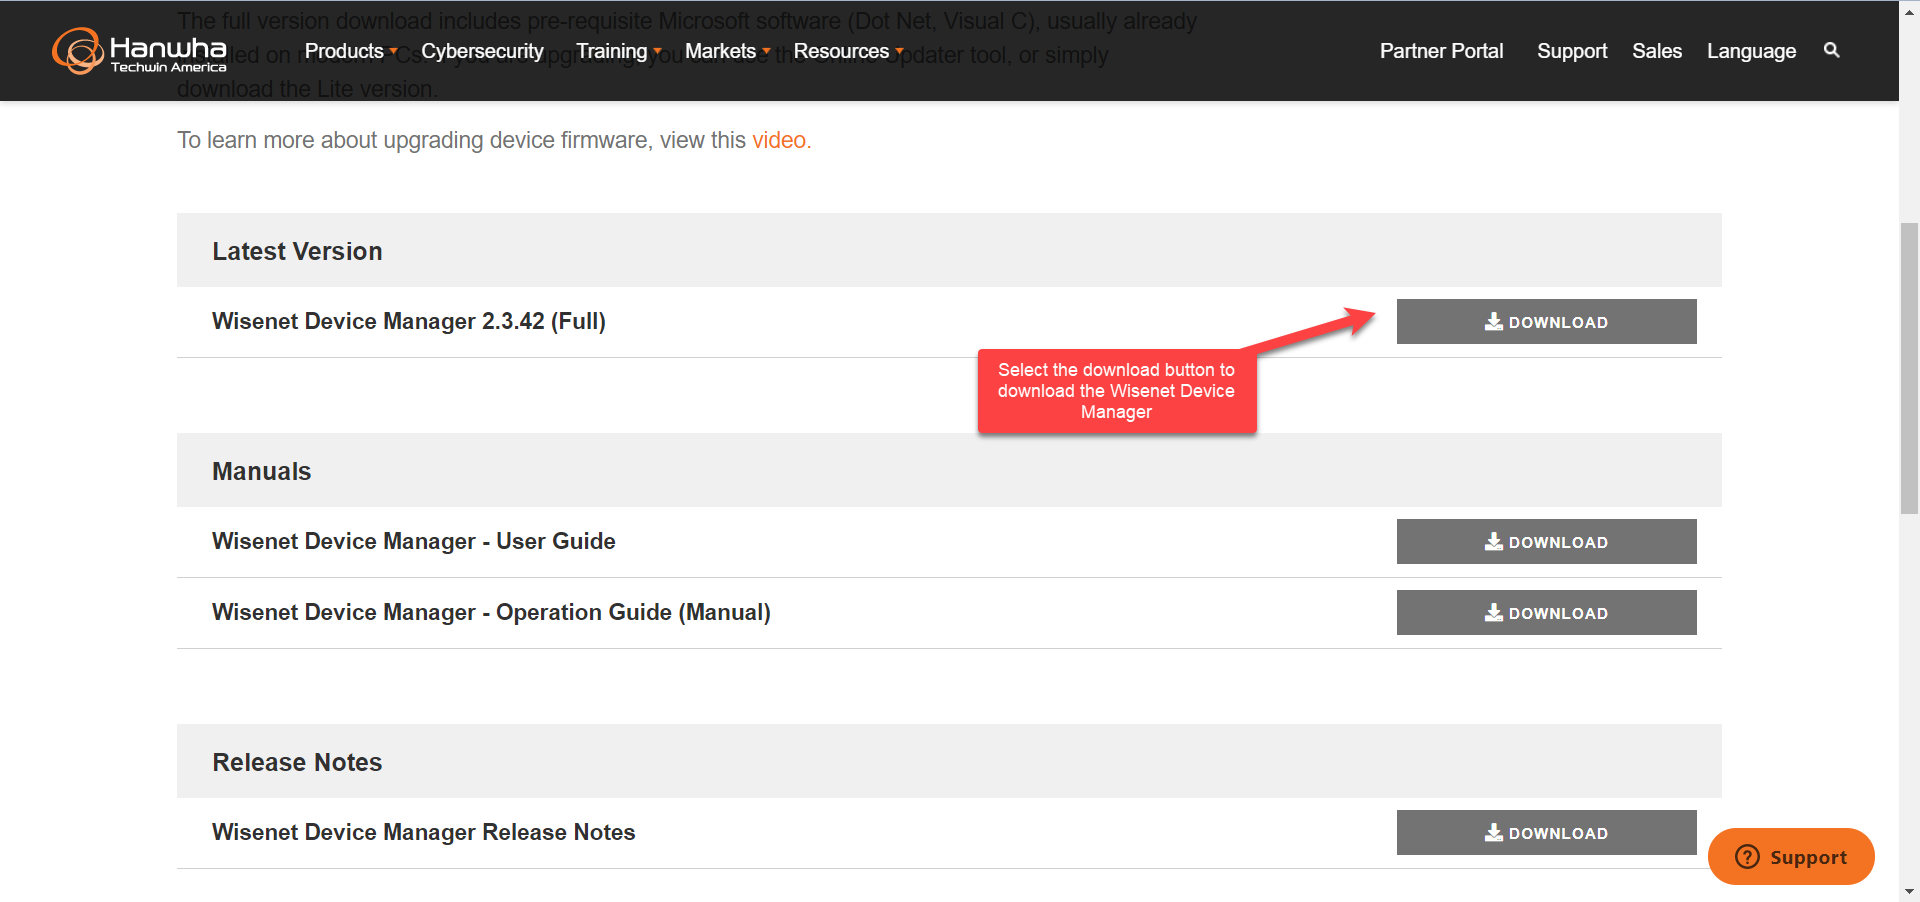
Download the Wisenet Device Manager here.
- Select the download button to download the Device Manager.
- Install the software and open the Wisenet Device Manager
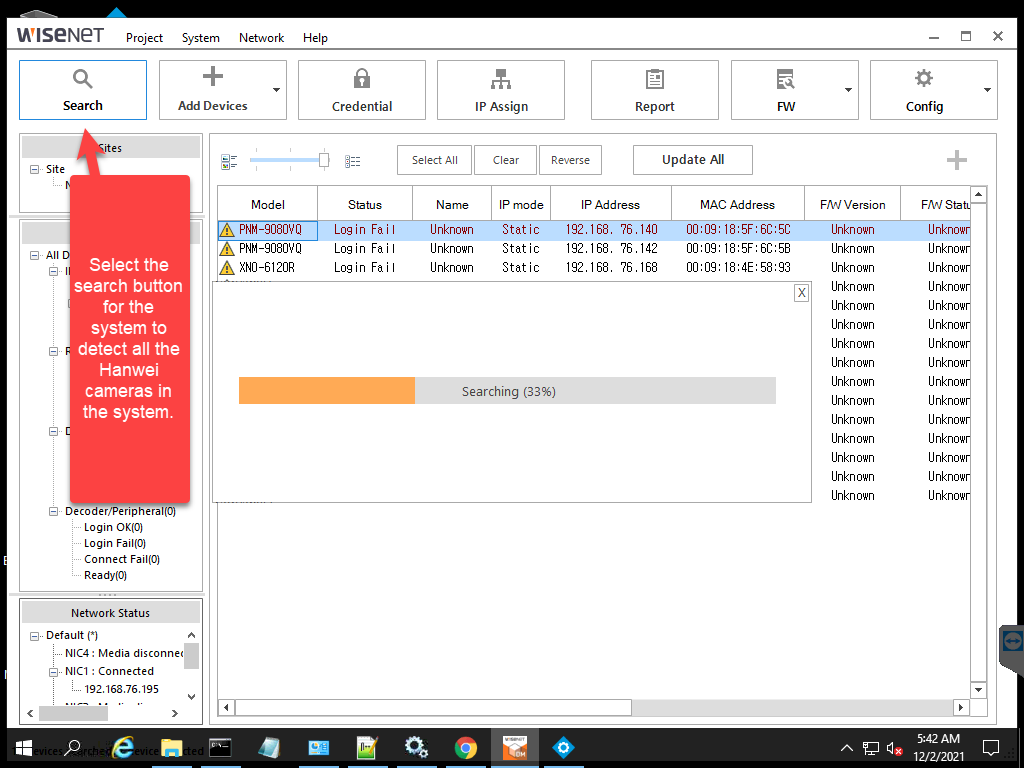
- Select the Firmware update and go to the firmware update page.
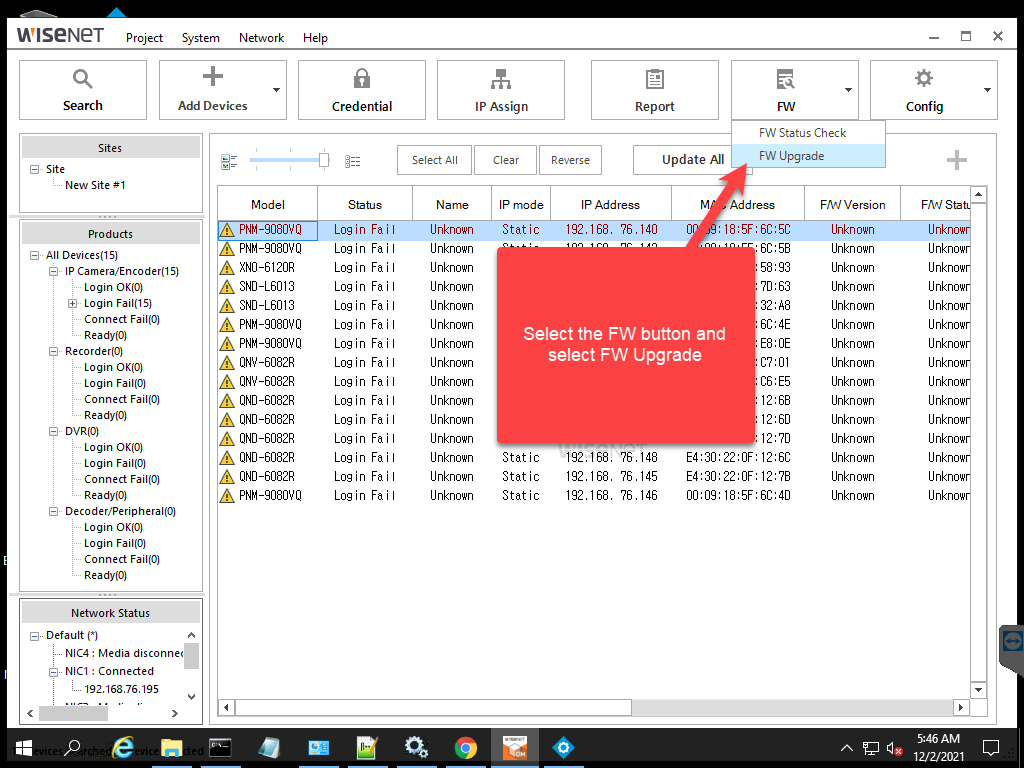
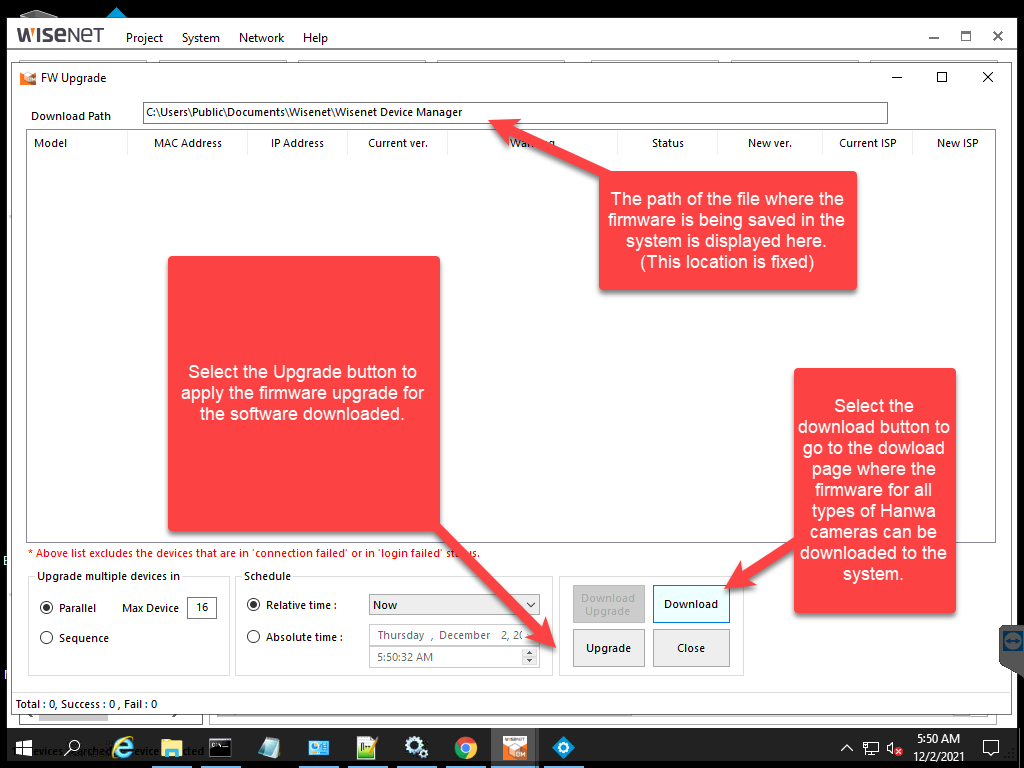
- Select the download button to go to the download page.
- Select the upgrade button to apply the firmware upgrade to the cameras detected.
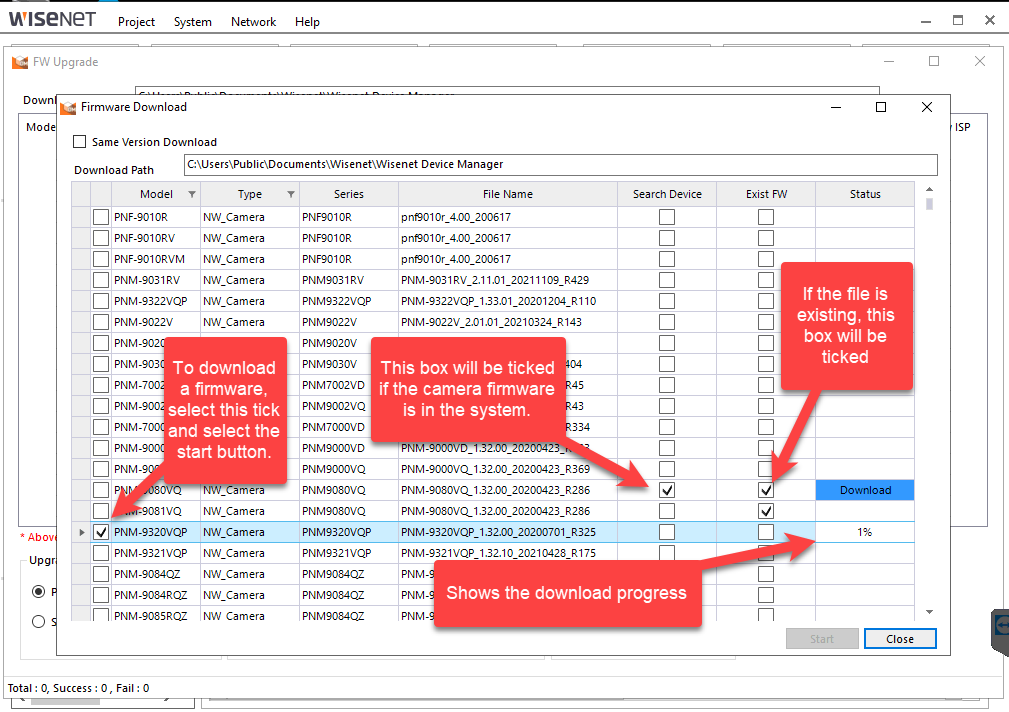
- Select the firmware required and select tick box and select the start button to download the firmware.
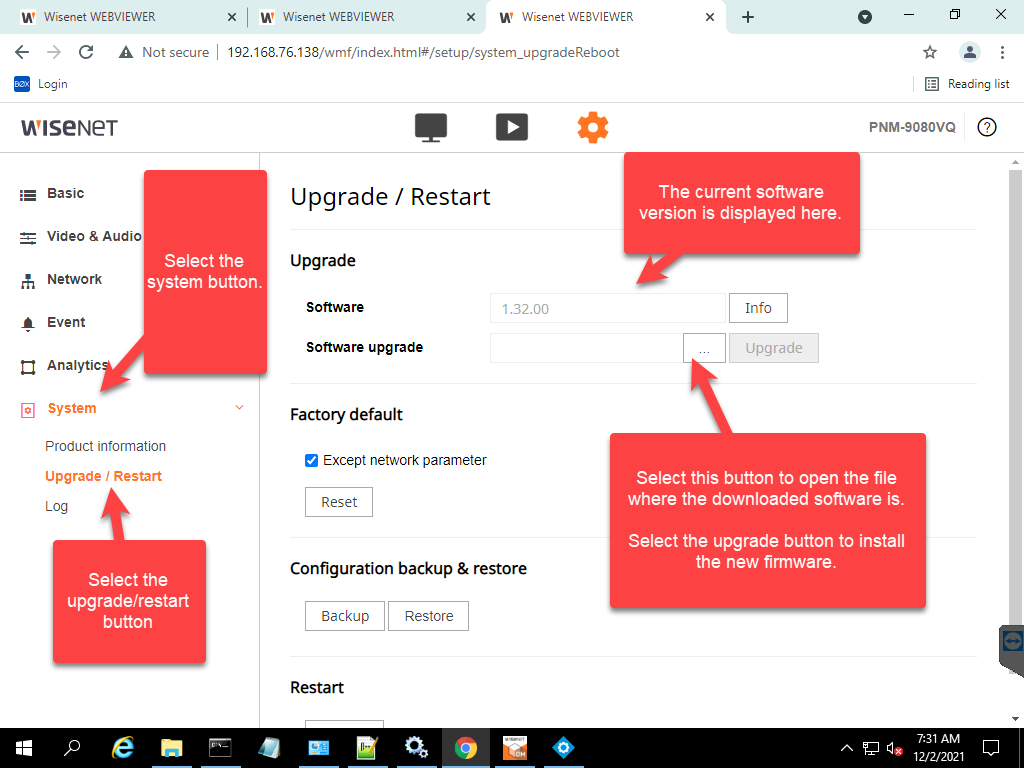
- After all the firmware for the Hanwei cameras are downloaded. The cameras can be directly accessed by entering the IP address in a web browser or by opening them through the Milestone Management Client.
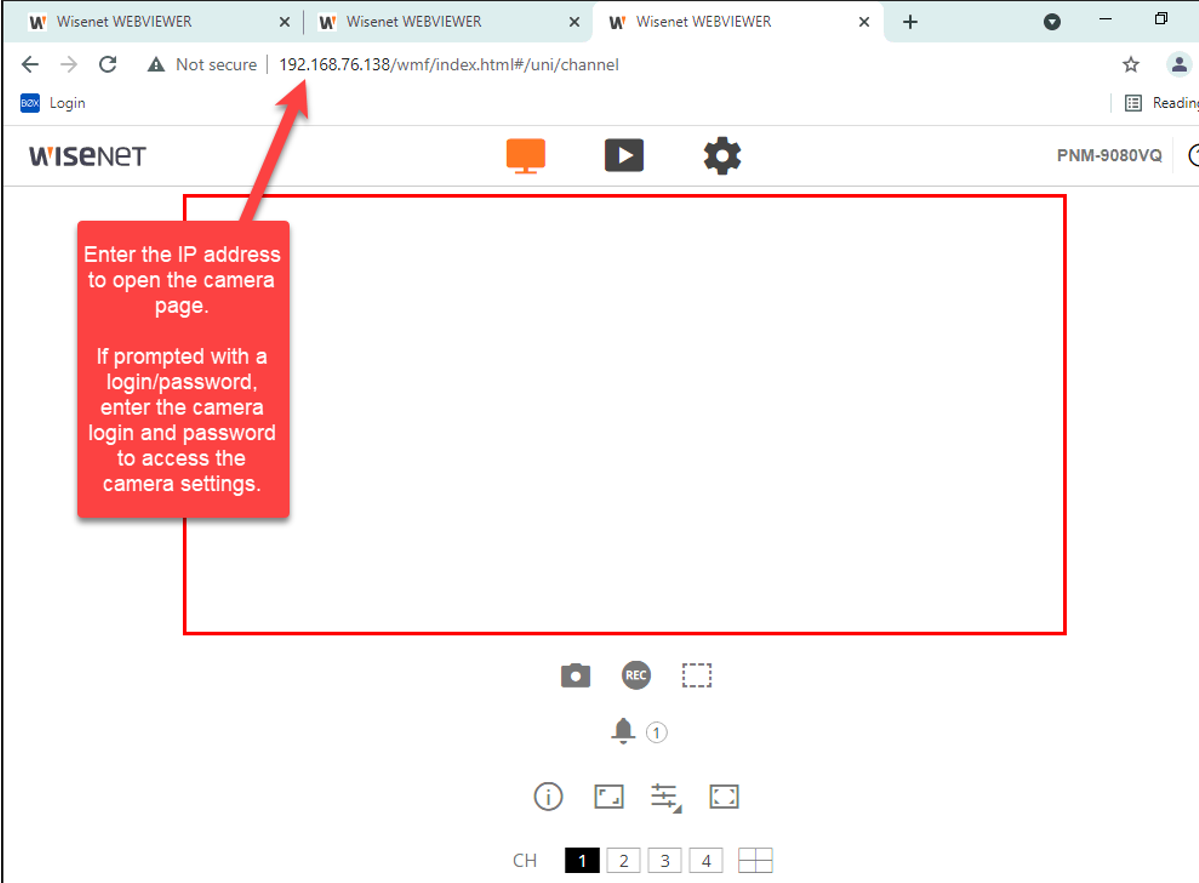
- Once inside the camera page, select the cog wheel button.
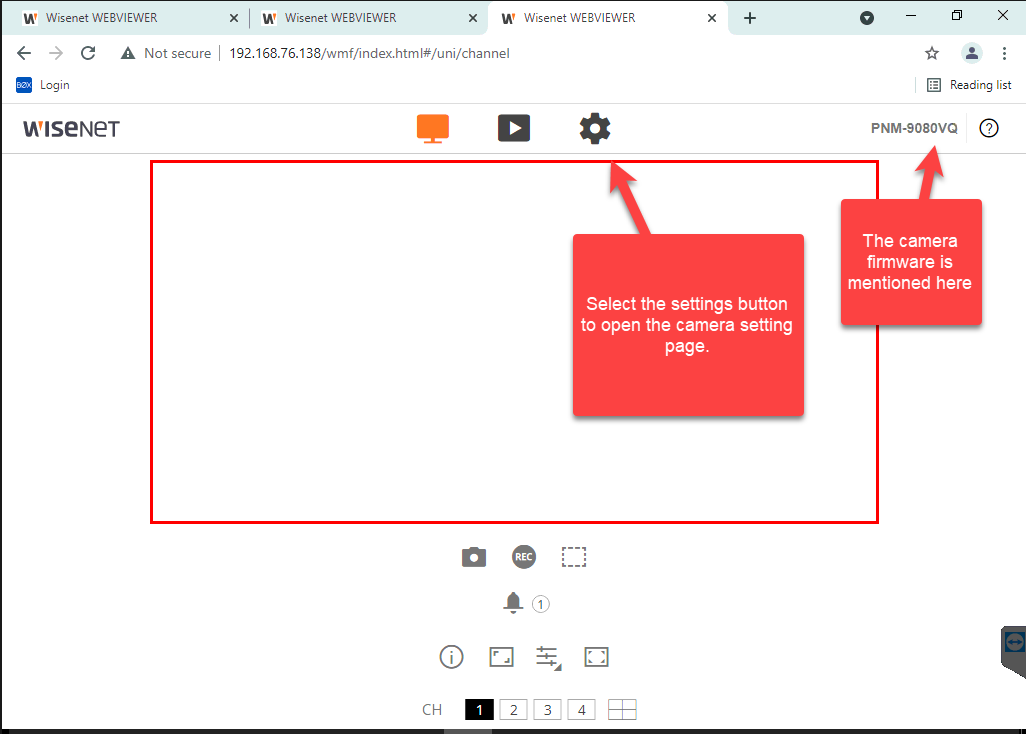
- Select the 3 dots to access the firmware upgrade. Select the upgrade button to upgrade the firmware. The camera will restart after the firmware has been upgraded and browser page will close.