Check In and Badge a Visitor
Overview
The Check In and Badge feature allows a Person with the appropriate permissions to Check In and create credentials a Visitor from one simple screen. This article will provide detailed instruction on how to Check In and create Credentials for a Visitor using BluSKY's Visitor Management system.
This is the fastest way to Check In and assign a badge to the Visitor. If you do not need to assign a badge to the Visitor you may use the Check In button. We have provided step-by-step instruction on how to Check In a Visitor from the Visitor Administration page.
Instructions
- Log in and navigate to Visitor Administration. Main Menu-> Control-> Visitor
- Click the
 icon, labeled "Chk+Badg". This will open the Visitor Request edit screen.
 - If you wish to take a picture use the
 button or upload a file using the
  button.

- Select the Card type in the lower half of the page.
- Note: In some cases there is a default card type and this field will be filled in. If your Facility is using only one card type and you want to specify a default card type, please contact support at support@blub0x.com.
- Enter the Card information. This process will be different depending on which Card Type you select.
- If you are entering a CSN card type, you will enter the Serial Number using an unencrypted reader.
- For all other Cards enter the External Card Number.
- Depending on the Status you will have three different options:
Pre-Registered, Assigned to Last, FirstName.
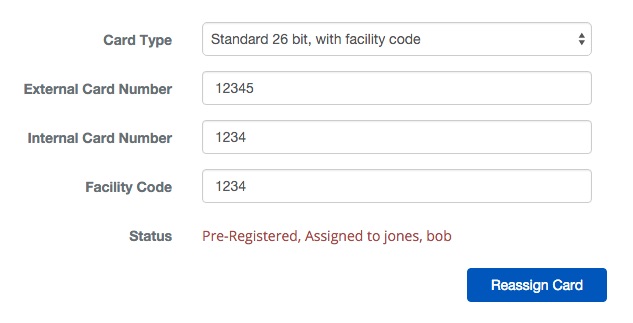
- This will take the Cards from another Person and assign it to the Visitor
- If you are sure the Card is no longer in use, click the
 .
. - This can save a lot of time if a previous visitor's card was not reclaimed at Check Out.
Pre-Registered, Available

- If the Card is found BluSKY will attempt to complete the entry process.
- If the Facility is using multiple Facility Codes you may be required to fill this field in.
Card Not Found - Adding New
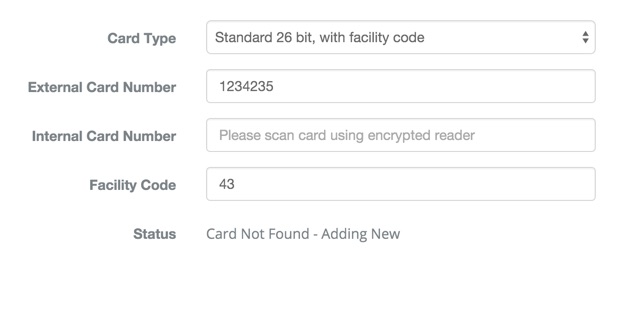
- Enter the Internal Number
- Enter the Facility Code
- Enter a PIN if necessary.
- ***Note:***This will enable a Person to use a Reader with a keypad.
- Note: Some Facilities impose a minimum PIN length.
- Use the User Flag section to add additional parameters to the credential.
- **EX:**Using the ADA Timing Parameter, once configured, gives additional time to enter a Portal.
- Check to make sure the Start Datetime is valid, adjust if needed.
- Note: This is especially important if the Visitor is arriving early.
- Ensure the End Datetimecorresponds with the end of the visit.
- Choose one of the five options to complete the process.
 will save all of the changes you have made.
 will save the changes and indicate the person is in the building.
 will check the Visitor in.
 this will print the badge.
 this will remove the Card you just assigned.