Check In and Badge
Check In and Badge will open the Vendor Invitation edit window, allowing you to Check In the Vendor, edit and assign credentials.
If your Facility waits to assign credential until the Vendor has arrived the Check In & Badge option will enable you to take both steps with a single click. Just click the ![]() button and new dialog will open up. From this dialog, you will be able to assign a card and check the person in.
button and new dialog will open up. From this dialog, you will be able to assign a card and check the person in.
Basic Info
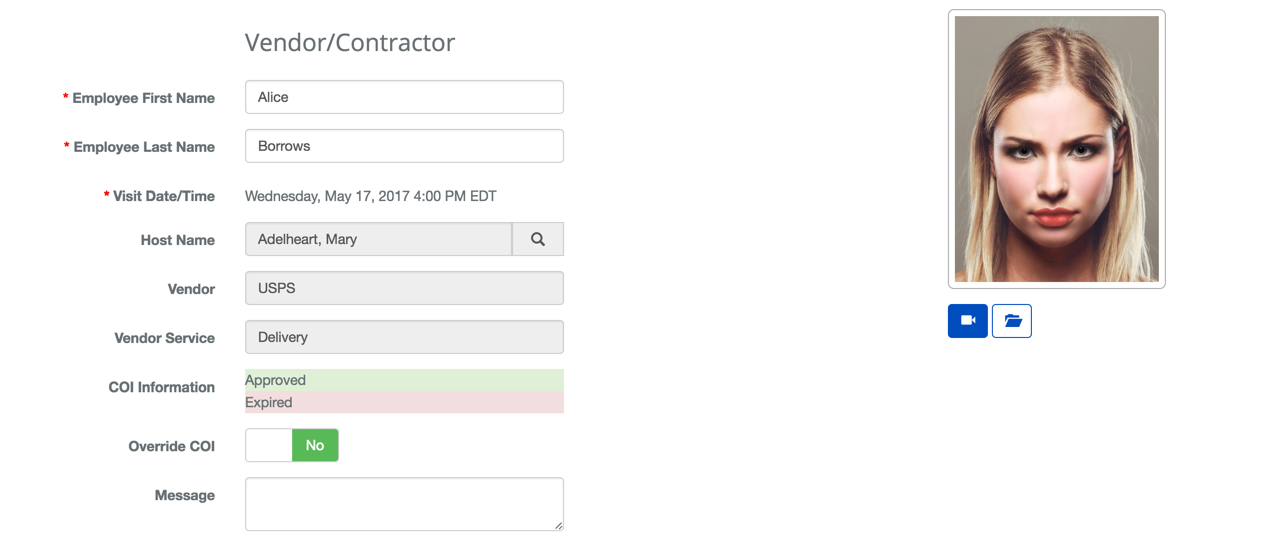
Information on the name of the Vendor employee and the Vendor's COI will be available on the page. If the Vendor does not have a current COI, you may need to override the COI restriction, for more information see our Overriding Vendor COI Restrictions article.
If you wish to update or take a new picture use the ![]() button or upload a file using the
button or upload a file using the ![]() button.
button.
Credential Management
This section of the Vendor Admission interface will allow you to manage the credentials of the Vendor Employee. The process will be very similar to adding a credential to a Person.
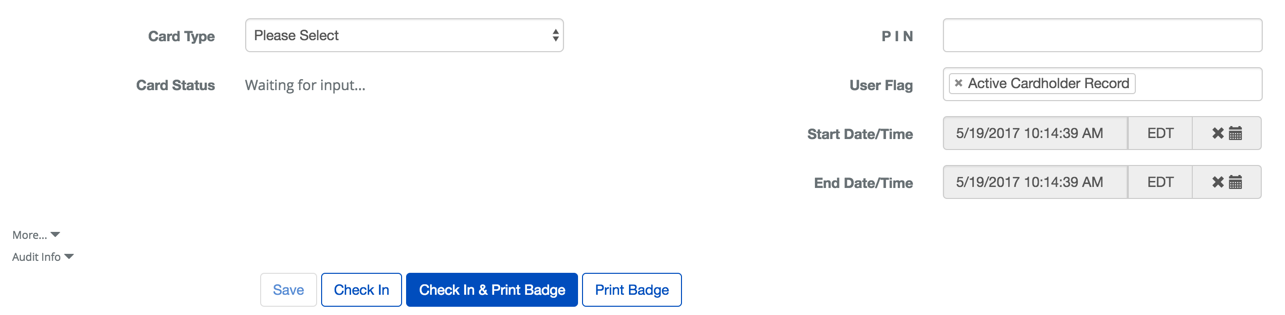
Once you select the Card Type, BluSKY will try to help out with the credential assignment. Below describes some of the normal card assignment workflows.
Pre-Registered, Assigned to Last, FirstName.
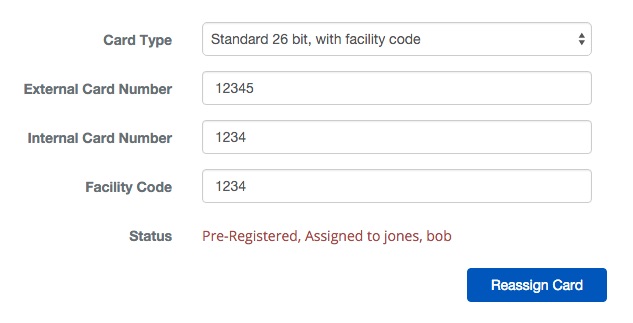
- This will take the Cards from another Person and assign it to the Visitor
- If you are sure the Card is no longer in use, click the
 .
. - This can save a lot of time if a previous visitor's card was not reclaimed at Check Out.
Pre-Registered, Available

- If the Card is found BluSKY will attempt to complete the entry process.
- If the Facility is using multiple Facility Codes you may be required to fill this field in.
Card Not Found - Adding New
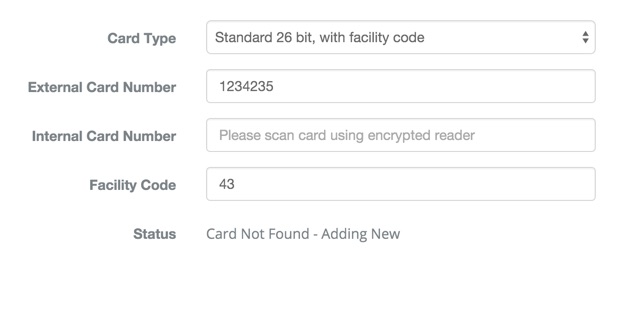
- Enter the Internal Number
- Enter the Facility Code
More Info
The more information section is not displayed by default. This is because all of this information is normally coming from the Vendor Invitation and does not need to be adjusted. However, we understand that changes may need to happen and to make it easy, we provide this information at the bottom of the screen. Simple click the "More..." link to expose this field. From here you will be able to adjust, default floor, Vendor Type, time of visit and their access.
