Create a Floor Matrix
BluSKY URL: https://blusky.blub0x.com/en-US/DestinationKeypadFloorMatrix
Overview
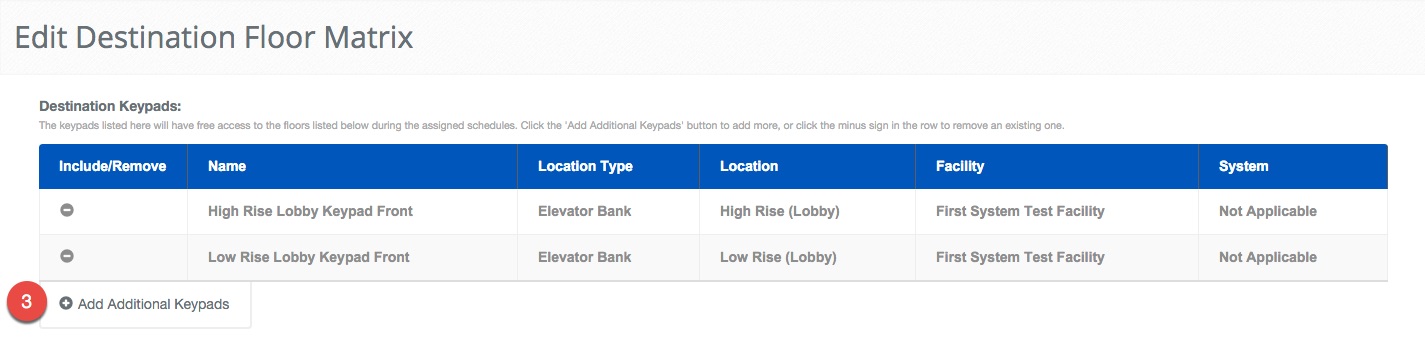
The Floor Matrix is used to determine which Floors are served by which Destination Keypads and when the Floors can be accessed. This article provides detailed information on How to Setup a Floor Matrix.
Instructions
Before creating the Floor Matrix you must ensure that Floor Stops, Device Schedules and Destination Keypads are configured properly.
- Log in and navigate to Floor Matrix. Main Menu-> Setup-> System Setup-> Floor Matrix
- Click the
 icon.
icon.
- Click the
 icon next to Add Additional Keypads. This will display a new window to select the Keypads you want to select for this Floor Matrix.
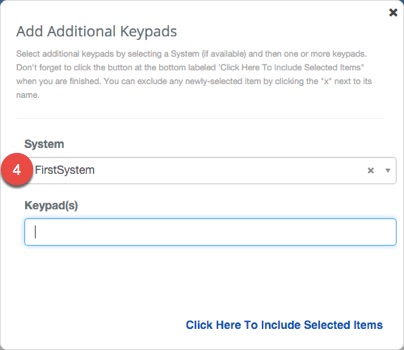

- Select the System using the drop down menu.
- Select the Destination Keypads you would like to configure.
- ***Note:***There is also a text search field to narrow down the results.
- Click the "Click Here To Include Selected Items" text.
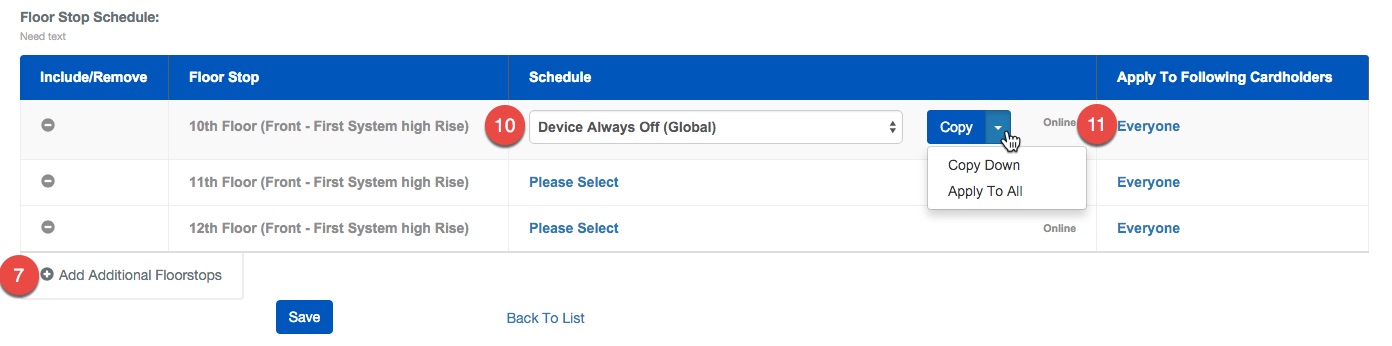
- Click the icon next to **Add Additional Floorstops.**This will open a new pop up window that will allow you to select the Floor Stops you wish to configure.

- Select the System and **Facility,**if needed, using the drop down menu options.
- ***Note:***This is usually filled in from making the choice from step 4 and 5.
- Select all of the Floor Stops you wish to configure by:
- Click all of the Floor Stops you wish to include.
- Use the
 to assign them or the
  to assign all from the list.
 - Finish by clicking the "Click Here to Include Selected Items" text when finished.
- Select a Schedule to assign to Floor Stops by clicking on the Schedule text and selecting from the drop down list.
- If the Floor Stops will have the same Schedule use the Copy Down or Copy All by pressing the chevron next to the Copy button.
- Use the Apply to Following Cardholders to limit the people that should be affected by this change.
- Note: These flags are specifically to communicate with the destination dispatch system and have no bearing on BluSKY.
- Confirm changes with the
 button.