Edit a Controller
BluSKY URL:https://blusky.blub0x.com/en-US/MercuryController
Overview
The Controller serves as the brain of the access control system and is also how BluSKY is able to make the connection to the physical world from the cloud. This article will instruct you how to make various edits to an existing Controller.
WARNING: It is critical that the Controller is configured properly and changes should not be attempted unless you are certain the change is necessary. All fields denoted with a ( 1 ) will need their controller to be reset and fully synchronized (using the Mercury Test Tool). The portals and elevators secured by this controller WILL NOT BE SECURED while this is taking place. This change should be scheduled during a period of minimal activity.
Edit a Controller's Name
- Log in and navigate to System. Main Menu-> Setup-> System Setup-> Controller
- Select the Controller you wish to edit from the list.
- Click the
 icon in the lower left side of the screen.
- Note: If the edit button is not available ensure that only one Controller has been highlighted.
- Use the Name field to enter the correct name of the Controller.
- Confirm changes with the
 button.
Edit a Controller's System
- Log in and navigate to System. Main Menu-> Setup-> System Setup-> Controller
- Select the Controller you wish to edit from the list.
- Click the icon in the lower left side of the screen.
- Note: If the edit button is not available ensure that only one Controller has been highlighted.
- Use the System drop down menu to assign the Controller to the correct System.
- Confirm changes with the button.
Edit a Controller's Description
- Log in and navigate to System. Main Menu-> Setup-> System Setup-> Controller
- Select the Controller you wish to edit from the list.
- Click the icon in the lower left side of the screen.
- Note: If the edit button is not available ensure that only one Controller has been highlighted.
- Use the Description text field to enter the new description.
- Confirm changes with the button.
Edit a Controller's MAC Address
- Log in and navigate to System. Main Menu-> Setup-> System Setup-> Controller
- Select the Controller you wish to edit from the list.
- Click the icon in the lower left side of the screen.
- Note: If the edit button is not available ensure that only one Controller has been highlighted.
- Use the MAC Address field to correct the MAC Address.
- ***Note:***This is how BluSKY communicates with the controller. Changing this field may prevent BluSKY from communicating with the hardware.
![]()
- Confirm changes with the button.
Edit a Controller's Type
- Log in and navigate to System. Main Menu-> Setup-> System Setup-> Controller
- Select the Controller you wish to edit from the list.
- Click the icon in the lower left side of the screen.
- Note: If the edit button is not available ensure that only one Controller has been highlighted.
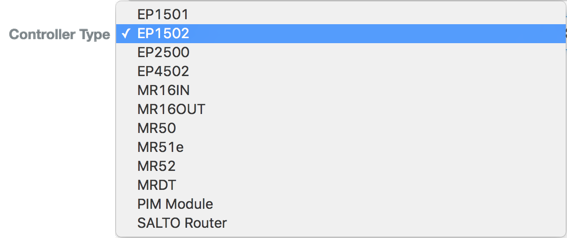
- Use the Controller Type drop down menu to select the correct controller type.
- Confirm changes with the button.
Change the Max Card Length1
Changing the Max Card length should only be done when absolutely necessary. The memory on Mercury Controllers can be a precious resources and needlessly increasing the Card Bit Length can limit available memory in the future.
- Log in and navigate to System. Main Menu-> Setup-> System Setup-> Controller
- Select the Controller you wish to edit from the list.
- Click the icon in the lower left side of the screen.
- Note: If the edit button is not available ensure that only one Controller has been highlighted.
- Click
to expose additional options.
- Scroll down until you see the User Database section.
- Use the Maximum Allowed Card Bit Length selector to select the max card length of the Controller.

- Confirm changes with the button.