Edit a Customer
BluSKY URL: https://blusky.blub0x.com/en-US/Customer
Overview
A Customer is the person or the organization that is responsible for an access control system. This article will assist in changing any of the fields for a customer.
Change an Integrator
- Log in and navigate to Customer. Main Menu-> Setup-> Facilities and Customers-> Customer Setup
- Use the search criteria to find the entry you wish to edit and then click to select it.
- ***Note:***You cannot edit multiple entries at a time.
- Click the
 icon in the lower left hand side to open the edit screen.
 - Select the correct Integrator from the Integrator drop down menu.

- Confirm changes with the
 button.
Change a Customer's Name
- Log in and navigate to Customer. Main Menu-> Setup-> Facilities and Customers-> Customer Setup
- Use the search criteria to find the entry you wish to edit and then click to select it.
- ***Note:***You cannot edit multiple entries at a time.
- Click the icon in the lower left hand side to open the edit screen.
- Using Customer Name field enter the new Customer Name.

- Confirm changes with the button.
Change a Customer's Billing Address
- Log in and navigate to Customer. Main Menu-> Setup-> Facilities and Customers-> Customer Setup
- Use the search criteria to find the entry you wish to edit and then click to select it.
- ***Note:***You cannot edit multiple entries at a time.
- Click the icon in the lower left hand side to open the edit screen.
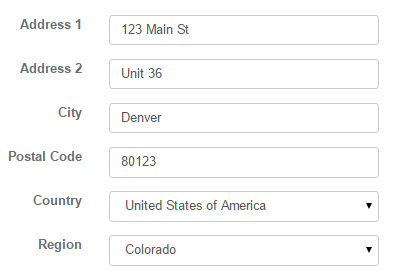
- Enter the Address in the Billing Address text fields.
- Note: If the billing address is the same as the mailing Address check the Same as billing address
- Confirm changes with the button.
Change a Customer's Billing Address
- Log in and navigate to Customer. Main Menu-> Setup-> Facilities and Customers-> Customer Setup
- Use the search criteria to find the entry you wish to edit and then click to select it.
- ***Note:***You cannot edit multiple entries at a time.
- Click the icon in the lower left hand side to open the edit screen.
- Navigate to the Address fields on the right associated with the Customer.

- Confirm changes with the button.
Add an Email
- Log in and navigate to Customer. Main Menu-> Setup-> Facilities and Customers-> Customer Setup
- Use the search criteria to find the entry you wish to edit and then click to select it.
- ***Note:***You cannot edit multiple entries at a time.
- Click the icon in the lower left hand side to open the edit screen.
- Click
 to the right of Add Email.
 - Select either Personal or Work in the first drop down menu.
- Enter the email address in the new text field.
- Confirm changes with the button.
Add a Telephone Number
- Log in and navigate to Customer. Main Menu-> Setup-> Facilities and Customers-> Customer Setup
- Use the search criteria to find the entry you wish to edit and then click to select it.
- ***Note:***You cannot edit multiple entries at a time.
- Click the icon in the lower left hand side to open the edit screen.
- Click to the right of Add Phone.
- Select Work, Home, Mobile or Fax from the first drop down menu.
- Enter the phone number in the newly created text field.
- Confirm changes with the button.