Vendor Management - Quick Start
Overview
Typically, the process of granting access to visitors (who are individuals who pass through the front lobby and use the passenger elevators) is not the same as the granting of access to Vendors (who are usually companies that use the dock and the freight elevators). For this reason, BluSKY has several modules that cover specifically the admission of Vendors to a secured property.
Some Vendor differences:
- Vendors are invited to the property to perform certain services.
- Before they can be admitted, they need to have provided an acceptable Certificate of Insurance (COI) to the Property Office.
- In many cases, the host does not know the name or even the number of workers who will arrive to perform the work.
- Vendors need different access rights because they use a different path than visitors into the property (the dock and freight elevators vs. the lobby and the passenger elevators).
How It Works
- The property management must first settle on a standard list of Vendor Services for the property (Electrical, Plumbing, Portage, etc).
- A BluSKY Vendor record is created for each Vendor company. Besides the identification fields such as name and address, it includes two “flag fields” that only those with the Vendor Admission permission to do so:
- The Vendor Status which is set by the Property Office and indicates whether the vendor can be admitted to the building or not, and
- The COI Start and End Dates- The End Date is key because a vendor is normally not admitted unless the COI is current.
- A new Vendor record can only be created by a property manager or an Occupancy manager with the proper permissions.
- When a vendor is to be invited into the property, a Vendor Invitation must be created. The invitation shows the status of the Vendor. If it is RED (Vendor NOT approved or COI expired), the invitation can be completed only if the host chooses to override the warning.
- When the property office receives the new vendor’s COI, it opens the Vendor’s record and sets the flags to “Approved” and enters the COI start and expiration dates.
- When a Vendor employee arrives and is to be admitted, the Security Officer search for the Vendor Invitation.
- If the flags are green in the invitation, (Vendor Approved, COI Current), the Security Officer can admit.
- If one of the flags is red, the Security Officer follows the property’s protocol. The Security Officer, with proper authorization, can override the red flag(s) and admit.
- The admission of the Vendor personnel is accomplished by adding the individual names to the Vendor invitation and issuing credentials.
Vendor Services
This module provides for the maintenance of the list of Vendor services. It is available with the Vendors / Vendor Administration permission and found under Administration → Vendor Services. The module opens to the Vendor Services List.
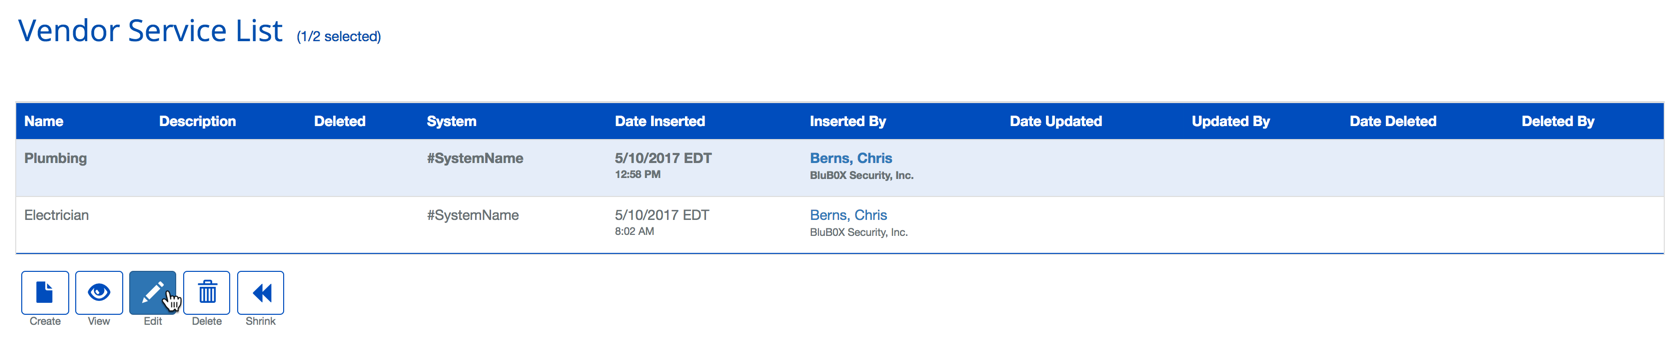
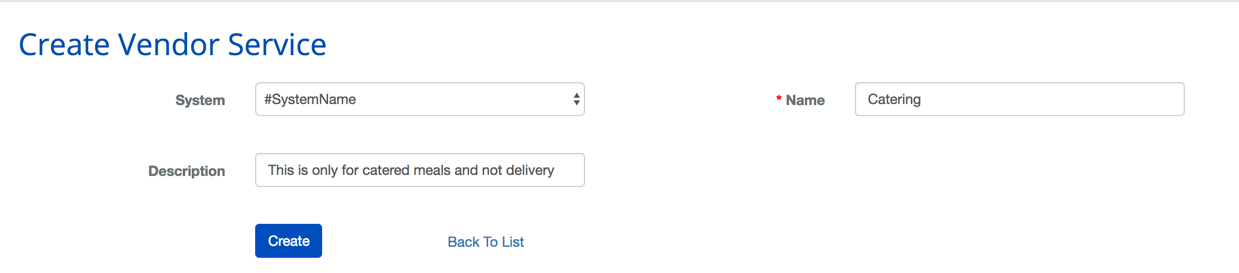
Users can either highlight a service and edit it, or click Create, and create a new one. The window provides for a Service Name and an optional description.
Vendor Administration
This module provides for the maintenance of the list of vendors. It is available with the Vendors / Vendor Administration permission and found under Administration → Vendor Services. The module opens to the Vendor Services List.
How It Works
Vendors can be associated with a System, Facility or an Occupancy. Those associated with the Facility are displayed in the Vendor List for all Occupancies to see. Those associated with one or more Occupancies can be seen only by those Occupancies and the property management.
The Vendor Administration Filter

From the filter, you can either:
- Create a new Vendor (by clicking
 ),
), - Search for a vendor by typing a few letters of the vendor’s name in the Search Text field and clicking

- Search for all vendors who provide a service by typing a few letters of the service’s name in the Search Text field and clicking
- Display a list of all the Facility’s vendors by simply clicking .
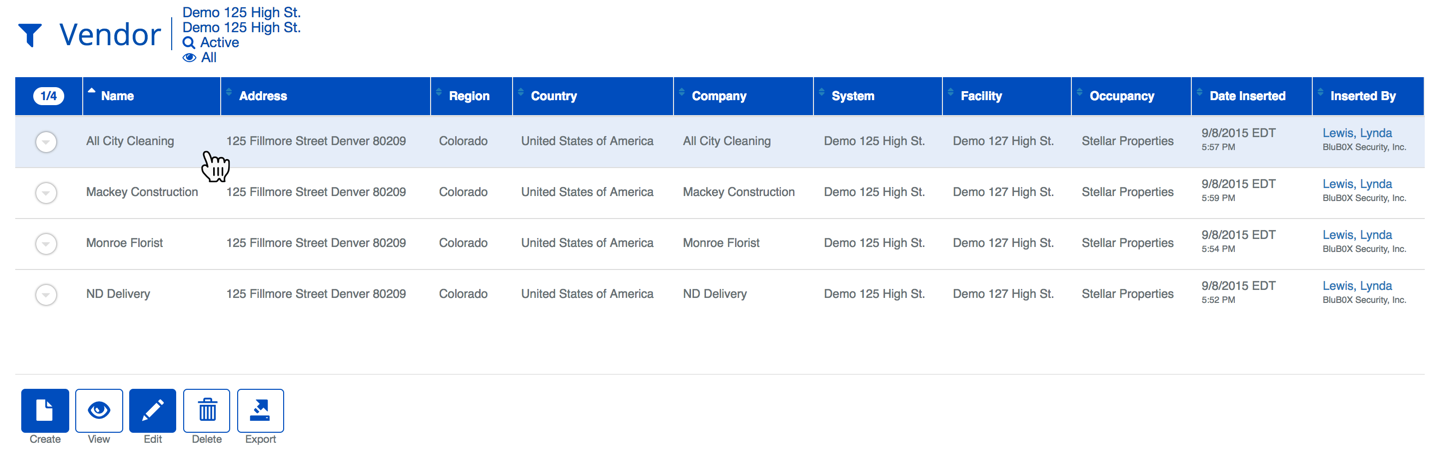
The Vendor List
The Vendor List conforms to the criteria entered in the filter. You may:
- Browse the list, or
- Select one Vendor and edit the record, or
- Create a new Vendor record by clicking create
The Vendor Edit Screen
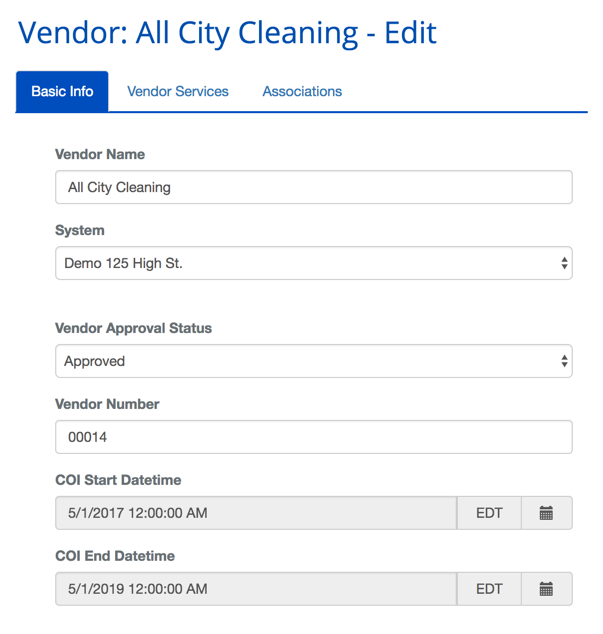
Basic info tab:
This screen captures the needed information about a Vendor
Note: The three flag fields:
- Vendor Approval Status,
- COI Start Datetime,
- COI End Datetime.
These can only be edited by those with the Vendor Admission permission.
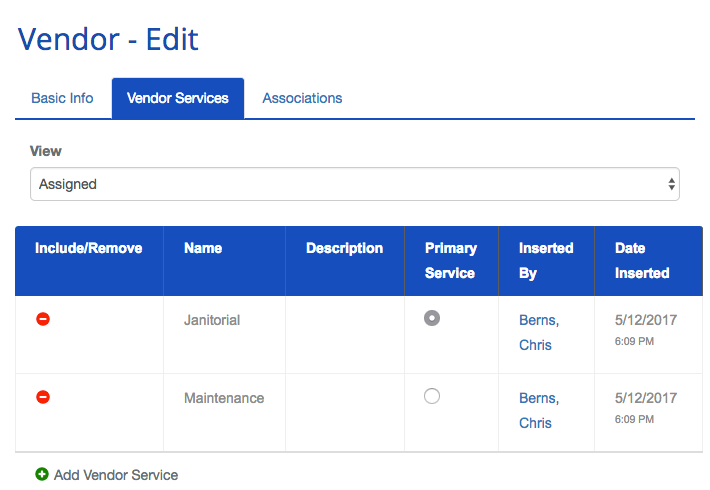
Vendor services tab:
This screen captures the services that are performed by the Vendor.
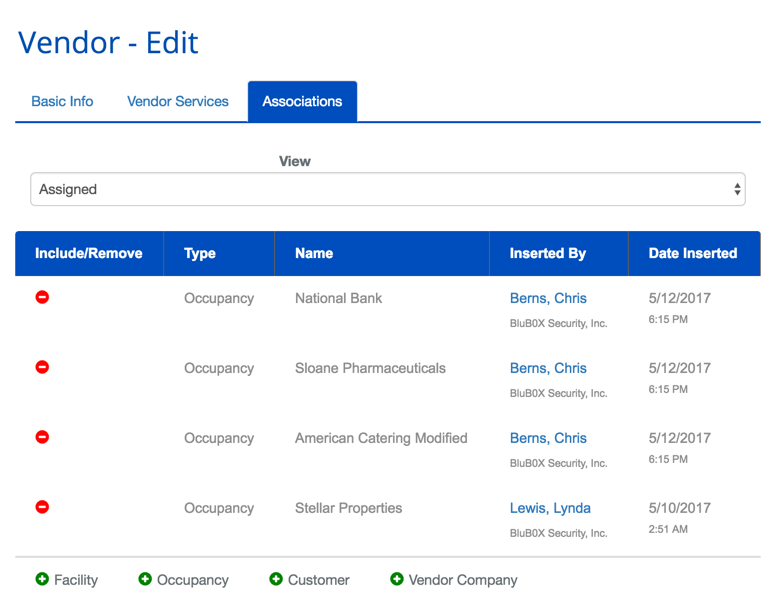
Associations tab:
This window controls the association of the vendor to either an Occupancy or the Facility. Vendors that are associated with the Facility are displayed in the Vendor List for all Occupancies to see. Those that are associated with one or more Occupancies can be seen only by those Occupancies and the property management.
Vendor Invitation
This module provides for the invitation of a Vendor Company into the property. It is available with the Vendors / Vendor Invitation permission and found under Requests → Vendor Invitation. The module opens to the Vendor Invitation Filter.
How It Works
- When a Vendor is to be invited into the property, a Vendor Invitation must be created.
- The invitation shows the status of the Flags. If either one of them is RED (Vendor NOT approved or COI expired), the invitation can be completed, but only if the host chooses to override.
- Note: The override serves to notify the host that the vendor will not be admitted unless the red flag is removed before the vendor’s arrival. Hosts are responsible for ensuring that the Property Office receives a suitable COI before the Vendor arrives.
- When the property office receives the new vendor’s COI, it opens the Vendor’s record and sets the flags to Approved and enters the COI Expiration date. This will turn the flags green in anticipation of the Vendor’s arrival.
The Vendor Invitation Filter
Users with the Vendor Invitation permission can access the invitation form by clicking Requests → Vendor Invite. This will open the Vendor Invitation filter.
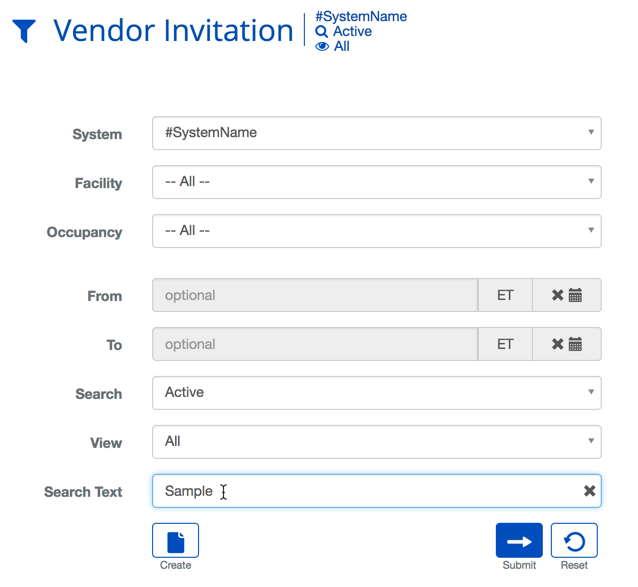
Users can:
- Create a new Invitation (by clicking )
- Search for an existing invitation by filling in the appropriate search fields in the filter, and clicking
- Display a list of all the Vendor Invitations by simply clicking .
The Vendor Invitation List
A Vendor Invitation List is shown below:
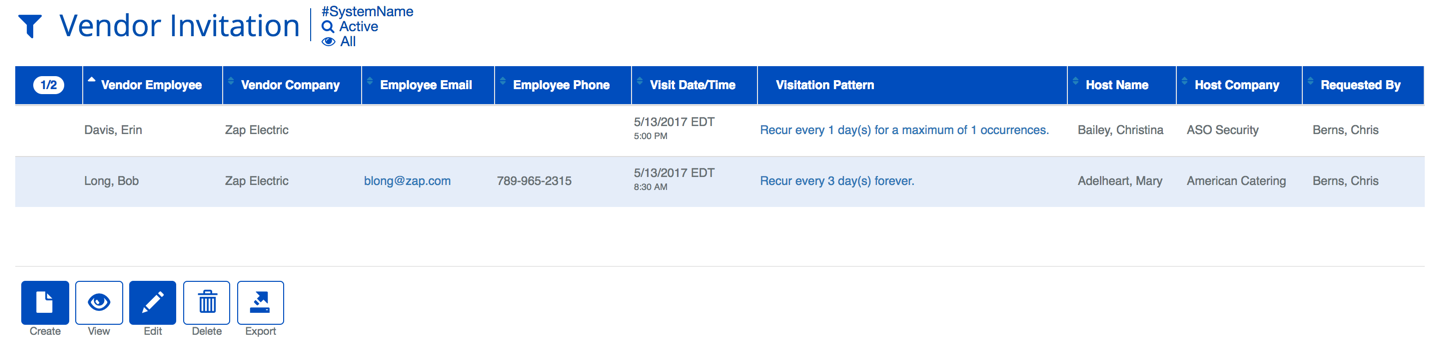
From this screen you will be able to do the following:
- Browse the list
- Select one vendor and edit the record
- Create a new vendor invitation record by clicking create
The Vendor Invitation Form
The form is completed much like a Visitor Invitation. The differences are:
-
The principal field of the invitation is for the Vendor Company, not an individual.
-
There is a Vendor Services field. It is pre-populated with the Vendor’s default service. This can be changed if the vendor can provide more than one service and the vendor is coming to perform a service other than the default service.
-
It reveals the status of the Vendor’s two flags:
-
Whether the Property Office has approved the vendor for admission to the property, and
-
Whether the COI is current.
-
It provides several options for identification of the vendor employee(s) who are being invited:
-
Unknown - which leaves it up to the admitting security officer to identify the vendor’s employee(s) when they arrive.
-
Vendor Employee - that allows you to browse the list of the vendor’s employees that are in BluSKY (if any)
-
Ad Hoc - which allows you to enter an employee name that you know
-
The green dot associated with Vendor Invitation at the bottom of the form opens an additional window to invite additional vendor employees.
Like the visitor Invitation form, there are fields to indicate the desired access level to be given to the arriving employees and the floors to which they shall be admitted.
- IMPORTANT NOTE: The floors field can hold several floors, but it only serves for them to be printed on the badge. The actual floor access is determined by the content of the Access Level that is specified.
The “Add Another Facility” green dot expands the invitation to more than one Facility (building) if necessary. The building must be in the same System and the Host must have permissions to it for it to appear in the pull-down menu.
Vendor Admission
This module provides for the admission of a Vendor Company’s employees into the property.
How It Works
- When a Vendor is invited into the property, a Vendor Invitation must be created.
- The admitting security officer searches for the Vendor invitation in the Invitations databases.
- This should have been completed by a Host
- If no invitation exists, the admitting officer will follow the property's protocol for on the spot Vendor admissions.
- If protocol allows, the admitting officer can complete an invitation form on behalf of a Host.
- The invitation shows the status of the Flags (Vendor approved for admissions (GREEN) or not (RED), and COI current (GREEN) or expired (RED)). Both flags need to be green for the vendor to be admitted.
- If either flag is RED (Vendor NOT approved or COI expired), the admitting officer will follow property protocol.
- Admission may simply be denied, or
- The property office may give permission to override.
- The admitting officer can complete the admission if authorization to override has been given.
- A comment window provides a record of the override decision.
The Vendor Admission Filter
Users with the Vendor Admission permission can access the admission form by clicking Control → Vendor Admission. This will open the Vendor Admission Filter.
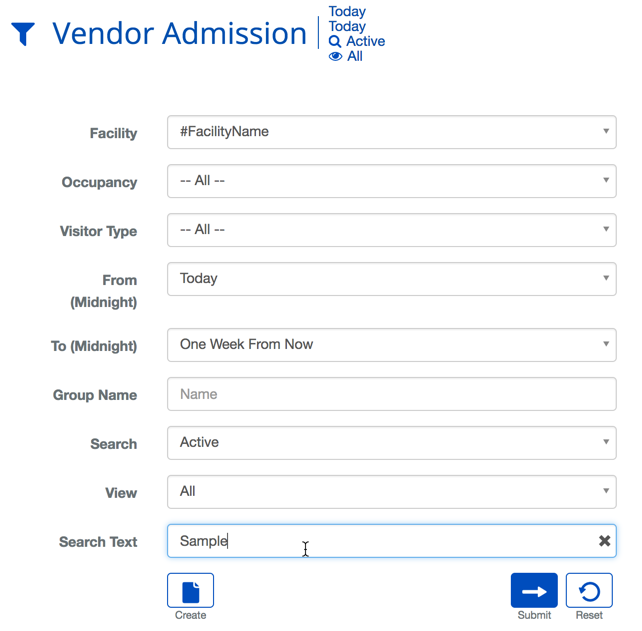
The admitting officer can:
- Create a new Vendor Invitation (by clicking )
- Search for an existing invitation by filling in the appropriate search fields in the filter, and clicking
- Display a list of all the Vendor Invitations by simply clicking .
The Vendor Admission Form
The Vendor Admission Form is shown below:
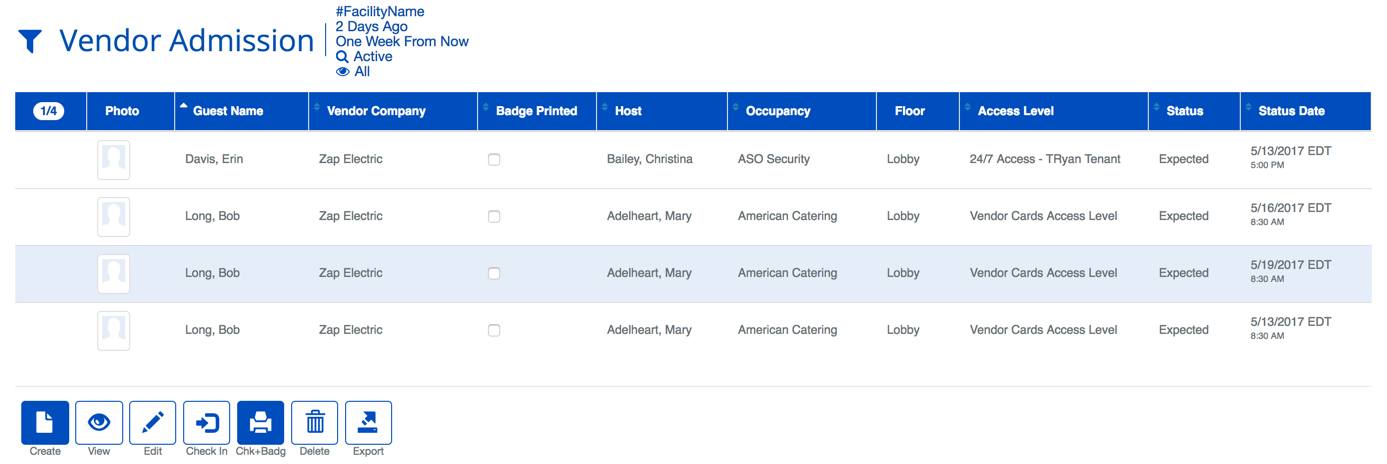
The form is completed much like a Visitor Admission Form. The differences are:
-
The principal field of the invitation is for the Vendor Company, not an individual.
-
There is a Vendor Services field. It is pre-populated with the Vendor’s default service. This can be changed if the vendor is coming to perform a service other than the default service.
-
It reveals the status of the vendor’s two flags:
-
Whether the property office has approved the vendor for admission to the property, and
-
Whether the COI is current.
-
It provides several options for identification of the vendor employee(s) who are being invited:
-
Unknown - which should not be used: the badge will be issued with “Unknown / Unknown” if the First and Last Name fields.
-
Vendor Employee - whereby the admitting officer can find the employee name in a list of the vendor’s employees that are in BluSKY (if any)
-
Ad Hoc - whereby the admitting officer can enter the employee’s name as provided verbally or via driver’s license
-
The green dot associated with Vendor Invitation label at the bottom of the form opens an additional window to invite additional vendor employees.
Like the Visitor Invitation form, there are fields to indicate the desired access level to be given to the arriving employees and the floors to which they shall be admitted.
- IMPORTANT NOTE: The floors field can hold several floors, but it only serves for them to be printed on the badge. The actual floor access is determined by the content of the Access Level that is specified.
The “Add Another Facility” green dot expands the invitation to more than one Facility (building) if necessary. The building must be in the same System and the Host must have permissions to it for it to appear in the pull-down menu.
Vendor / Certificate of Insurance (COI) Notifications
BluSKY has a robust notification capability. It must be triggered by the module(s) that emit the notifications.
The Vendor / COI modules have not yet been programmed to generate the required triggers (as of 5/15/17).
When the triggers are added, the following Notifications can be programmed:
Creation of a new Vendor record
Deletion of a Vendor record
Change in the Vendor Approval field
Change in the COI start or end dates
Notification of a new or modified Invitation to the Vendor
Notification of Vendor Admission
Notification of denial of Admission
Notification of pending COI expiration (30 days before)