Edit a Distribution List
BluSKY URL: https://blusky.blub0x.com/en-US/DistributionList
Overview
Distribution Lists are collections of contacts that can be used as part of Notifications or Rules to send e-mail messages to a group of people. This article covers the process needed to modify an existing Distribution List.
Add People to a Distribution List
- Log in and navigate to Distribution Lists. Main Menu-> Administration-> Distribution List
- Select the entry you wish to edit from the list.
- Click the
 icon in the lower left side of the screen.

- Use the
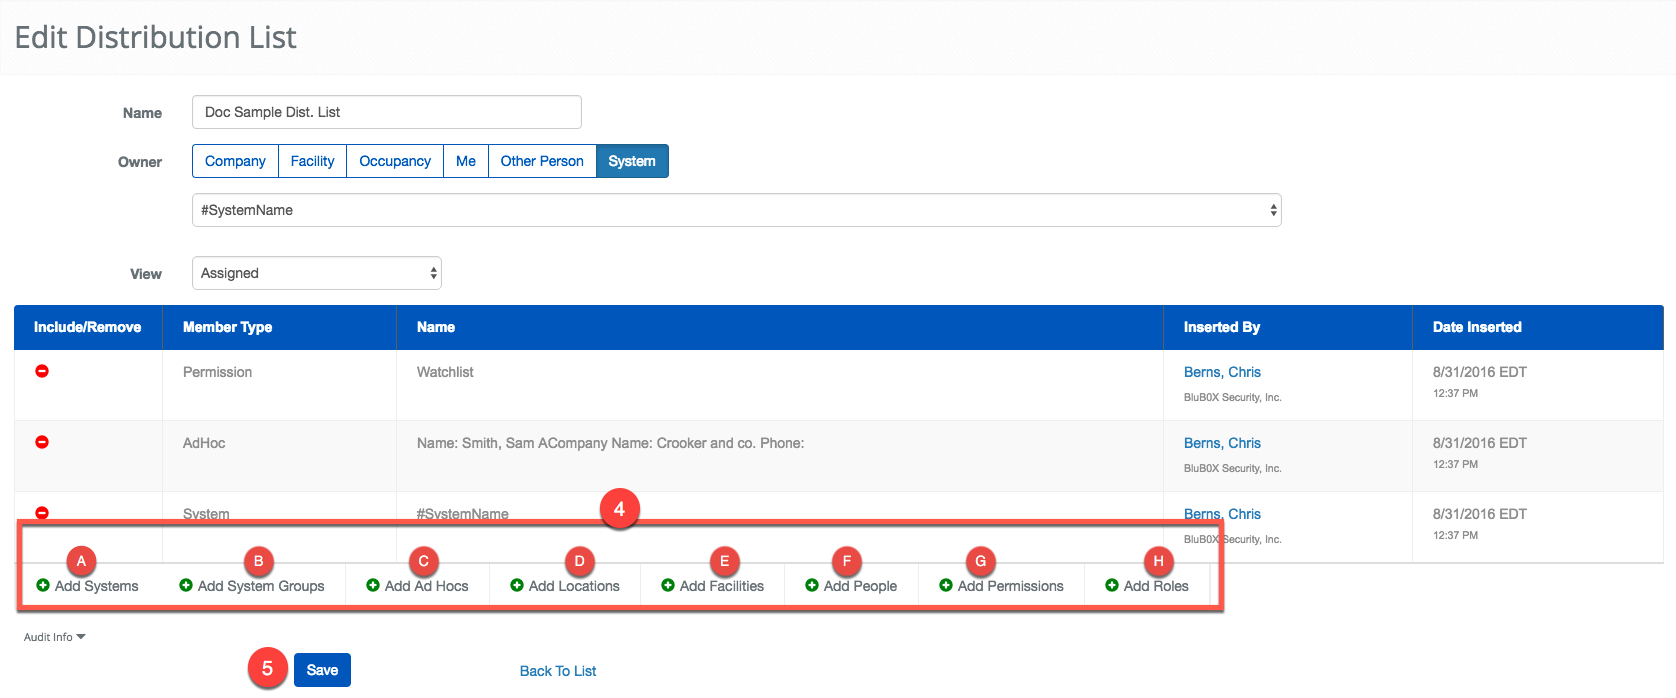
 button to select the different groups of people to notify.
 Add System - If selected you are able to add an entire System to the list.
 Add System Group - Adding a System Group add all of the People of the System Group selected to the Distribution List.
 Add Ad Hocs - This option allows you to create a Person to be notified with only a name and email address. This is the only way to notify someone that is not entered into BluSKY.
 Add Locations - This option is still being developed and should be available soon.
 Add Facilities - This option allows you to add an Facility to a Distribution List. Once added, any associated with the Facility will be part of the Distribution List. This option can be particularly useful when administrating a large multi-facility campus System.
 Add People - This add one or more People to the Distribution List.
  Add Permissions - If a Permission is selected, the Distribution List will add all of the People that have the selected Permission to the Distribution List. Please bare in mind that the selection will be limited by the choice of Owner.
 Add Roles - If a Role is selected everyone that is assigned said Role will be part of the Distribution List.
- Click the
 button to commit your changes.
Remove People from a Distribution List
- Log in and navigate to Distribution Lists. Main Menu-> Administration-> Distribution List
- Select the entry you wish to edit from the list.
- Click the
 button in the lower left side of the screen.

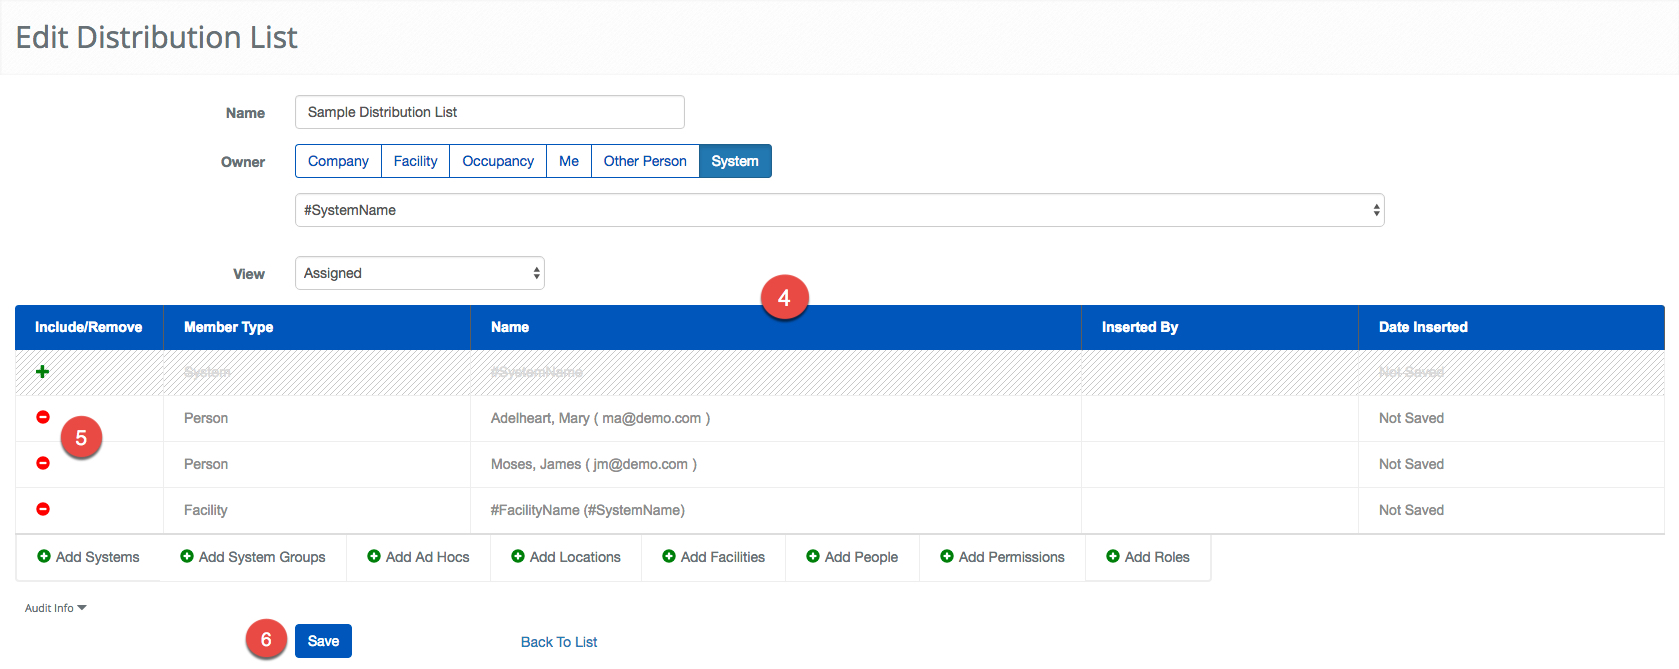
- Locate the selection you wish to remove from the list below.
- Use the
 button to remove it. The row will be grayed out and a will appear, allowing you to easily undo your selection.
 - Click the
 button to commit your changes.