Report Training
Reports
There are individual permissions for each report. You may or may not have access to all of them. This training module will cover all of them but your needs may vary depending on your job responsibilities.
Access Denied Report
The Access Denied Report provides information about all unsuccessful access attempts. The report also contains information about the reason for the denial and the time the event occurred. This article discusses how to run this report and how to use it to diagnose issues with a person's access rights.
Learn More
Access Level Report
Learn More
Access Report
Learn More
Alarm Report
Learn More
Audit Report
Learn More
Delegates Report
Learn More
Expected Visitor Report
Learn More
Person Activity Report
Learn More
Person Status Report
Learn More
Role Report
Learn More
Visitor Arrival Report
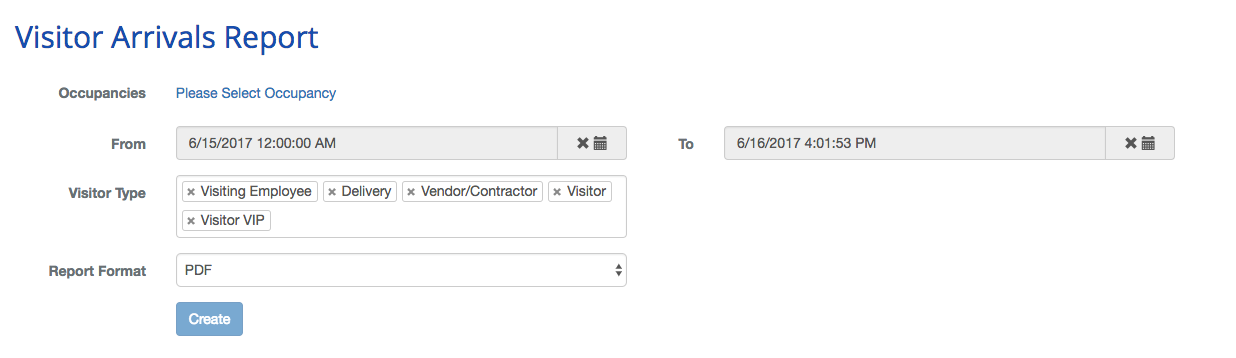
The Visitor Arrival Report is an important report for any system with Visitor Management. This report can be used by the security staff to help ensure a speedy check-in or by management to ensure the check in desk is staff accordingly. This article discusses how to run the Visitor Arrival Report as well as some of the uses for this report.
Learn More
Creating the Report
- Log in and navigate to Visitor Arrival Report. Main Menu-> Reports-> Visitor Arrival Report
- Click the "Please Select Occupancy" link.
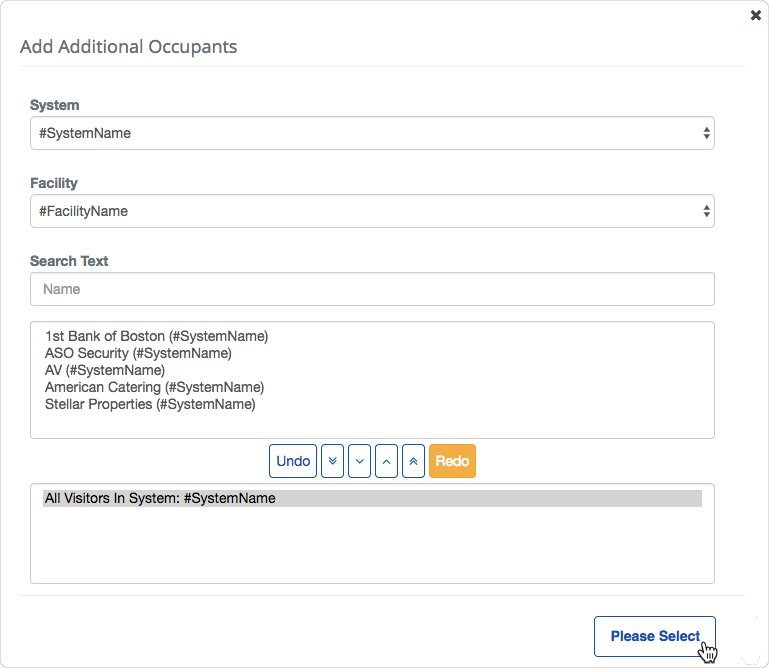
- In the new dialog, select one or more Occupancy or "All Visitor in System: YourSystemName" and move them to selection portion of the form.
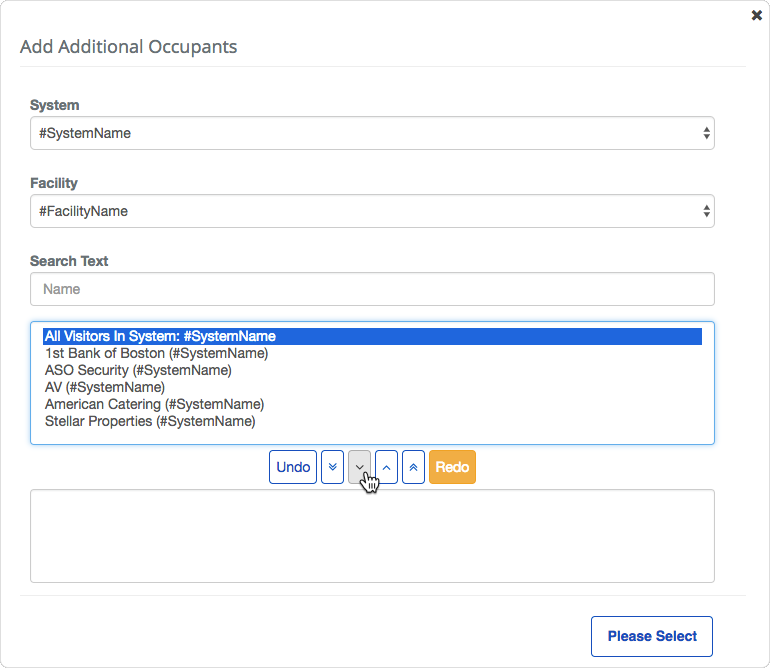
- Once selected, click the
 button to confirm your selection.
- Use the From and To field to select a beginning and ending date of the report.
- **Note:**Depending on the type of query you may need to limit the date. This will help avoid a timeout from a lengthy query.
- Optional: Add or Remove Visitor Types by click in in the Visitor Type field to add or the small 'x' to remove the tag.
- Select the format you want the report in, either PDF or Excel spreadsheet.
- When finished use the
 button to generate the report.
Whos In Report
The Who's In Details Report shows where a Person (Occupant, Vendor, or Visitor) has most recently used their credential(s) to gain entry. This Report provides useful insight into arrival and departure information of People at a target Arrival Facility.
Learn More
Creating the Report

- Select the scope of People to be included in this Report. Use the System Group, System, Facility, and/or Occupancy drop-down menus to specify this.
- One of these fields must be filled in to be able to run the Report.
- This is the group of People you want to monitor activity for.
- If applicable, use the Role drop-down menu to filter on People with certain BluSKY Roles.
- If applicable, select the types of People to be included in this Report. Use the Occupants, Vendors, and/or Visitors toggles to specify this.
- Setting a toggle to 'No' will exclude that Person type from the Report.
- Select the Arrival Facility using the Arrival Facility drop-down menu.
- This is the target Facility you want to monitor activity in.
- This value can be the same as or different from the Facility drop-down menu value from step 2.
- Select the timeframe for data that will be included in the Report using the From and To calendar fields.
- If applicable, change the timezone that data is reported in using the Timezone drop-down menu.
- The default value is the timezone associated with the BluSKY Person profile creating this Report.
- If applicable, change the export file format of the Report using the Format drop-down menu.
- When finished use the button to generate the Report. The file will be downloaded to the default folder specified by the browser using BluSKY.