Visitor Import from Excel
Please follow the steps below to Import Visitors from Excel:
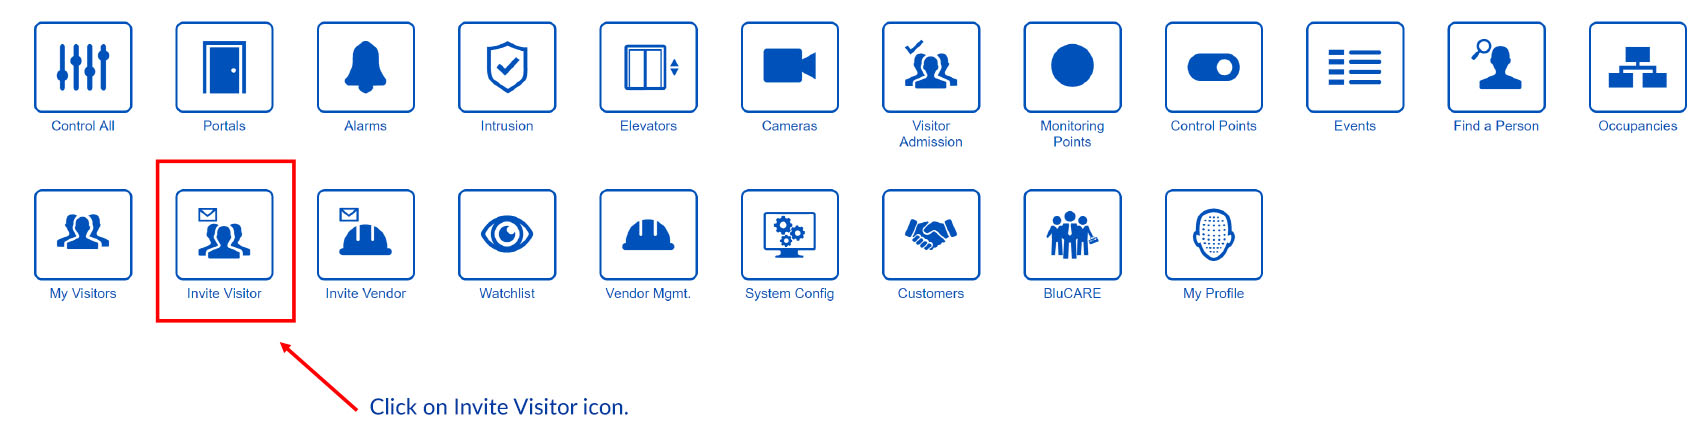
Step 1 - Click on Visitor Icon
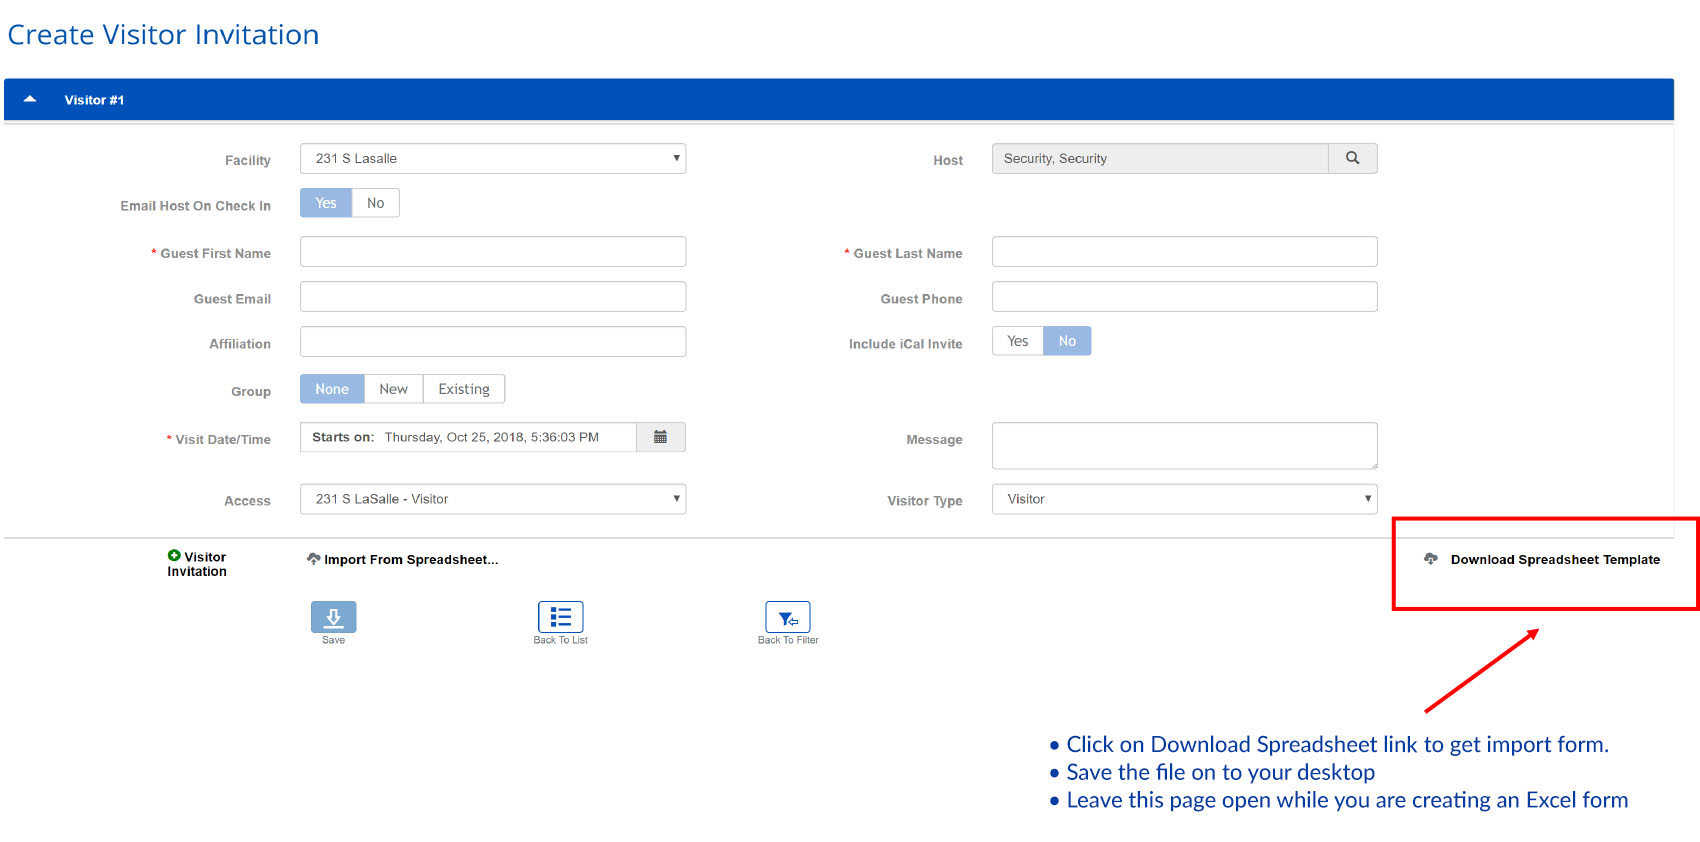
Step 2 - Download Spreadsheet
Step 3 - Complete required fields
- Locate spreadsheet on your desktop
- Complete required fields as shown below
- Do not change column formatting or names Please note you can only add 50 visitors per sheet.
- You can enter as much information as you would like
- What is shown on the example is a minimum require information

- If you want to send an invitation to a visitor please enter an email address
- If you prefer to indicate which company visitor is coming from use Affiliation filed.
- If you prefer to identify or group visitors use the Group name, for example, “annual budget” for all visitor coming to this meeting.
- Please note all visitor invitation times will be active starting midnight on the date of the invitation.
Step 4 - Save
- Save Created File
- Proceed back to Visitor Invitation Screen
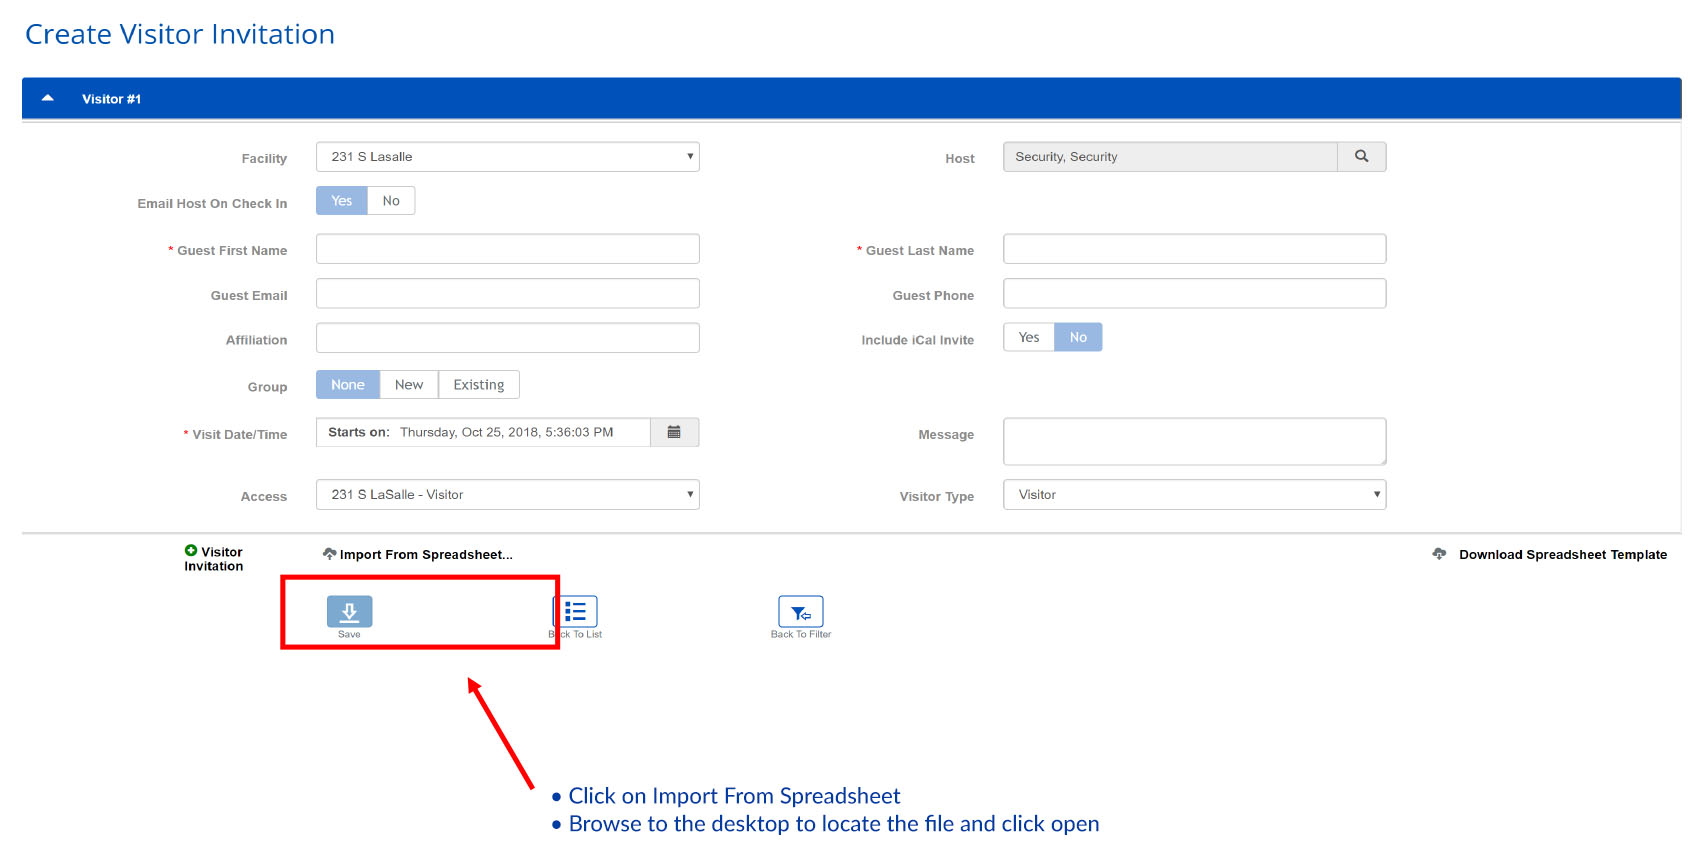
Step 5 - Validate and Import
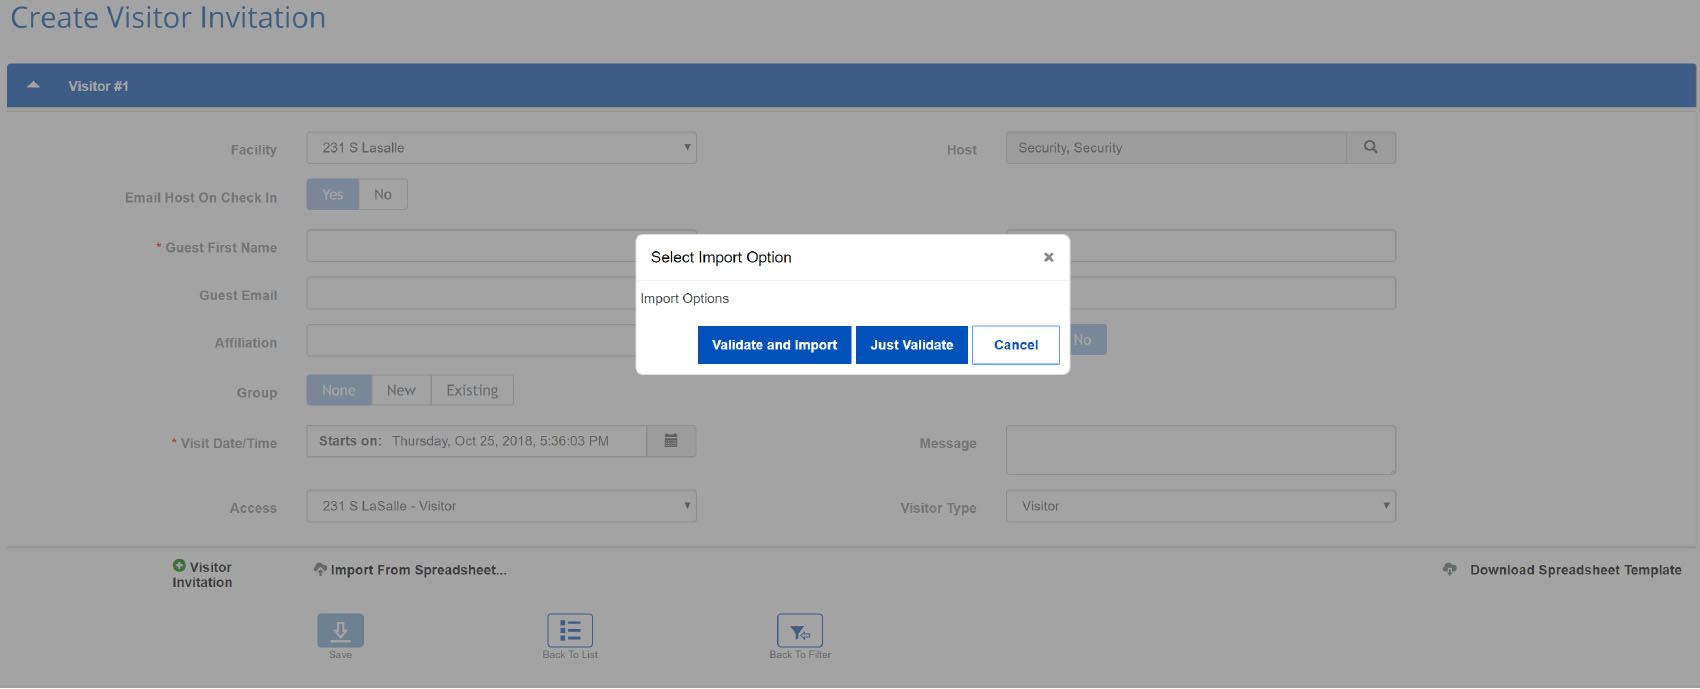
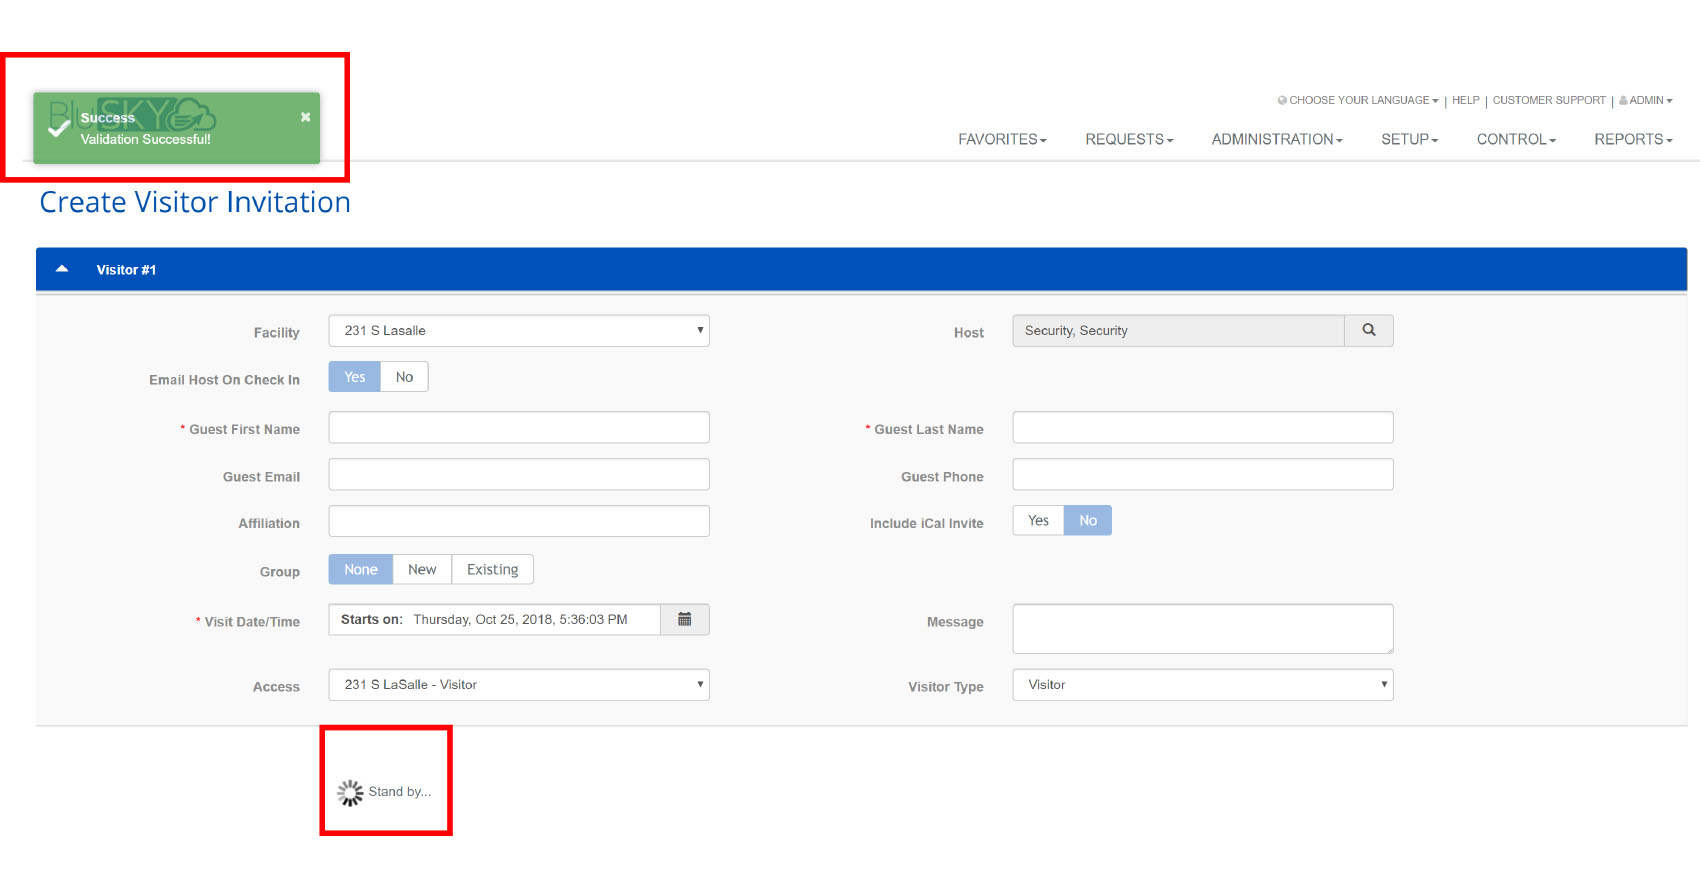
- The following message will be displayed
- Click on Validate and Import
- If validation is successful you will see a green box with Validation Successful massage
- You should also see a spinning wheel at the bottom of the screen with the Standby message.
- Please be patient, when the import is complete you will see all of your visitors on Visitor Invitation screen (see next page)
Step 6 - Validation
Step 7 - Save
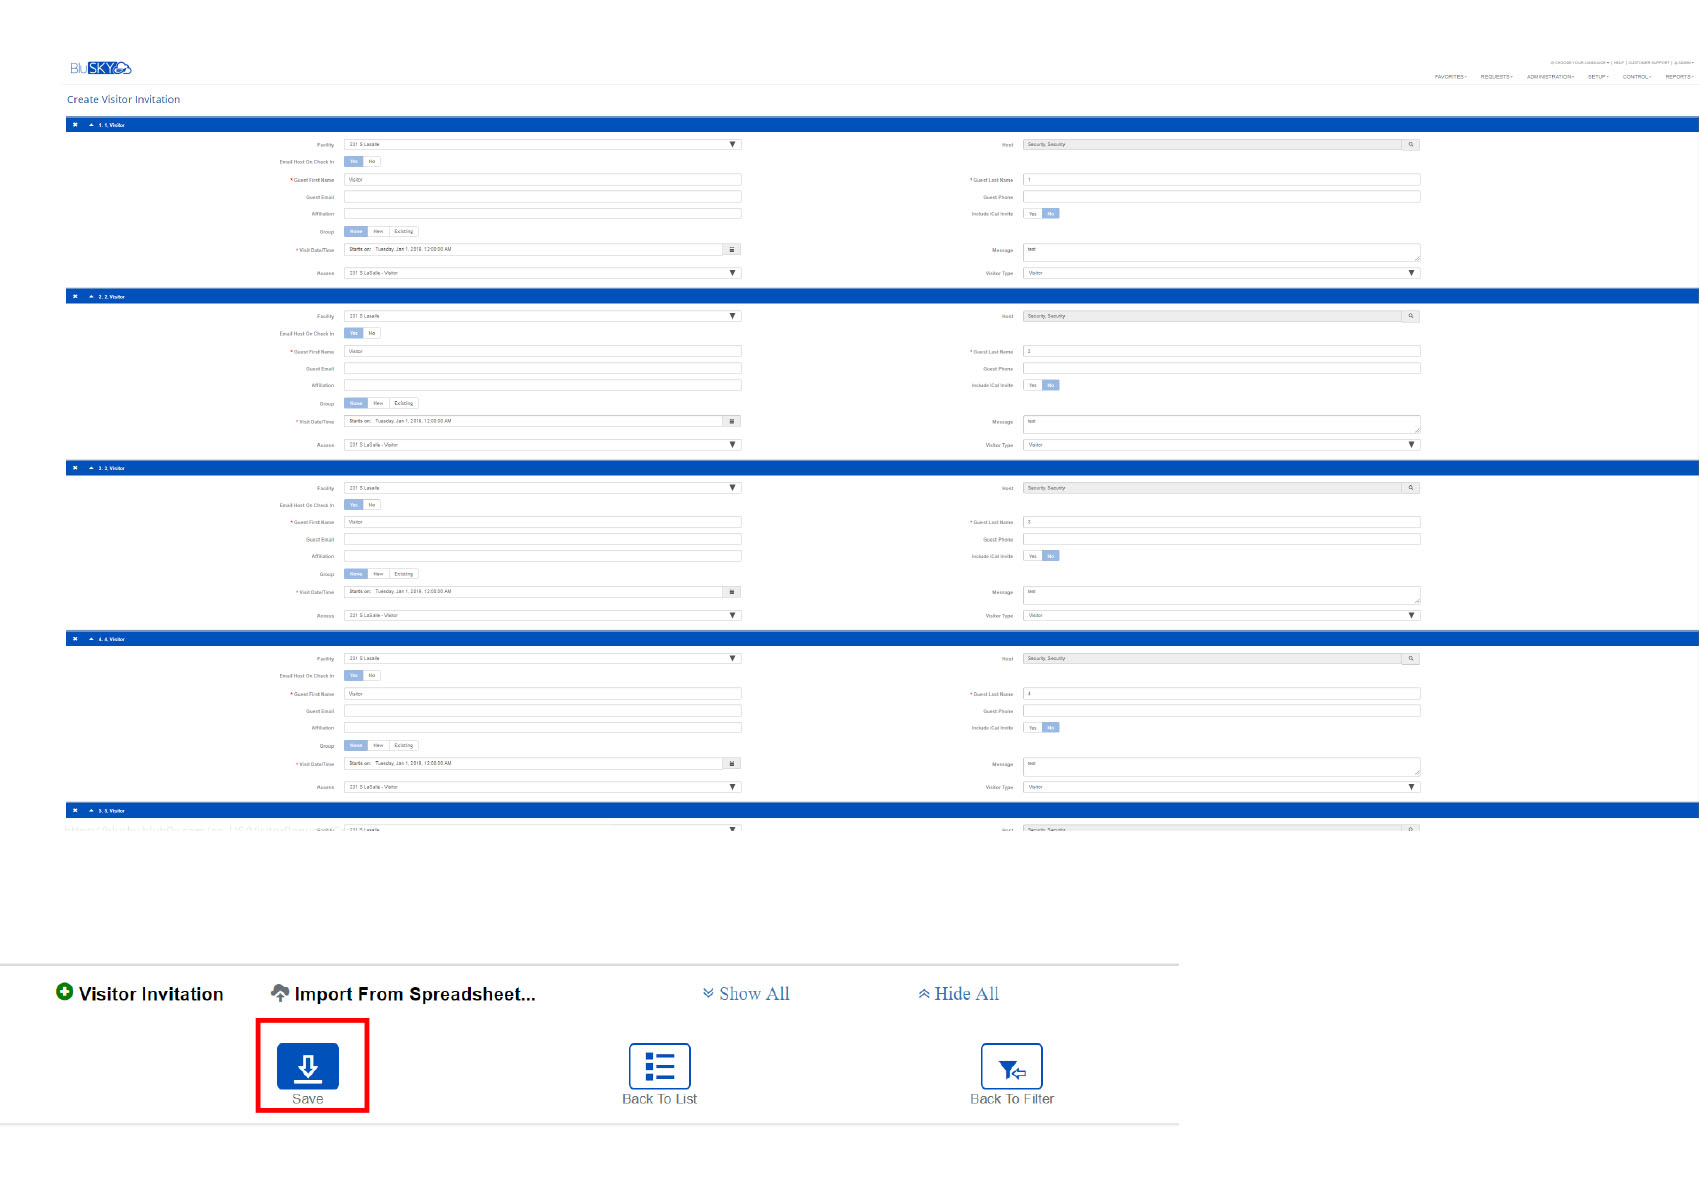
- Scroll and verify all of your information
- Click Save
- Import is complete