Setting up Zone Based Anti-Passback w/ Mercury Controllers in BluSKY
Overview
This guide is for BluB0X Integrators to set up zone-based anti-passback functionality in a Mercury Controller using BluSKY.
Preparation: Ensure you have administrative access to BluSKY and are familiar with the Mercury Controller's configuration settings.
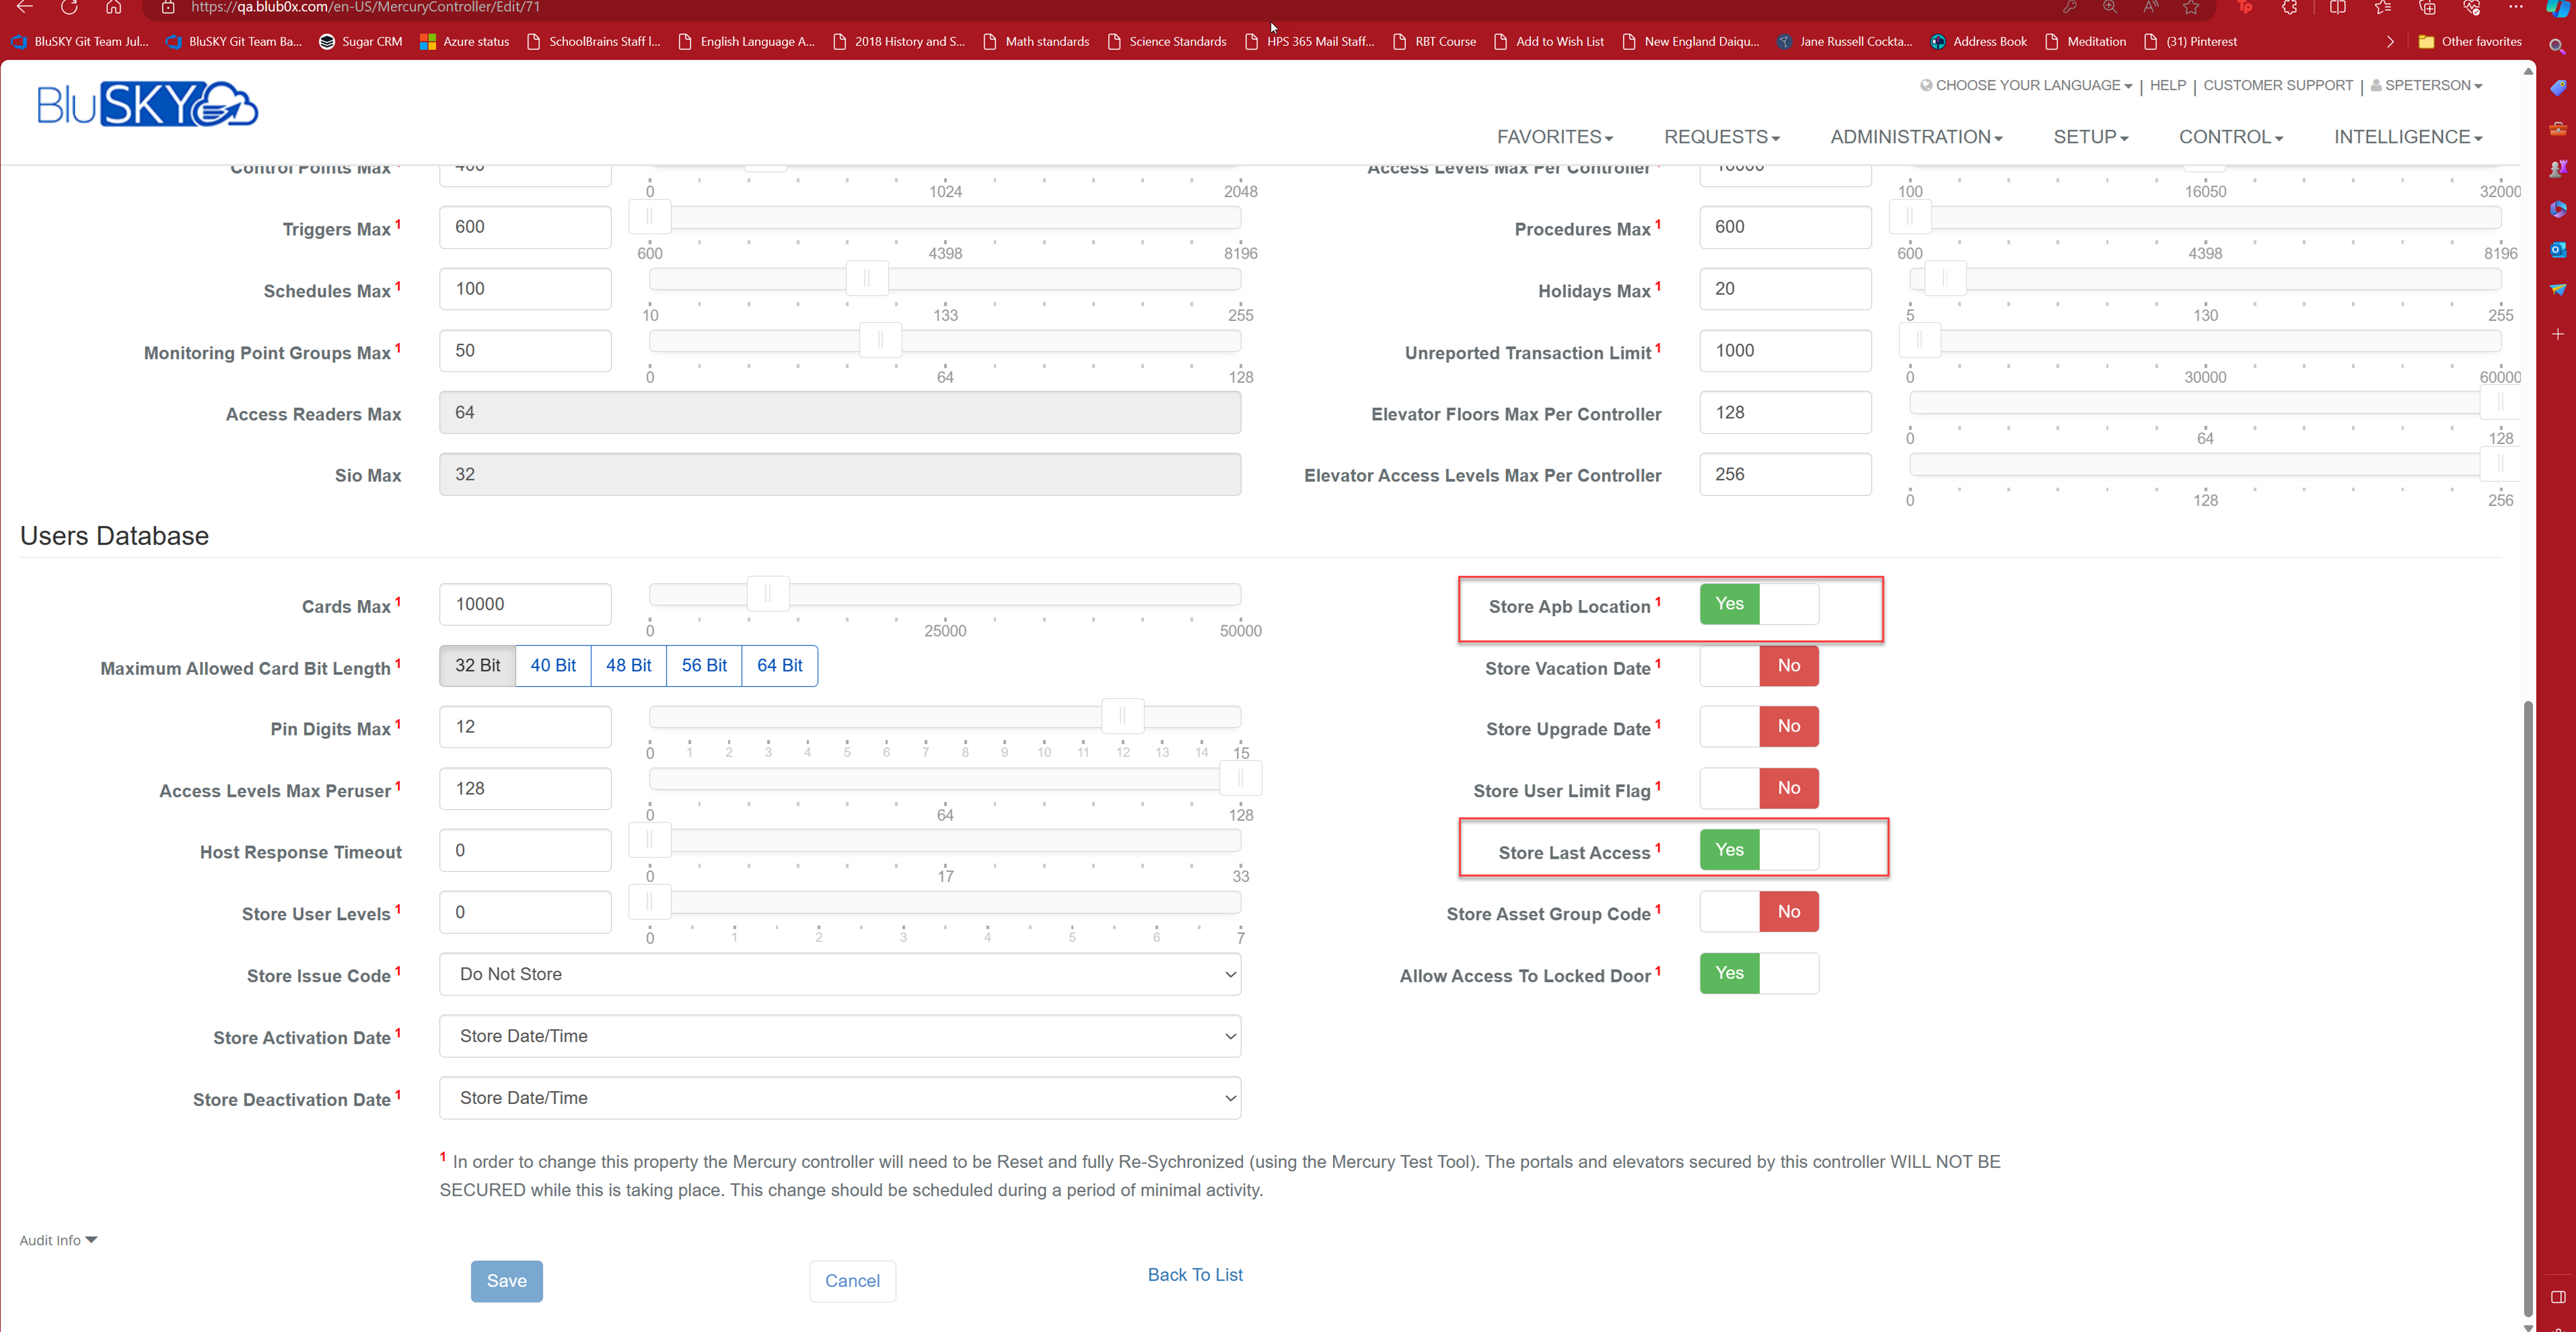
Step 1: Edit the Controller Settings
- Navigate to the controller's settings in BluSKY.
- Locate the field "Store Apb Location".
- Change the value to "Yes".
- Find the "Store Last Access" field.
- Change the value to "Yes".
- Click Save to apply the changes.
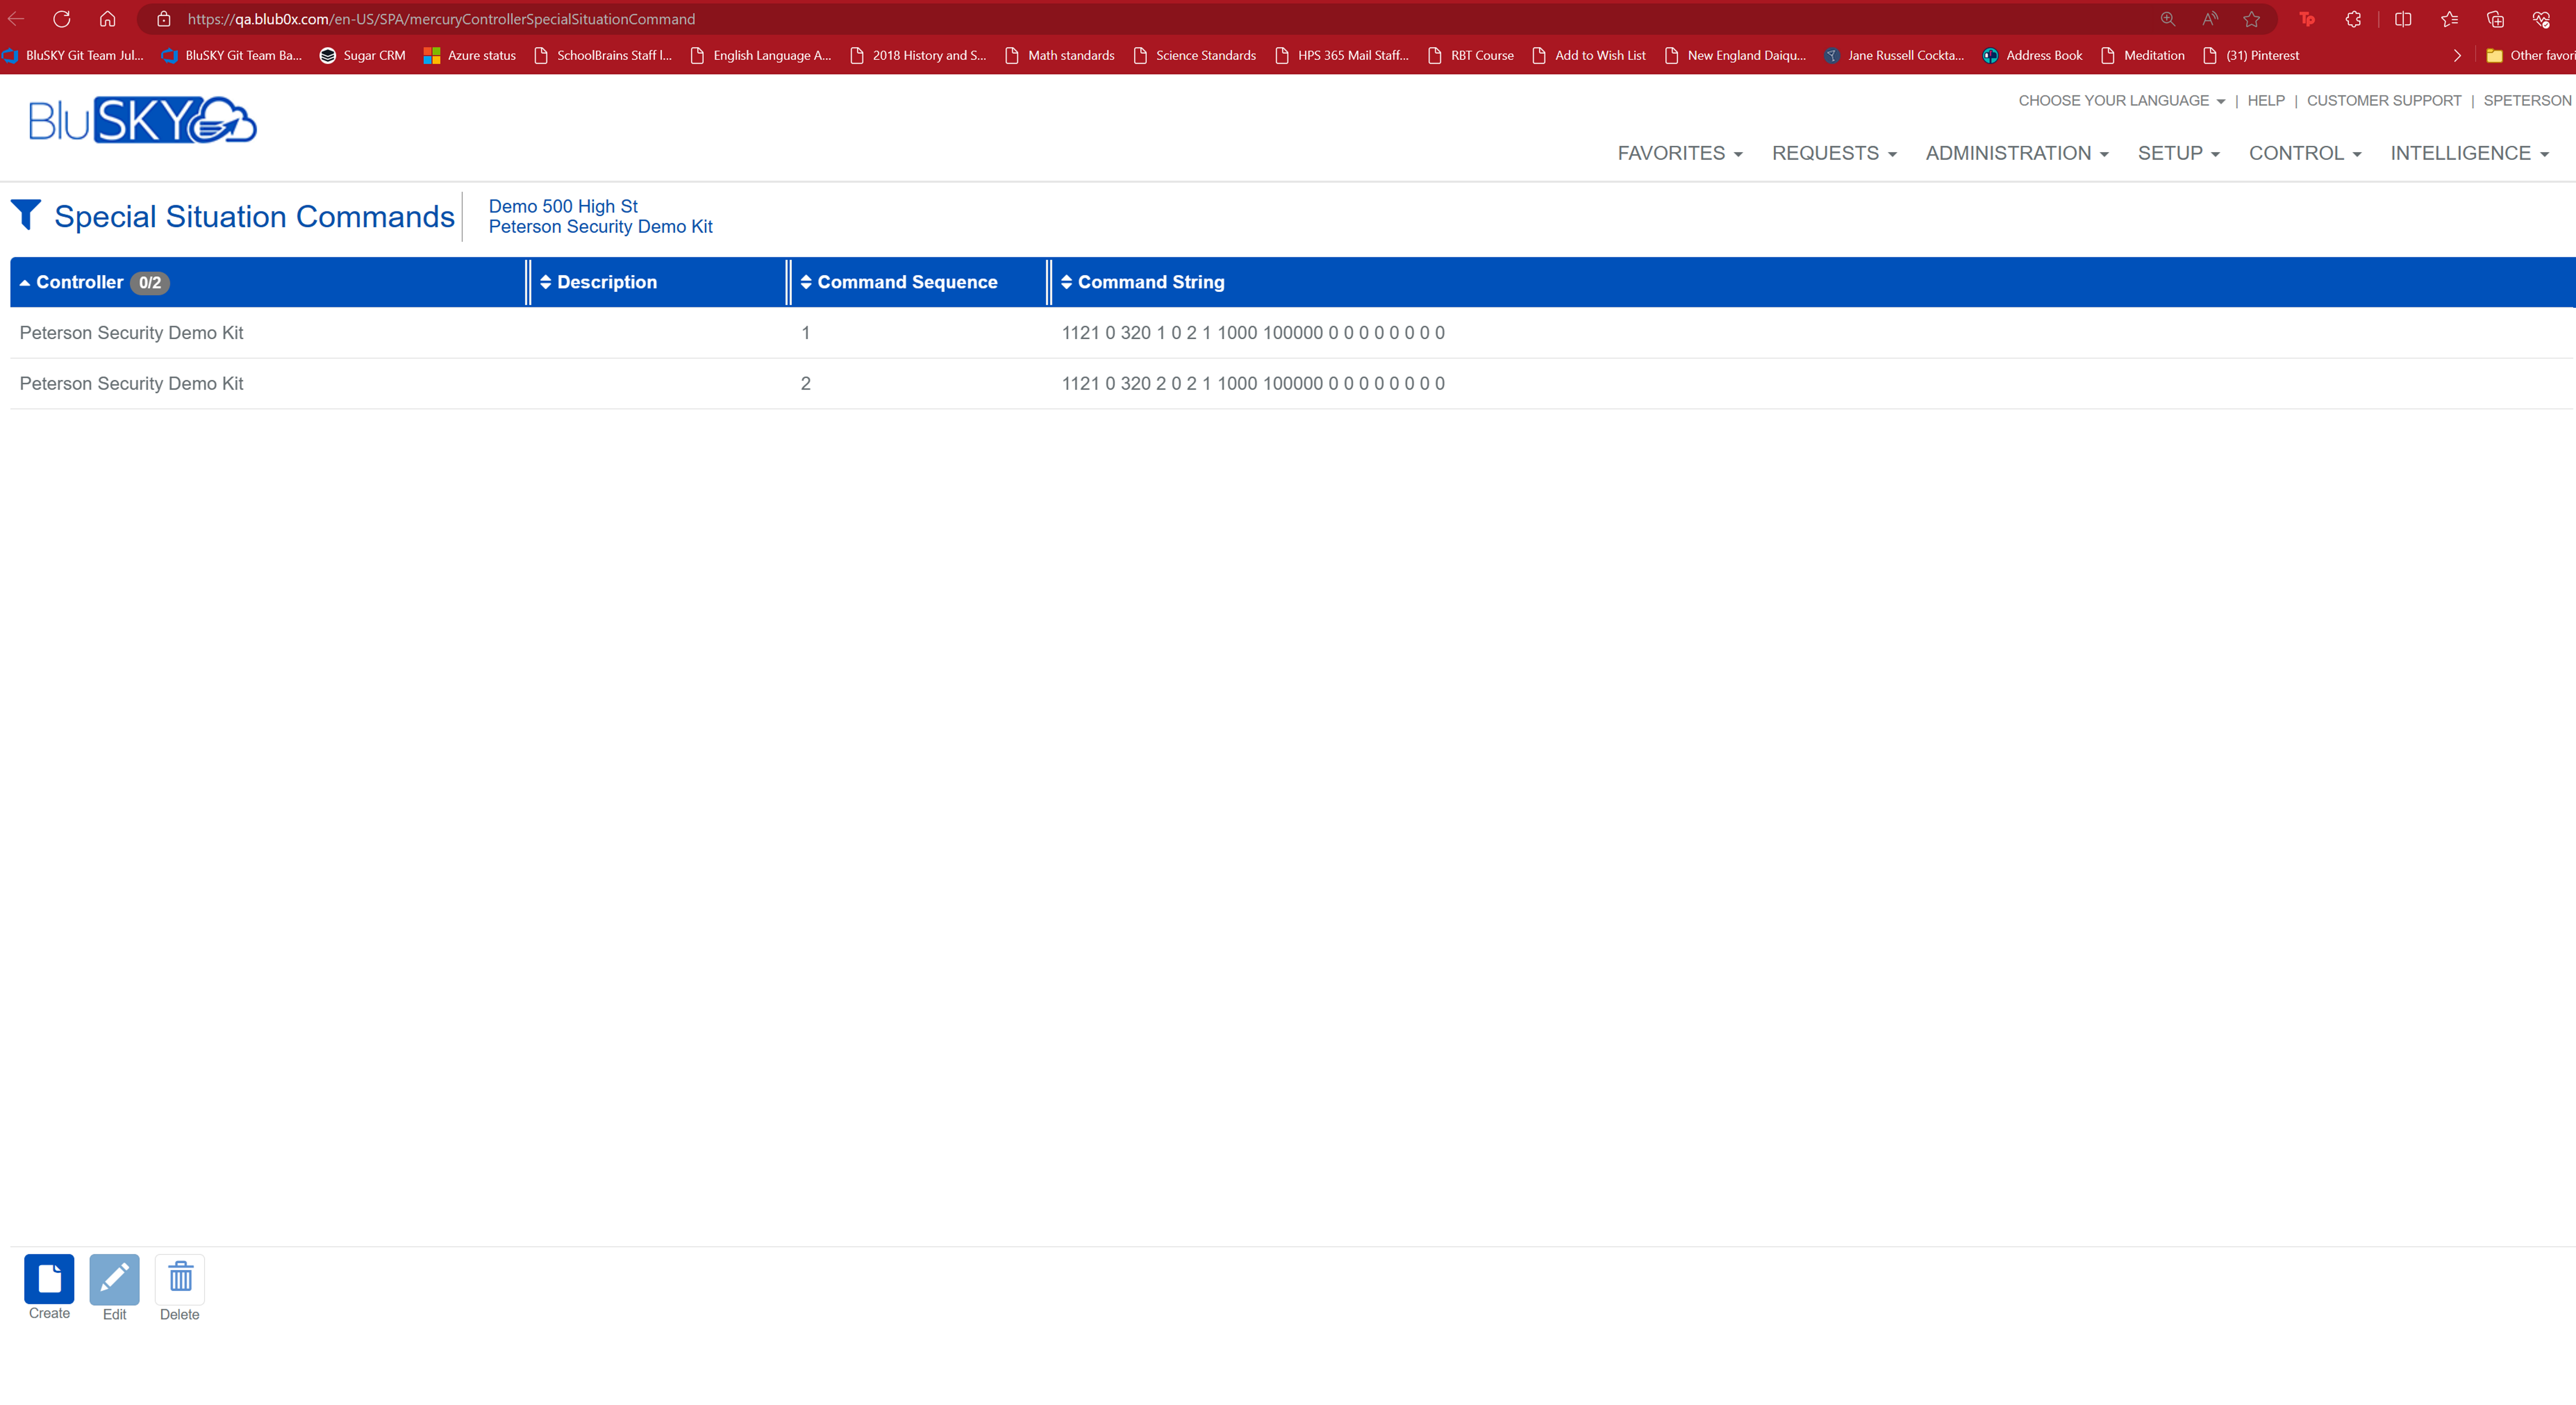
Step 2: Create Special Situation Commands (For BluB0X Support Only)
These commands are not exposed to customers and should be executed only by BluB0X support personnel.
- In the BluSKY interface, navigate to the Special Situation Commands section.
- Enter the following command strings:
Ex.1121 0 320 1 0 2 1 1000 100000 0 0 0 0 0 0 0and1121 0 320 2 0 2 1 1000 100000 0 0 0 0 0 0 0
1121 0 {SCP} 1 0 2 1 1000 100000 0 0 0 0 0 0 0 0- Note: Replace [SCP] with the controller number.
- Note: Replace [SCP] with the controller number.
Step 3: Create Antipasspack Area ID's (For BluBoX Support to Create)
- Let BluB0X Support know the Antipassback areas you need created. Think how many areas you want and how the person is going to walk through the building.
- Ex.
- Person is going to walk into the lobby (Let's call this "Outside" Area)
- Person is going to swipe their credential at the turnstile to go from the "Outside" area to the "Elevator Area"
- They then go to the 5th floor where they come to a portal where they go from the "Elevator Area" to "Occupancy ACME Area"
- In this example all the portals are one one controller. This controller has 3 Antipassback areas "Outside", "Elevator Area", "Occupancy ACME Area")
Step 4: Add Portals to Antipassback Areas
- In BluSKY, goto Portals
- Select the Portal you want in your group
- Edit the Portal
- Set "Antipassback Mode" to ""Area Based Antipassback"
- Set "Antipassback Area ID From" to the area you defined as on the secured side of the portal when entering.
- Ex. "Outside" is the unsecured side of the portal when entering.
- Set "Antipassback Area Id To" the area you defined as on the unsecured side of the portal when entering.
- Ex. "Inside" in thes screenshot below is the secured side of the portal when entering.

Step 5: Clear Controller Database and Synchronize
- In BluSKY, go to Setup.
- Select Controller-Door-Floor Diagnostics.
- Select Controller
- Select "Controller Info"
- Select "Clear Data"
- After the controller has rebooted. Select "Sync Controller"
- Once the controller is synced, Select "Sync Persons"
Important: After these changes, the controller will need to be reset and fully re-synchronized using the Controller-floor-door diagnostic tool. The portals and elevators secured by this controller will not be secured while this is taking place. This change should be scheduled during a period of minimal activity.
For further assistance or if you encounter any issues during this process, please contact BluCARE (support@blub0x.com) for support.