How Do I Wire and Configure an OSDP Reader
This guide will introduce open source device protocol (OSDP) readers, what their applications are, how to wire a capable HID reader to one of our controllers, how to enable OSDP on this reader, and how to enable OSDP functionality in BluSKY.
Instructions
Wire OSDP Reader
There are four wires involved in OSDP communication between the reader and the controller:
Power - this wire is red and connects to V0
Ground - this wire is black and connects to GND
Data 0 - this wire is green and connects to DAT D0
Data 1 - this wire is white and connects to CLK D1
See the below picture for a visual guide to wiring an OSDP reader to a controller.
*new picture needed*
A 1K-ohm pull down resistor should be added between the DAT D0 and GND lines on S3 interface modules and LP controllers with revisions (REV) older than the below values in the table:
| Model | PCB revision(Printed on PCB) | Assembly revision (white sticker) |
| LP1501 | B | B |
| LP1502 | C | C |
| LP4502 | B | C |
| MR50-S3 | F | F |
| MR52-S3 | B | E |
| MR63e | n/a | n/a |
- Note: EP controllers do not need a pull down resistor.
- Note: If a pull down resistor is necessary, it should be installed at the panel.
Configure an HID Reader for OSDP
To configure a compatible HID reader for OSDP functionality, the HIDReaderManagement mobile app is used. The app is available for Apple and Android devices.
- Op

 en the installed HIDReaderManagement app.
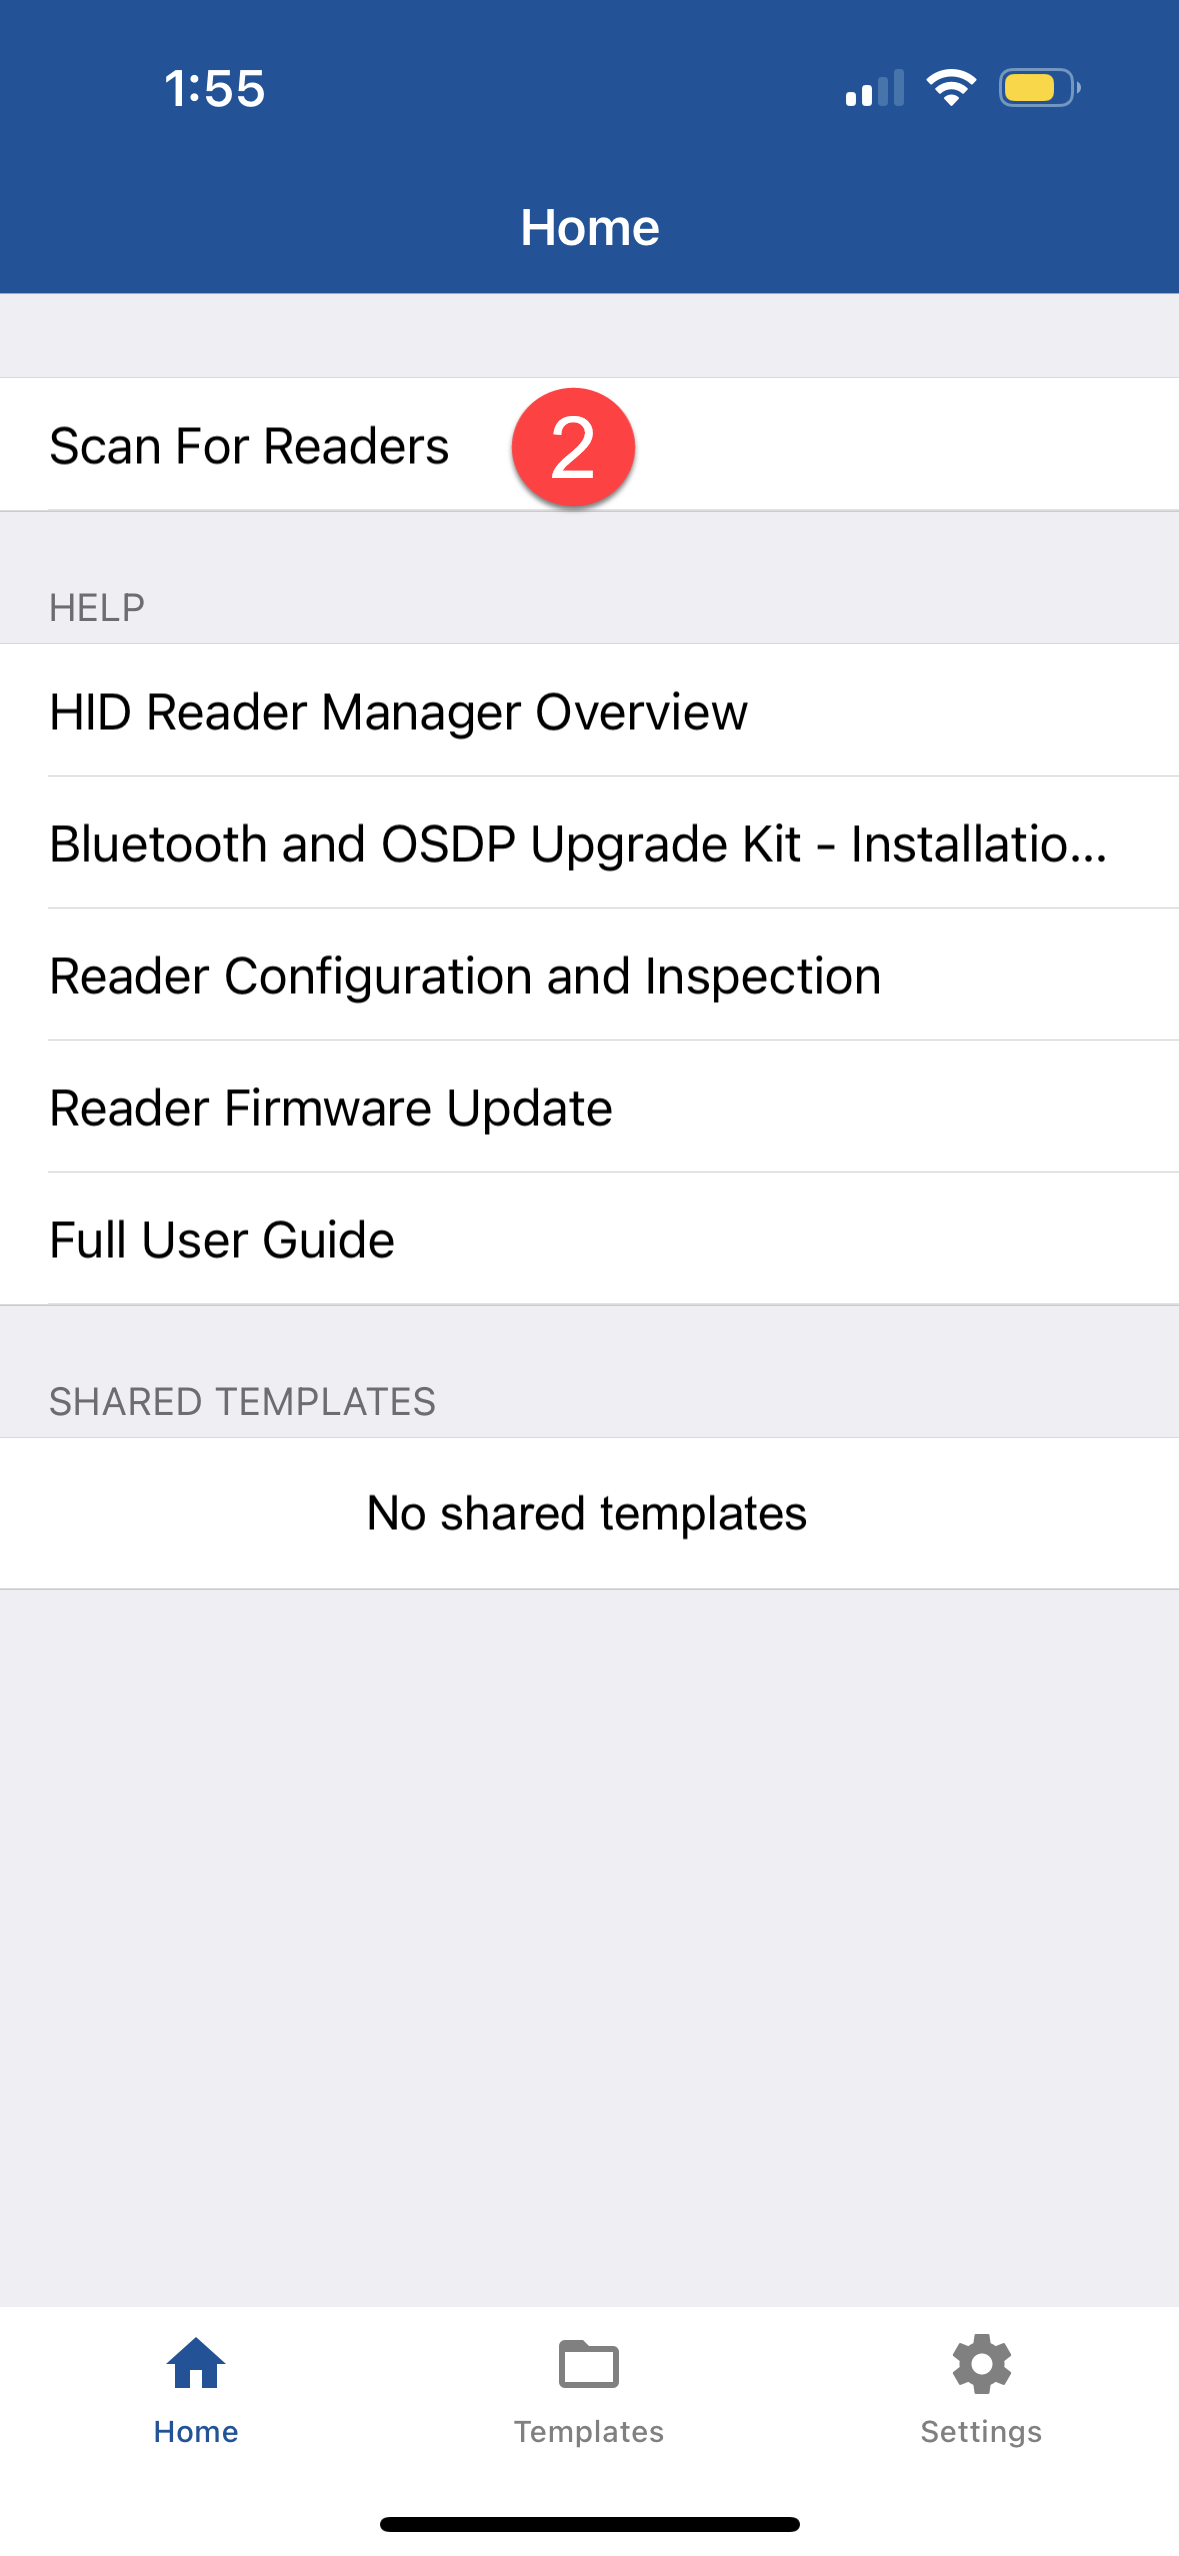
- Tap the Scan for Readers option to start looking for nearby HID readers. Note that Bluetooth needs to be enabled to find nearby readers.
- Tap on a nearby reader to open an options pop-up. Use Inspect to look at the reader's information or Locate to have the reader produce a sound. Once the correct reader is located, tap Inspect to open the Inspection Report.
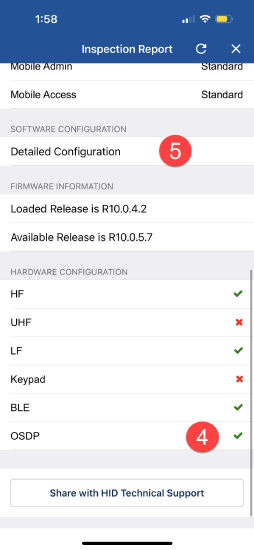
- At the bottom of the Inspection Report screen, ensure the reader's hardware is configured for OSDP communication. The reader should have a green checkmark next to the OSDP line item.
- Under the Software Configuration section on the same screen, tap Detailed Configuration.
- As this screen loads, power cycle the reader when prompted.
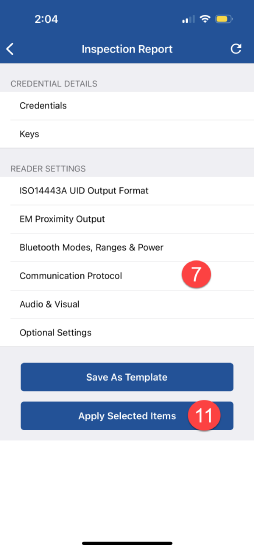
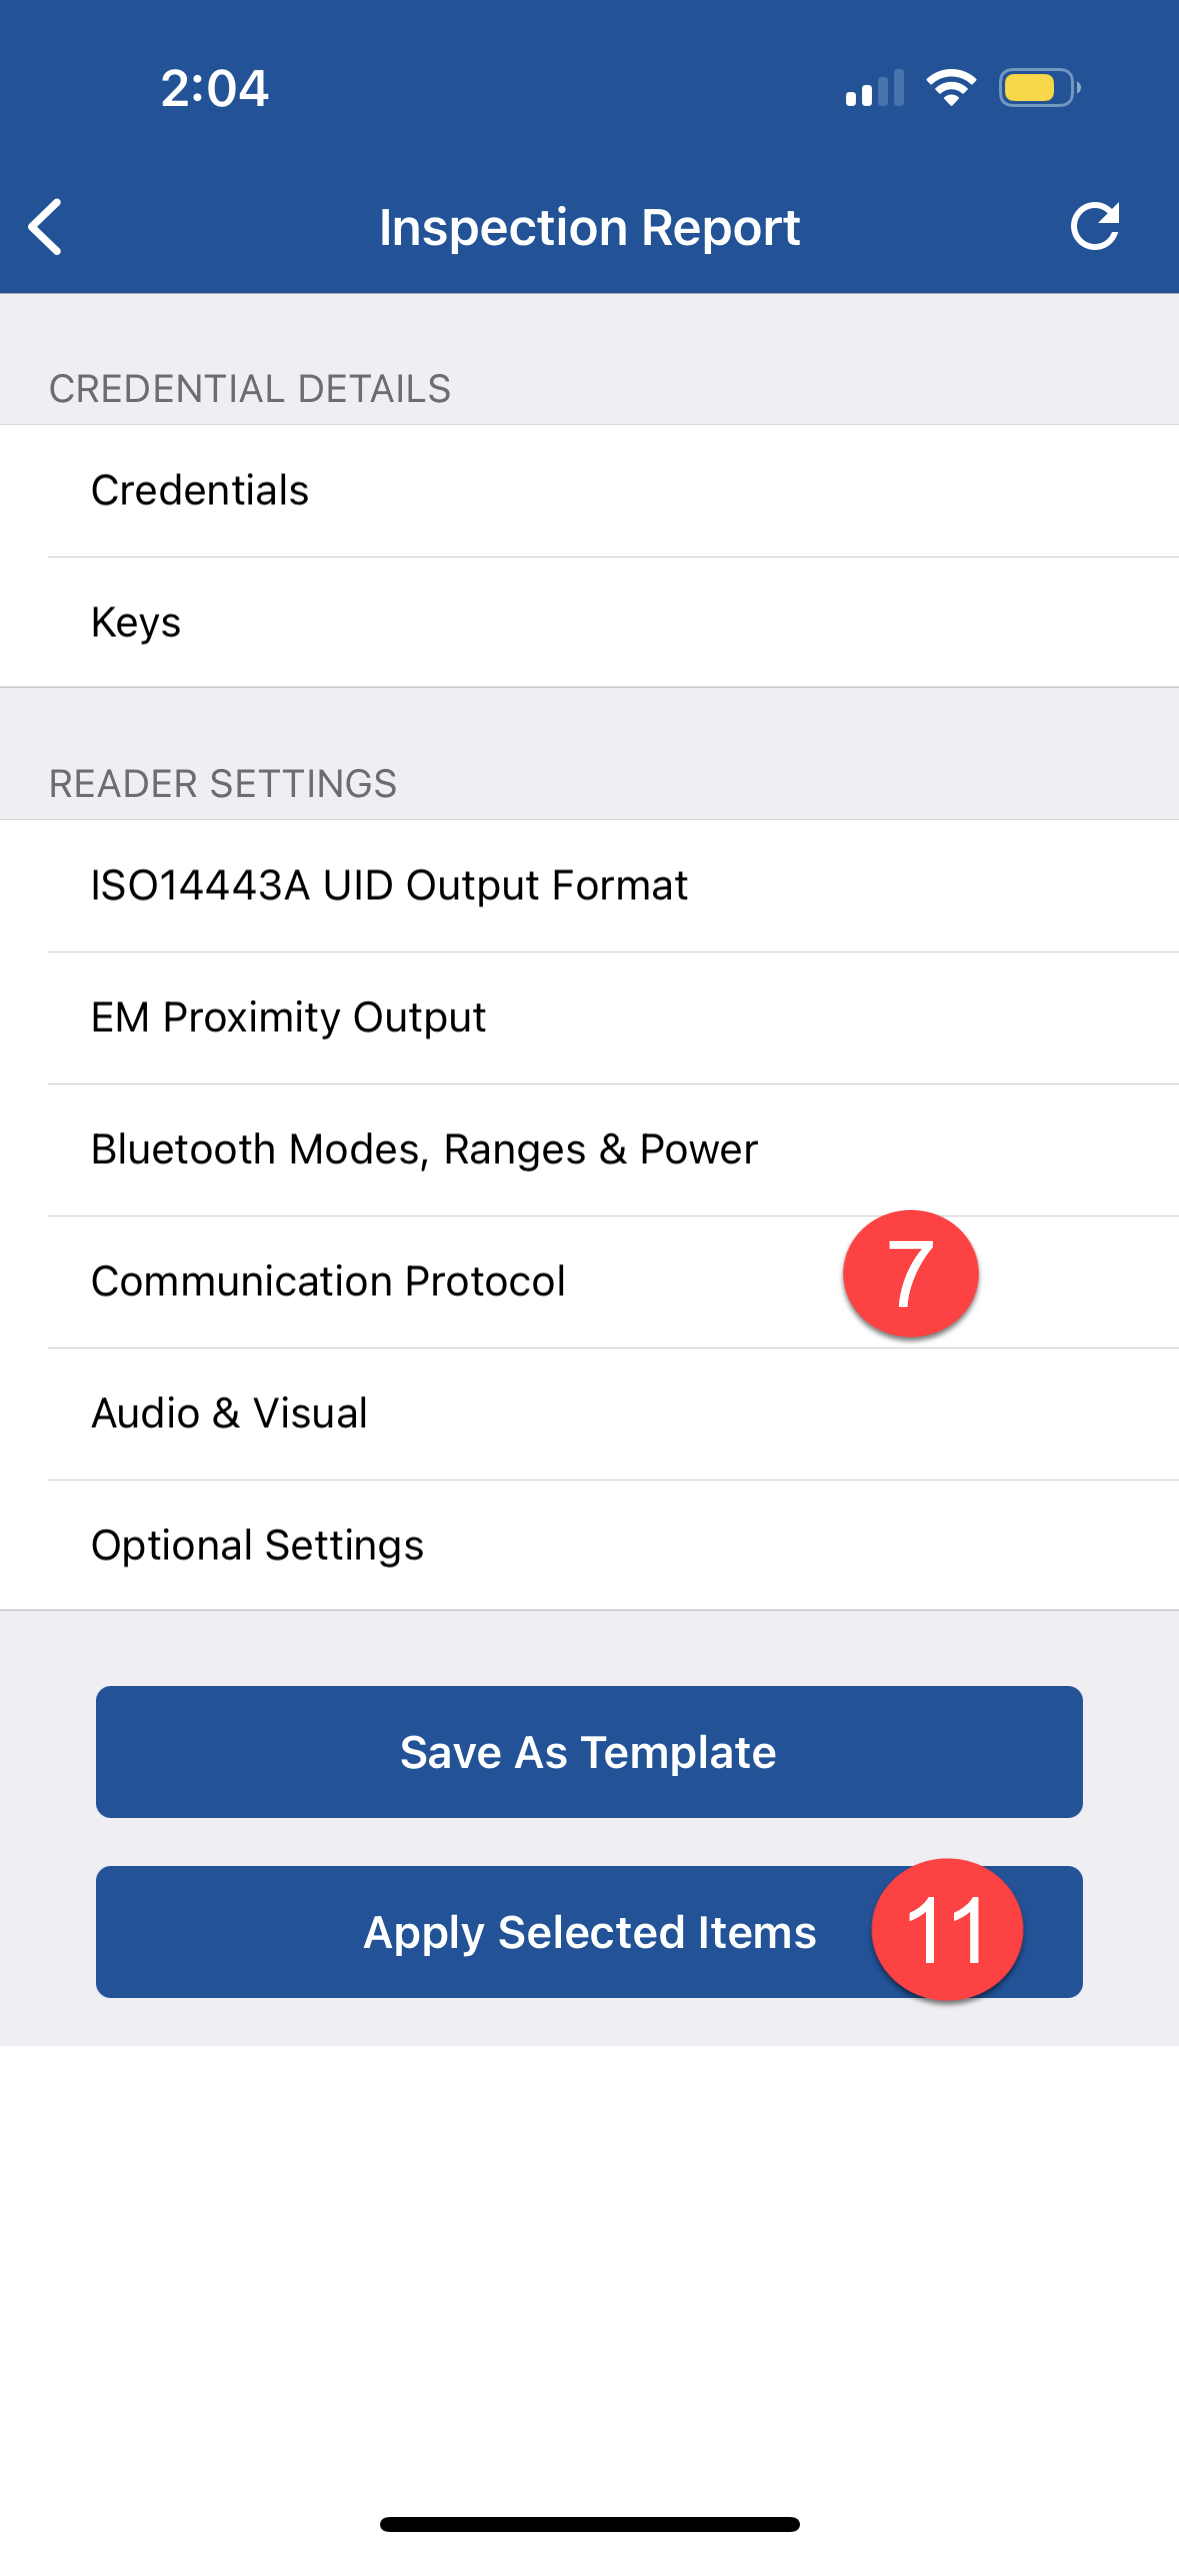
- Once the Detailed Configuration screen loads, tap Communication Protocol under the Reader Settings section.
- Tap the OSDP sliders to switch modes (it should turn green and Wiegand should turn gray). Note that these modes are mutually exclusive - tapping one slider will cause the other to change states as well.
- At the bottom of the Communication Protocol screen, tap the Add to Template button to select this change.
- Tap the back navigation button in the top left corner to return to the Detailed Configuration screen.
- Tap the Apply Selected Items button to apply the selected changes to the reader.


Configure the Reader in BluSKY
- Navigate to Readers. Main Menu-> Setup-> System Setup-> Readers
- Use the
 icon in the lower left side to create a new Reader.
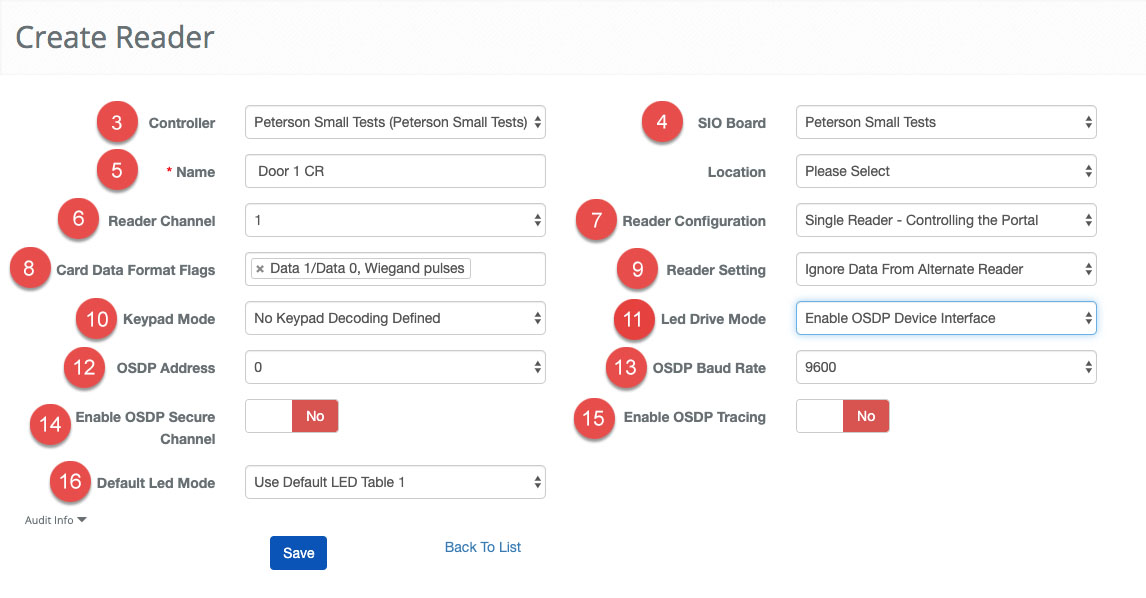
- First, pick the Controller that will manage the Reader.
- Select the SIO Board the Reader is attached.
- ***Note:***In some situations the SIO Board and Controller will be the same.
- Enter a name for the Reader in the Name text field.
- ***Note:***Using good names can make the process of servicing and debugging much easier.
- Select the Reader Channel that corresponds with the Reader port on the SIO Board or Controller.
- Note: This is the number that corresponds with which connection is used on the board.
- Choose the Reader Configuration.
- Click in the Card Data Format Flags field to bring up list of applicable Format Flags.
- Choose the Reader Setting from the dropdown menu.
- Choose the Keypad Mode.
- Select the appropriate Led Drive Mode set to OSDP Device Interface
- OSDP Address - Select the channel the reader is configured for. Most single OSDP Readers are 0. You can purchase readers with different channel numbers, and there are reader configuration cards that will change the channel. If you do not know your channel start with 0 and work your way up. Note: WIth OSDP you can now "daisy-chain" 4 readers to a single reader port on the SIO board.
- Set the OSDP Baud Rate - 4 speed options 9600 (default) 19200, 38400, 115200
- Enable OSDP Secure Channel allows for secure communication from Controller to Reader
- Enable OSDP Tracing This should be set to "No" unless directed by BluB0X support. This setting will add OSDP reader information to Mercury debug logs, which would also need to be manually configured by BluB0X Support.
- Click in the Default LED Mode field to bring up list of applicable modes.
- Confirm the entry with the
 button or because of the nature of this operation we provide a
  button to move onto the next entry quickly.
Configure the Controller in BluSKY
To enable the controller to work with OSDP-configured readers, you must change the external driver and port numbers. For use with an OSDP reader, change the external driver number to 0 and the port number to 3. Leave these as 1 and 1 respectively if an SIO board is being configured instead (default).