Release Notes 07-25-17 - 2
Feature Improvements
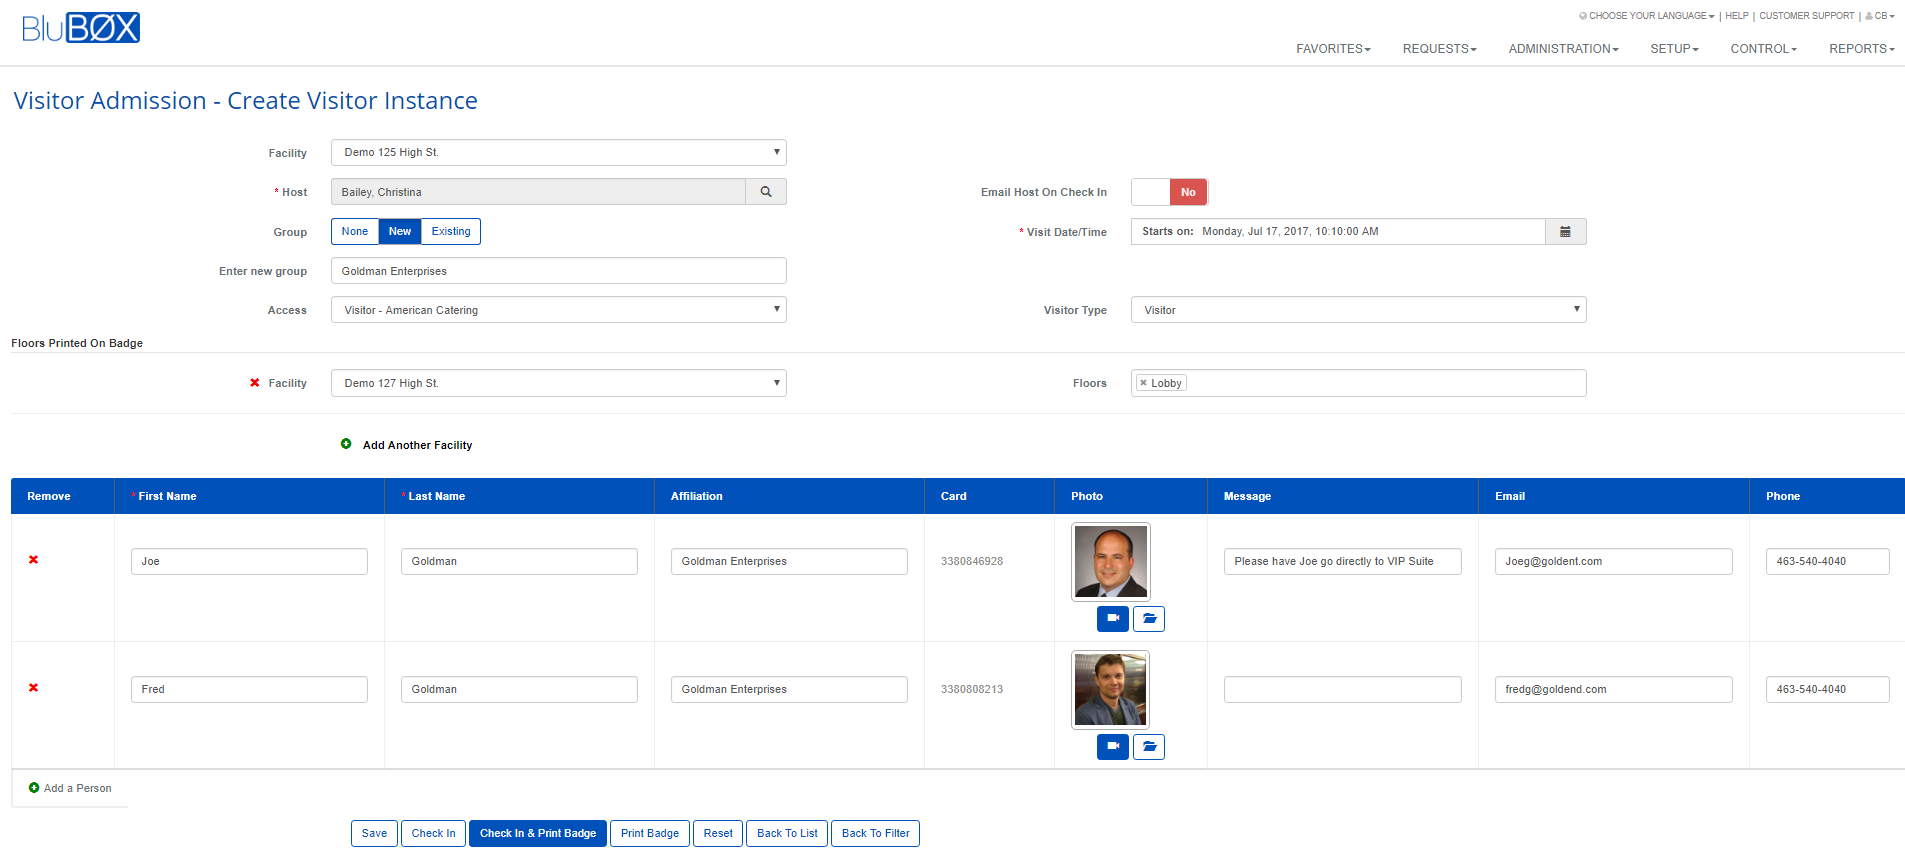
Visitor Admissions - Create New Visitor
The process by which Security Officers register unannounced visitors, take their photos and print their badges has been re-designed. The entire process is supported in a single browser window. The window handles the processing of one or more visitors at once, and significantly reduces the time it takes to print their badges. The Drivers License scanner works with the new window to help capture the first and last name of the visitors.
[Need to create a visitor instance documentation for this page]
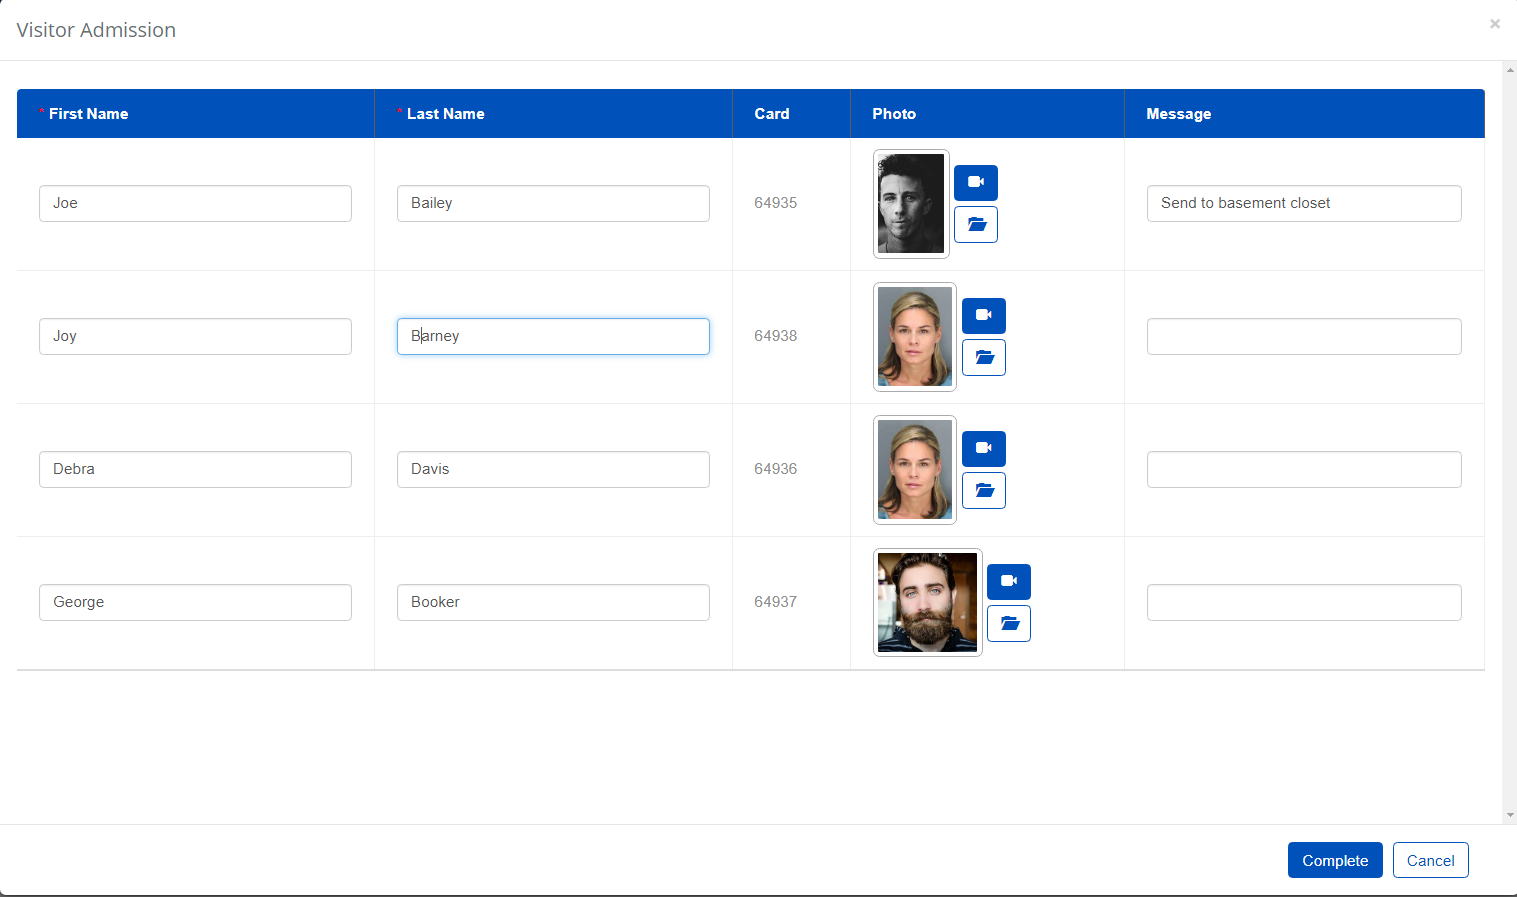
Visitor Admissions - Check-In / Check-In + Badge
Users can now check-in 1 or more visitors at the same time. Simple select each visitor you want to check in from the list of visitors and select the "Check-In" or the Chk+Badg button. A new page will pop-up with your selection pre-loaded, now you can make edits to First Name, Last Name, assign a card, or take a photo. While a picture is loading you can continue on to the next person. When visitor information is updated, then select "Complete" and they are checked-in or checked-in and their badge(s) is printed. This is a huge speed up for those who have to check-in multiple people that the same time. Even for one person is it much faster then editing each visitor and checking in or printing the badge.
Visitor Admissions - Print Badge
Minor Improvements
Drivers License Scanner
The Drivers License Scanner now supports concurrent browser and multiple browser tabs. A person admitting vendors and visitors can have different browsers or tabs open and use the license scanner in each. This enables the user to quickly go from browser/tab to the next browser/tab quickly. This will reduce the time it takes to create ad-hoc visitor and vendor requests.
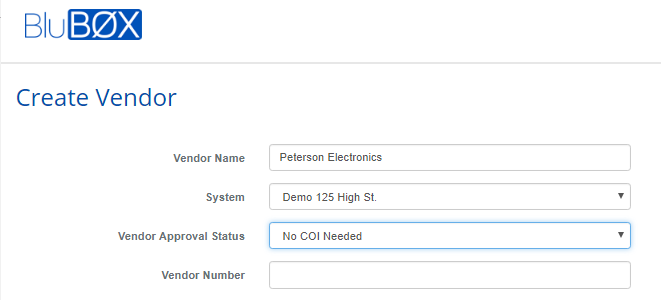
Vendor Management
- Added a new "Vendor Approval Status" "No COI Needed" Goto: Administration->Vendor to see the different status's.
- In the Vendor List screen changed column header "Vendor Approval Status" to "Approval Status"
- If the same user has overridden the COI in the creation of a vendor request they do not have to override the COI in the admission process. If a different user is admitting a vendor, then they will have to override the COI.
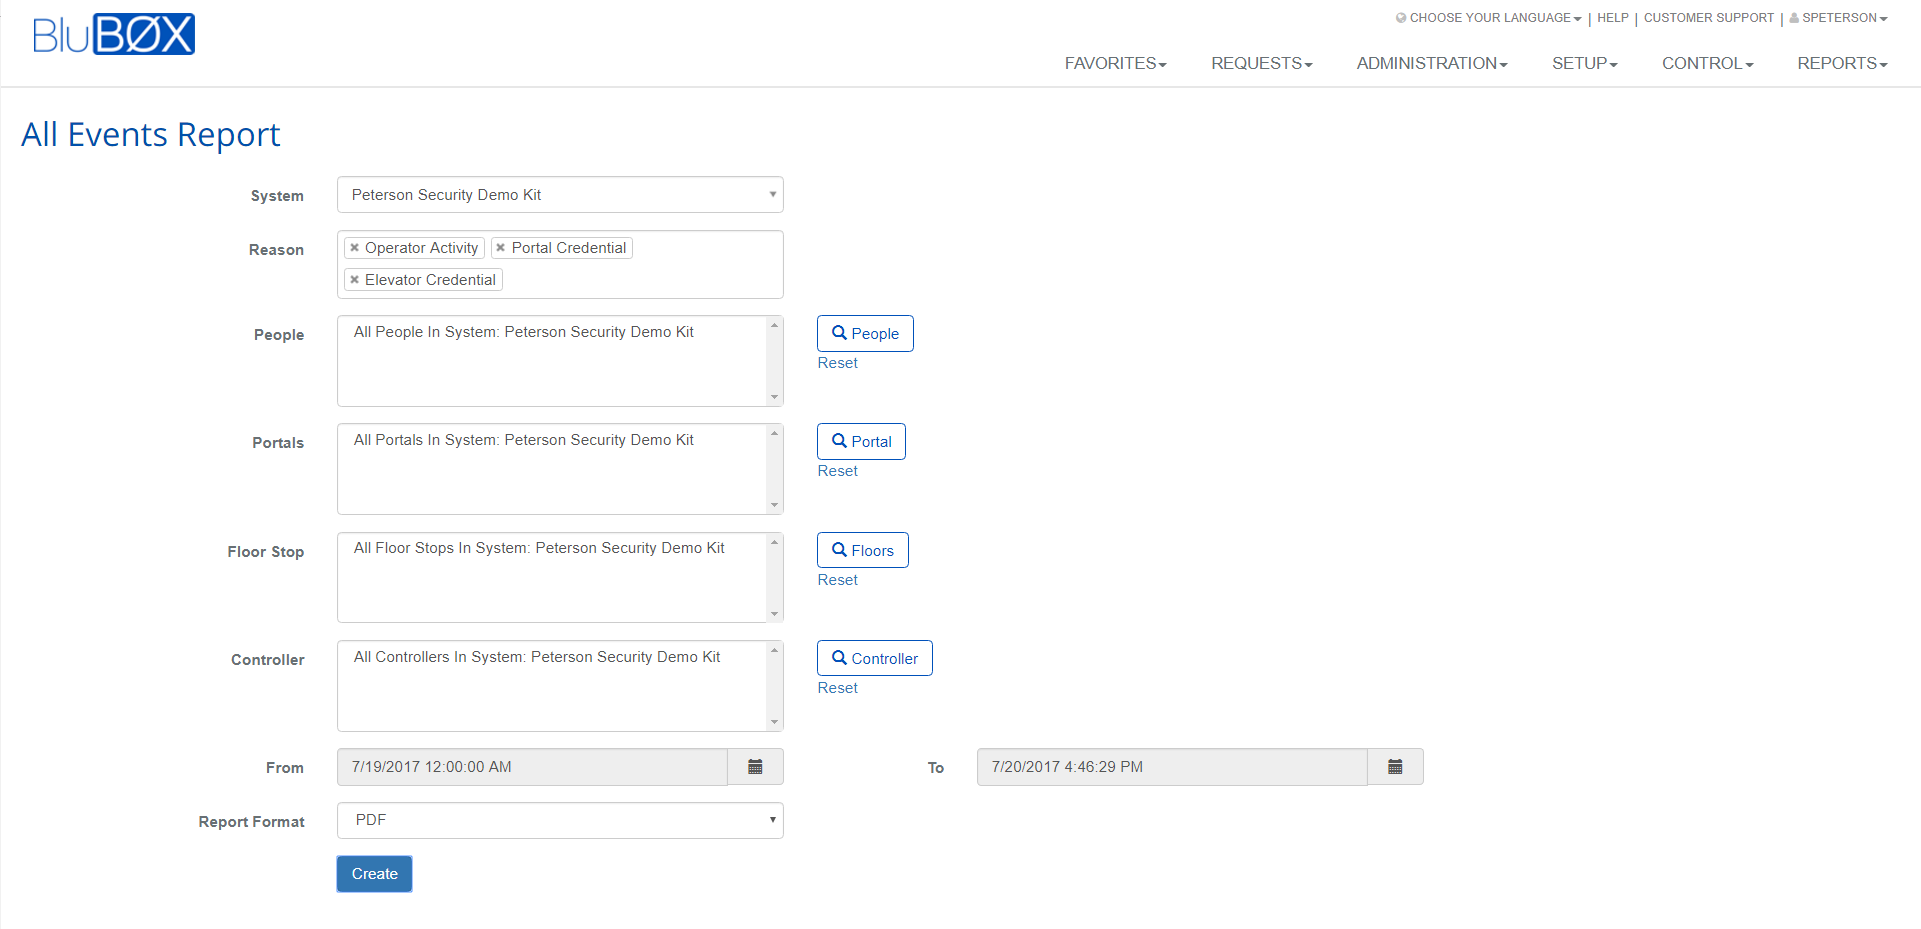
All Events Report
Now all the information you can find in the Events and Events History page can be pulled into a report.