Create Elevator Hardware
BluSKY URL: https://blusky.blub0x.com/en-US/MercuryElevator/Create
Overview
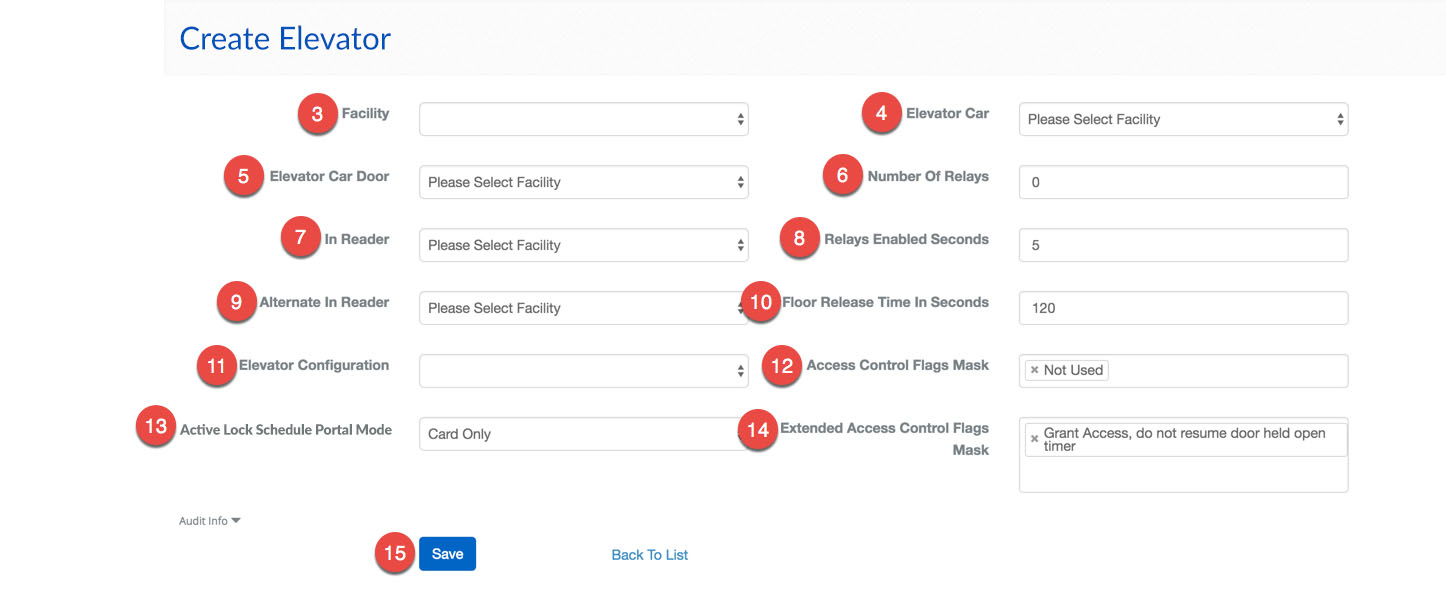
The Elevator Hardware menu is used to configure the hardware found inside of the Elevator car. This article will show you How to Setup Elevator Hardware.
Instructions
- Navigate to Elevator Hardware. Main Menu-> Setup-> System Setup-> Elevator Hardware-> Create
- Use the
 icon on the lower left side to configure new Elevator Hardware.

- Select the Facility from the drop-down menu.
- Then, chose the Elevator Car you are configuring.
- Note: If there is no Elevator Cars available, double-check the Facility to make sure they have been added.
- Important: If there is only one Elevator Car Door, leave this field blank. Only use it when you must specify which door.

- Enter the number of relays or Outputs the Elevator Car requires.
- Use the drop-down menu to select the In Reader.
- Next, you may use the Relays Enabled Seconds to specify the time the relays will be available, or you can use the default time of 5 seconds.
- Note: This is the amount of time a user will have after they present their credentials to select a floor.
- If the Elevator Car has more than one Reader you may use the Alternate In Reader to specify the other Reader.
- Enter the amount of time, in seconds, that the relay should remain active when it is released in the Floor Release Time in Seconds.
- Note: The release time is only applied when a Floor Stop is released through the Mercury Test Tool or the Elevator Control menu. The default setting is 120 seconds.
- There are two possible configurations, with feedback and without feedback. If the Elevator Car will contain inputs to record when a relay is activated, the Elevator Configuration should be set to "Elevator With Feedback".
- Click the Access Control Flag Mask field for a list of options, select any that are applicable.

- Then using the Active Lock Schedule Portal Mode define the default behavior when the Elevator becomes active.
- Click the Extended Access Control Flags Mask field and specify any additional parameters.
- When finished use the
 button to finish.