Access Control System Quick Reference Guide
| Access Control System Quick Reference Guide Click to download: Access Control System Quick Reference Guide - 2022.pdf |  |
Create a Person/Cardholder
-
Log in and navigate to People. Main Menu > Administration > People
-
In the lower left-hand side click the
 icon
icon
 |
-
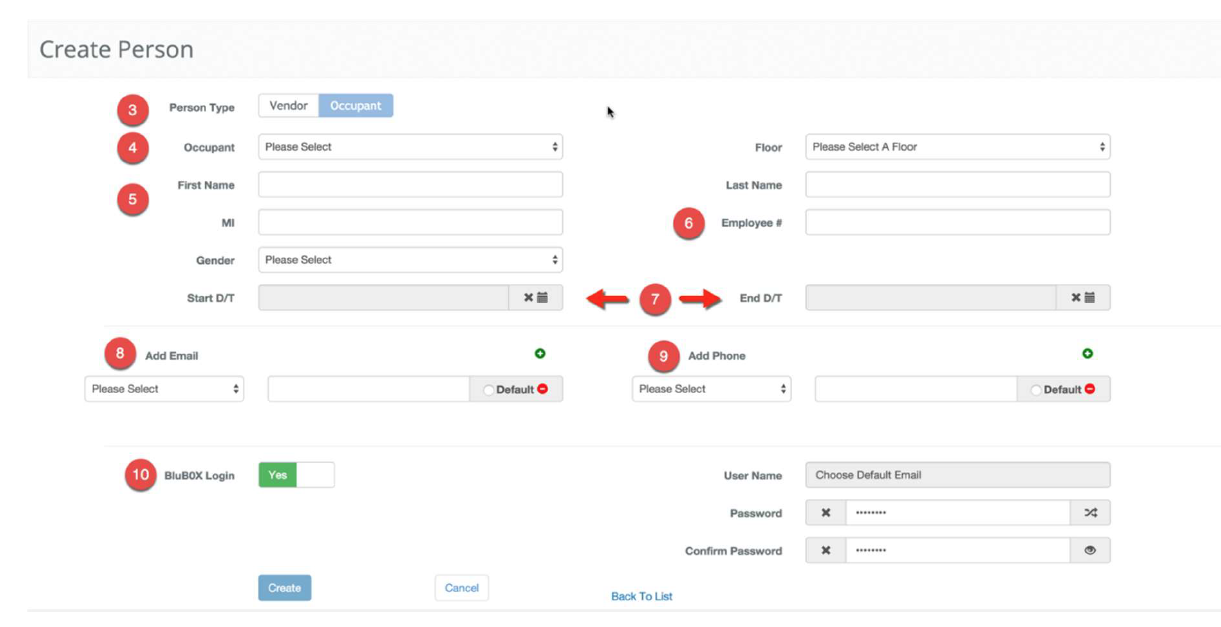
Select the type of person you wish to create (Vendor or Occupant)
-
Based on the previous choice, select the Vendor or Occupant
-
Enter the First Name, Last Name and Middle Initial
-
Provide the person with an ID Number, if applicable
-
If the Person will be temporary or will begin in the future, use the Start and End Time Fields to specify
-
Note: If you do not specify a time the Person will start immediately and will not expire.
-
Note: Click Here
 for more info on how to set times for a person.
- Enter an Email
-
You can add more than one email if necessary
-
If you use more than one you can specify which email you wish to use as the login by clicking the default button to the right of the email address
-
Add a Phone Number
-
If the Person will be using BluSKY please provide them a login using the BluBØX Login toggle
- Select one of the entered email address and make it default with the radio button

- Provide a password for the user, that is at least 8 characters long and includes uppercase, lowercase and special characters (you can toggle a plain view or generate a random password if you wish)
 |
- When finished use the
 Button to finish
Visitor Invitation
 |
-
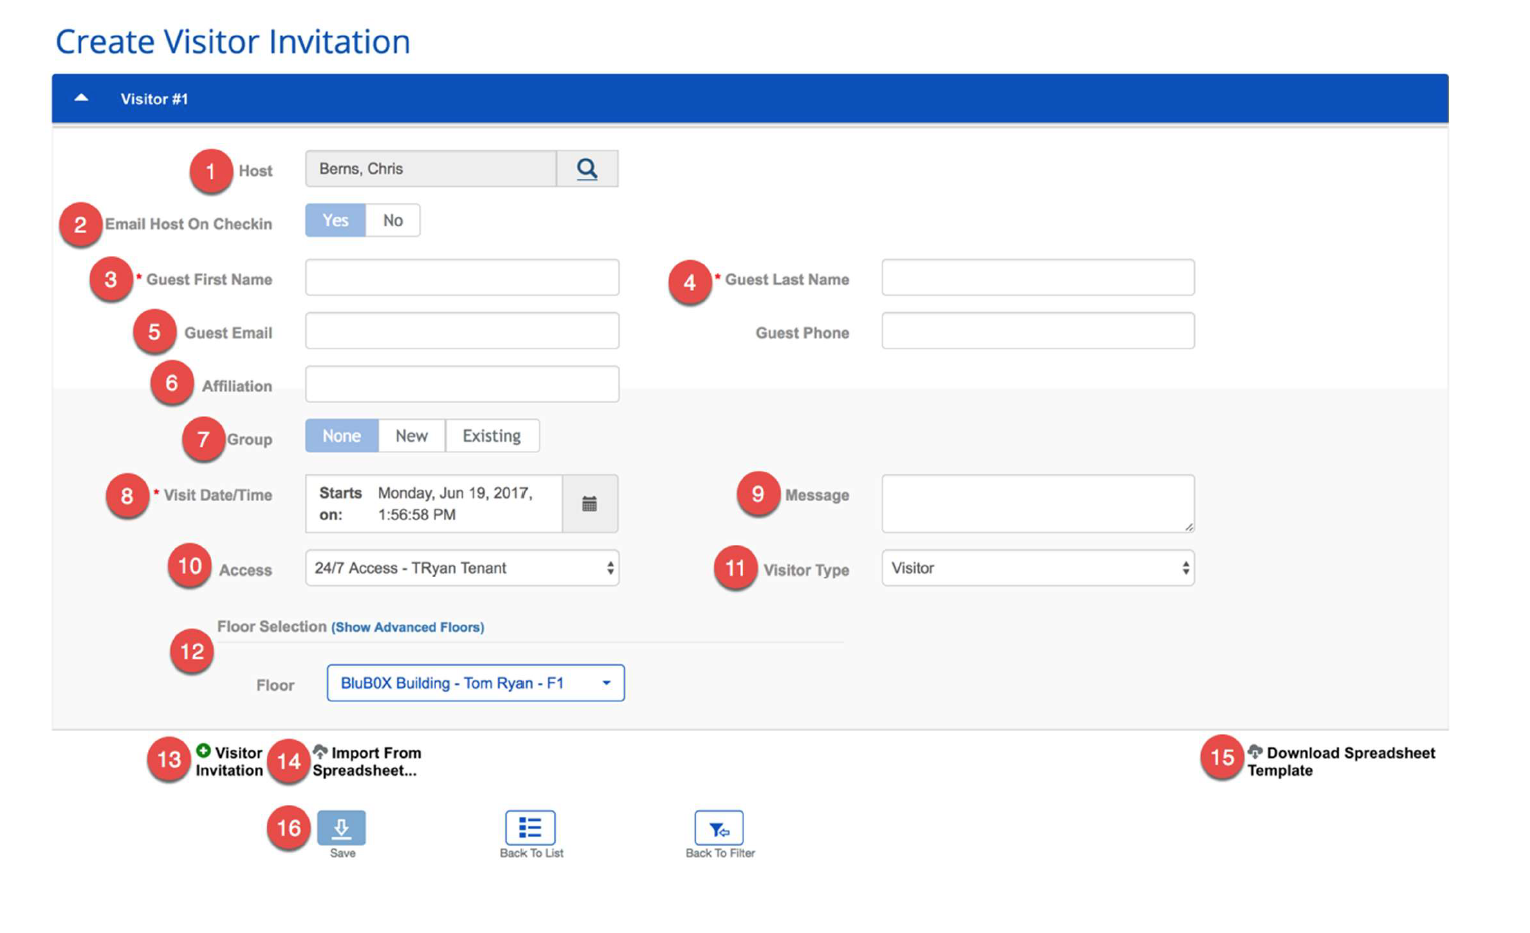
Host (Pre-populated) - The user, if he/she has the proper permission, can name a "Host" other than him/herself for the visitor. Click the looking glass
 to see a list of potential hosts.
 -
Notification Toggle - This field determines whether a notification should be sent to the Host at Check-In.
-
Guest First Name (Mandatory) - This field captures the Visitor's first name. It can be entered manually or if you have a license scanner will populated when the license is scanned.
-
Guest Last Names (Mandatory) - These fields capture the Visitor's last name. It can be entered manually or if you have a license scanner will populated when the license is scanned.
-
Guest Email / Guest Phone (Optional) - Some systems are programmed to send an e-mail or a text message to the Guest if a valid e-mail address or phone number is entered. The message is sent immediately after the invitation is completed; it confirms the invitation and provides instructions on how to proceed upon arrival.
-
Affiliation (Optional) - This field records the Visitor’s Company Affiliation.
-
Group (Optional) - It is sometimes practical to associate visitors with a certain Group. The default is NONE. You can click New to enter a new Group Name (like “Sales Seminar”). You can click Existing to associate this visitor with a Group that has already been defined.
-
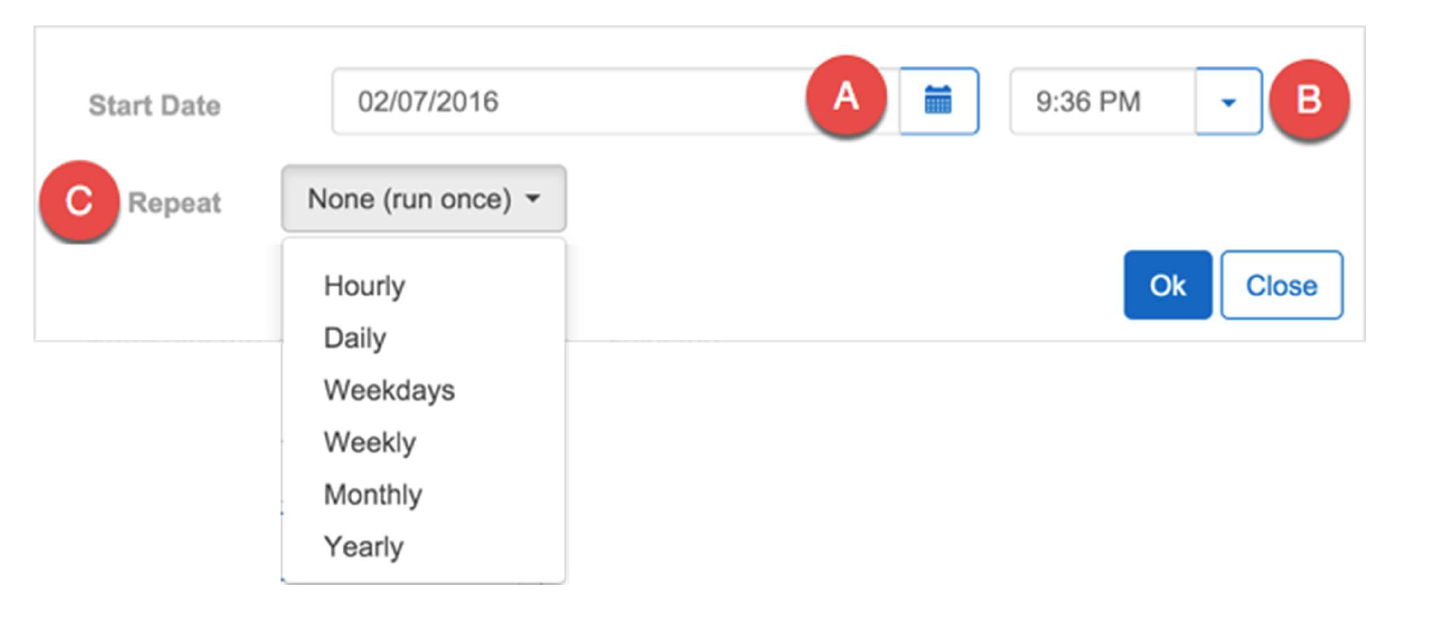
Visit Date/Time (Pre-populated) specifies the anticipated date/time of arrival of the visitor. By default, this is set to NOW. The content can be modified by clicking the calendar icon if the visitor is anticipated at a later date/time. If you click the calendar item:
A. Start Date (Pre-populated with today's date) - Is the visitor's expected date of arrival. The date can be modified by clicking the calendar icon.
B. Time (Pre-populated with the current time) - Choose a time from the pull-down menu. The arrival time does not need to be exact.
C. Repeat (Pre-populated with None) - This pull-down menu gives you a recurrence option: when you choose one, a window appears with a series of questions that must be answered to specify the recurrence. This allows you to create more than one invitation at once for your visitor. We have put together an entire article on the Visitor Repeat Options.
 |
TIP: The policy in some Facilities is that the visitor must obtain a new credential for every visit that you have specified (because credentials are valid only for the day of the visit). In other Facilities, the credential that is issued on the first visit is valid for all the visits that you have specified in the invitation. Check with your Administrator if you need to know your Facility's policy on this matter.
-
Message (Optional) - Any text that you enter into this field will be shown to the Visitor Admissions Staff in the lobby when the invitation is pulled onto their screen.
-
Access (Appears only in systems that feature access control for visitors) - (Pre-populated with the "default access level" that is specified for your visitors) - An "Access Level" indicates what doors or turnstiles can be accessed with a credential and at what time of day. Some organizations define more than one such access level for their visitors. If such is the this case, you can replace the pre-populated default access level with another from he pull down menu.
-
Visitor Type (Pre-Populated with "Visitor") - It is desirable to indicate the type of visitor being invited. Common types are: “Visitor”, “Vendor/Contractor”, "Delivery", Visitor VIP, or “Visiting Employee”...
-
Floor Assignments - Basic / Advanced - (appears only in systems that feature floor access control for visitors)
 |
- Basic - Simply select the Floor for the Visitor from the Floor drop down menu.
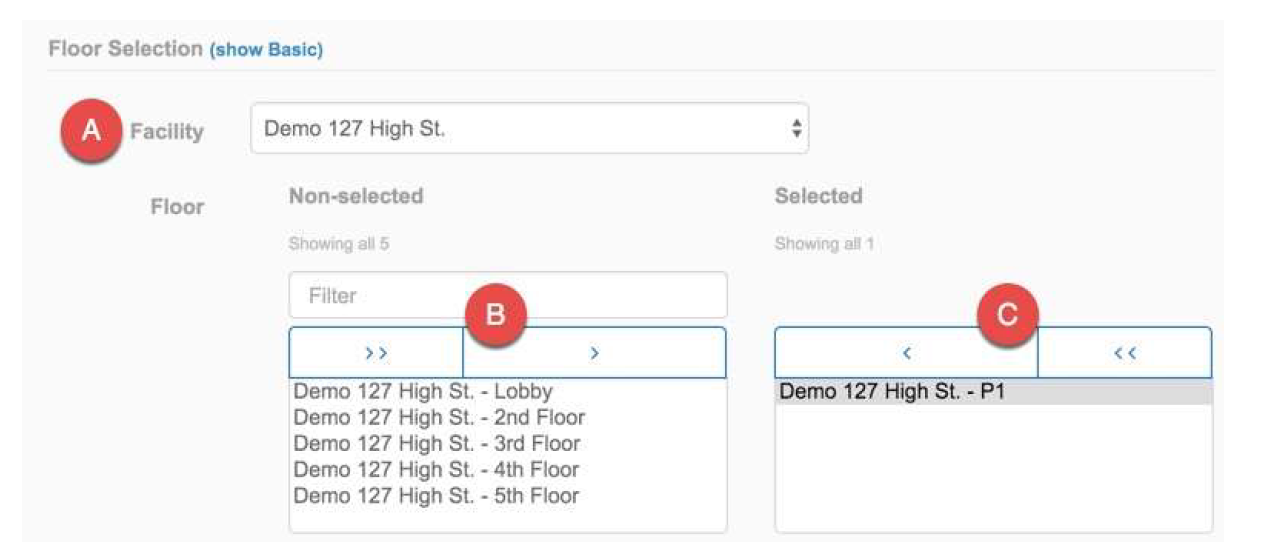
- Advanced - Click the (Show Advanced) to expand the Floor options.
A. Select the Facility from the Floor drop down menu to populate the Floor options.
B. Click the Floors and assign them using the selection commands.
C. Un-select unneeded Floors using the deselect commands.
-
Visitor Invitation (Optional) - This option will create another Visitor information form on the current screen.
-
Import from Spreadsheet (Optional) - See the article below.
-
Download Spreadsheet template (Optional) - See the article below.
-
Clicking the
button will save the Visitor Request. You can click Cancel or Back to List instead, but will discard all your current work
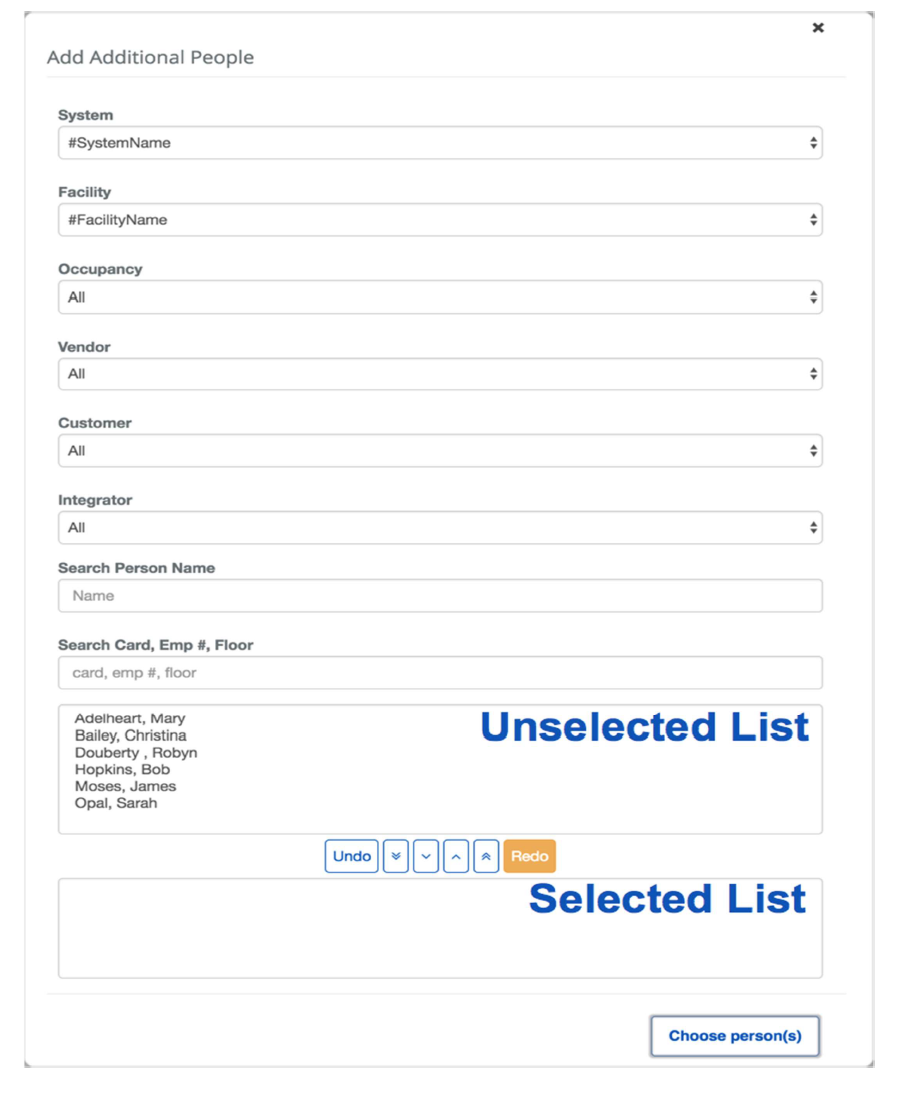
Filtering
- Select the System that contains the Person you are looking for
- Note: This field will automatically be filled in you only belong to one System
-
Select the Facility
-
Apply additional filters as needed
Select the Company the Person belongs to.
Note: This can be a great way to target all of the People from one Occupancy or Vendor.
Search for the Person's name. This will filter on the last and first names.
Search by Person's attributes. This field will perform a text search on the Card, Employee Number and Floor
- Select each Person and click the
 button to move them from the unselected list to the selected list or use the
  button to move everyone from the unselected list ot the selected list.
The  button will deselect everyone selected so far and the
  button allows you to deselect them individually.
The  !button will undo your last action and the
  button will reverse the undo action.
- When finished, click the
 button to select the People and close the person selector
 |