Create a Vendor
BluSKY URL: https://blusky.blub0x.com/en-US/Vendor/Create
Overview
Vendors are organizations that need access to an access control system to provide good or services to the Occupants of the system. This article will detail the steps needed to Create a Vendor in BluSKY.
Instructions
In order to create a Vendor, you will need to provide details on the Vendor. This information will include the basics like name, address and contact information. There may also be COI specific fields that indicate the status of the Vendor's COI and their ability to perform work in the building. Do not worry if these fields are not displayed, they are only exposed when your System requires COI for Vendors. 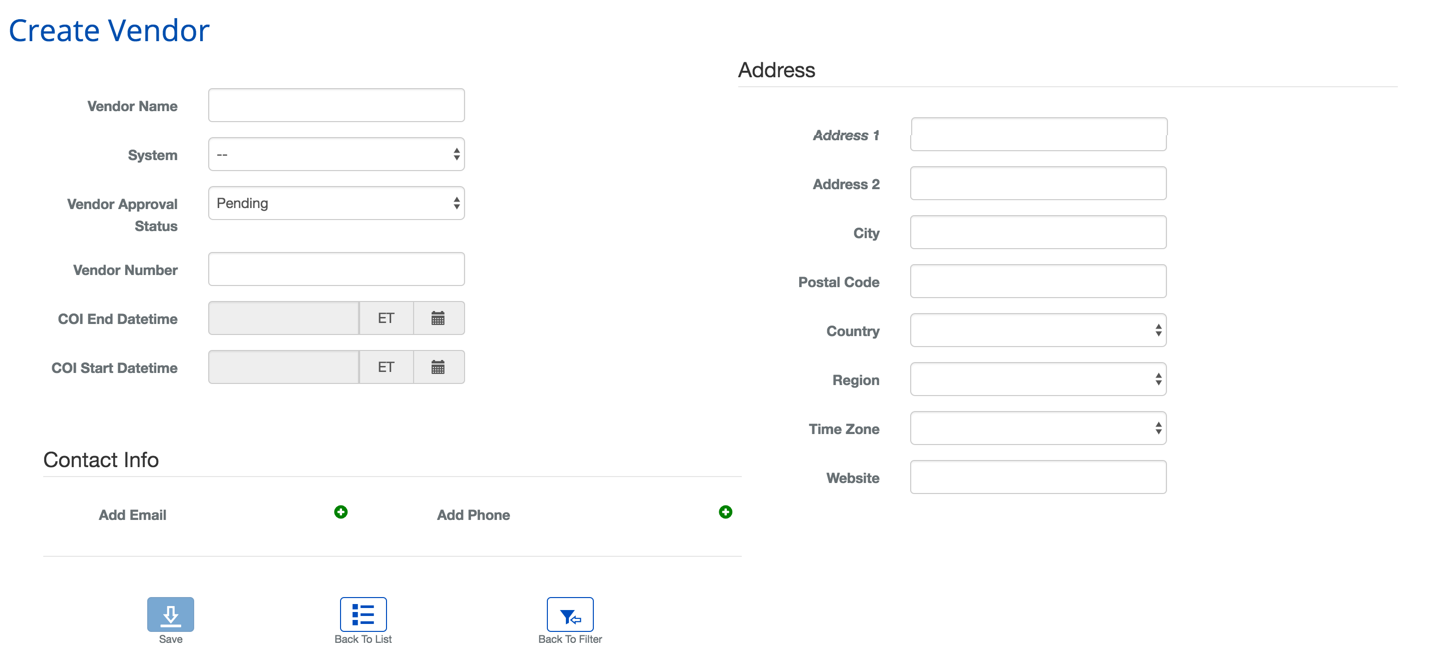
- Enter the Vendor's name.
- Select the System the Vendor will need access.
- Note: This Vendor can be associated with other Systems as well, through the Associations tab that will be available once the initial record is created.
- Select the current Vendor Approval Status.
- Note: This status will indicate to the person admitting the Vendor, whether they are allowed on site. The person will, however, have the ability to override the status if the situation allows for it.
- Enter the Vendor Number if applicable.
- If applicable: Add when the Certificate of Insurance (COI) becomes valid..
- If applicable: Add when the Certificate of Insurance (COI) becomes invalid..
- Note: If these fields are not visible on the user interface, contact support@blub0x.com or your Integrator of record.
- Add the Contact Information for the user using the appropriate fields. The more details you are able to provide the easier administering the Vendor will be in the future.
- Choose the Time Zone of the Vendor.
- **Note:**This is an important step, it will prevent the entry from being created if the time zone is not set.
- Use the get from address above text to add a location marker to the map. (Not shown in image above)
- When finished use the
 button to finish.
Definitions
| Name | Description |
|---|---|
| Vendor Name | The name of the Vendor |
| System | The System that will store the Vendor record. Note the Vendor can be shared across System by using the Associations tab. |
| Vendor Approval Status | This field indicated whether the Vendor has been Approved or Not Approved to perform work in the building. |
| Vendor Number | Any numeric used to identify the Vendor. |
| COI Start Datetime | When the Certificate of Insurance (COI) becomes valid. |
| COI End Datetime | When the Certificate of Insurance (COI) becomes invalid. |
| Address | The address of the Integrator, User, or Company. |
| Address 2 | An additional address field for lengthy or complex addresses. |
| City | The City. |
| Region | The Region, i.e. State, Province, County, etc. |
| Country | The country. |
| Time Zone | The time zone of the Vendor's office. |
| Contact Info | Where the contact emails and phone numbers are stored. |