LVSM Installation, Configuration & Debugging
Overview
The objective of this guide is to help anyone install LVSM software, from installing it in the NVR to creating and configuring the recorder page in BluSKY. We will also verify that both local and cloud streaming are available in BluSKY. Additionally, we will explore how to debug the Site Manager application if it is not launching successfully and how to investigate the issue.
Steps:
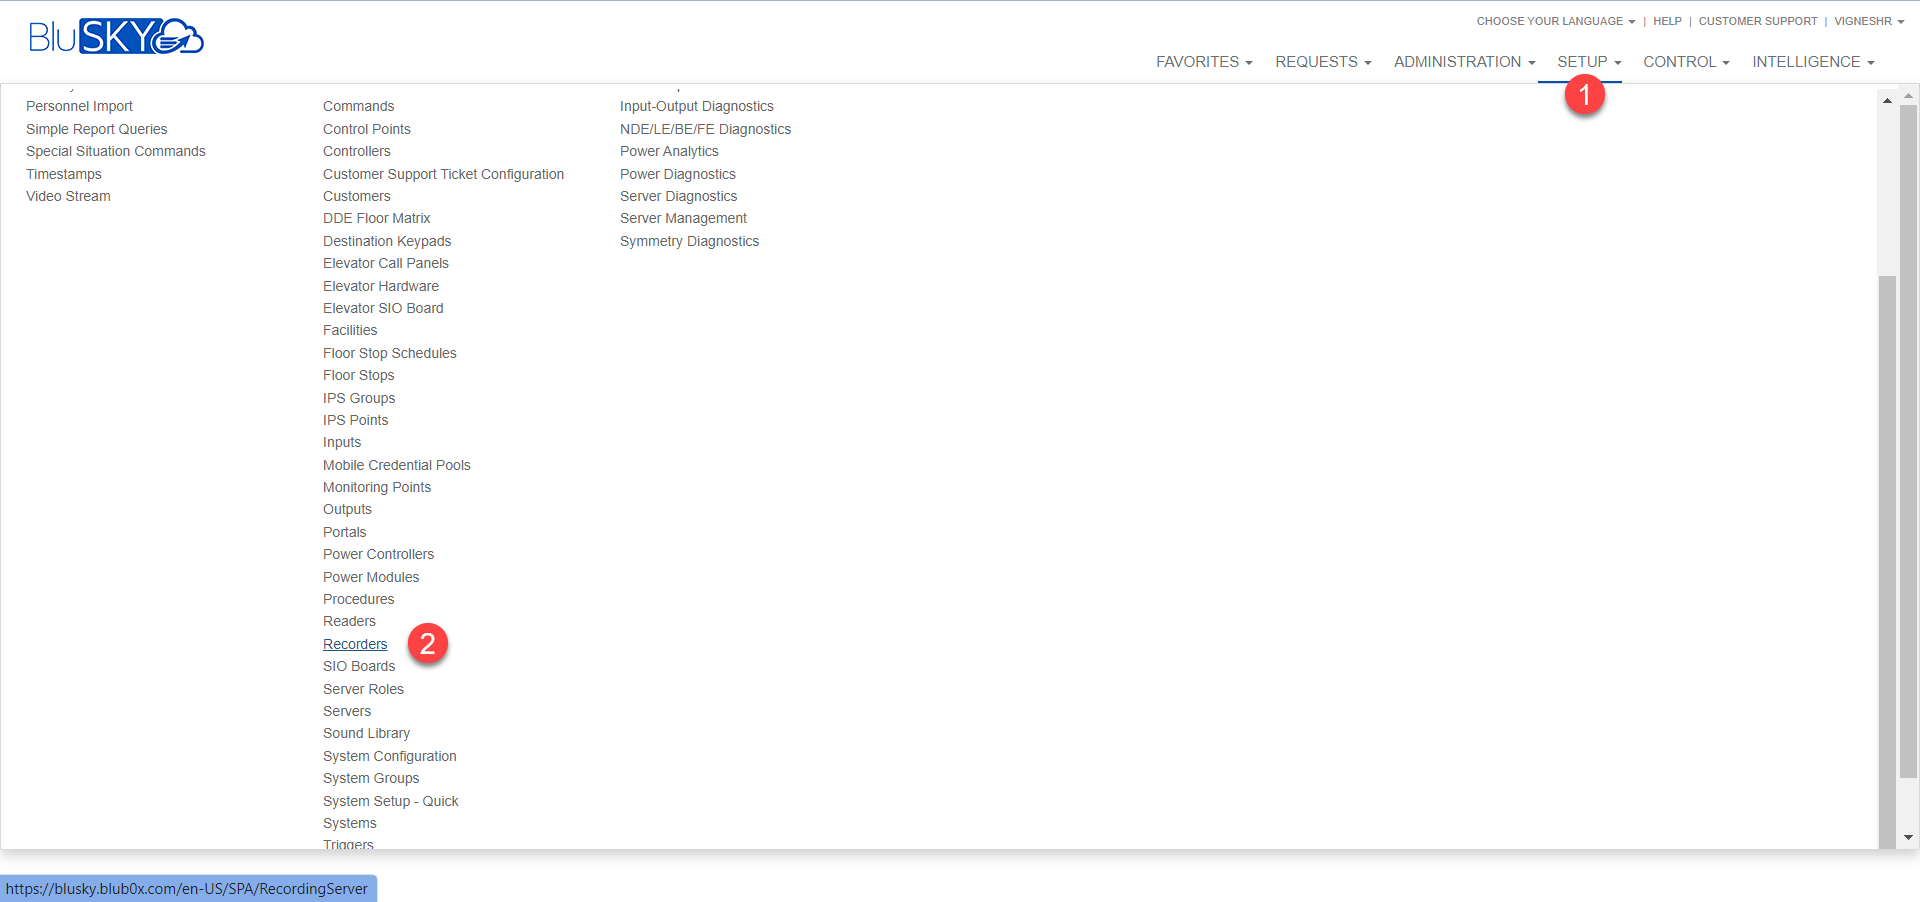
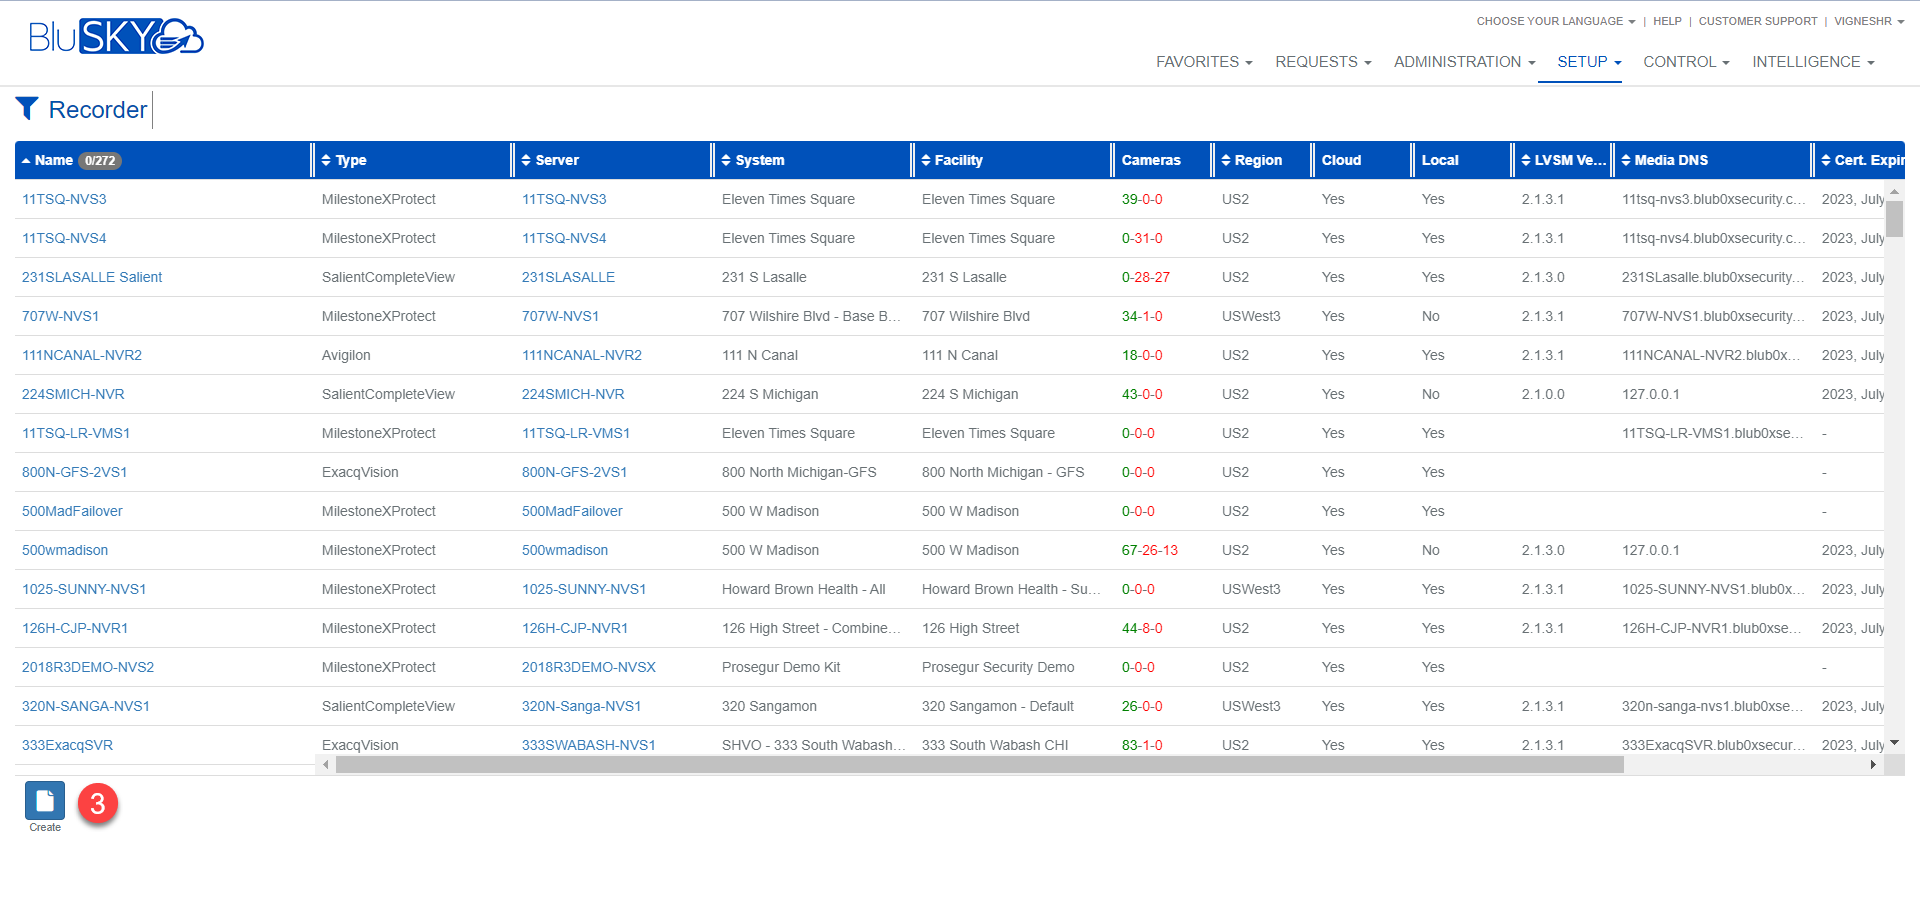
From the top dropdown navigation menus, go to Setup > Recorder. Select the Create button once the page loads.
Basic Info
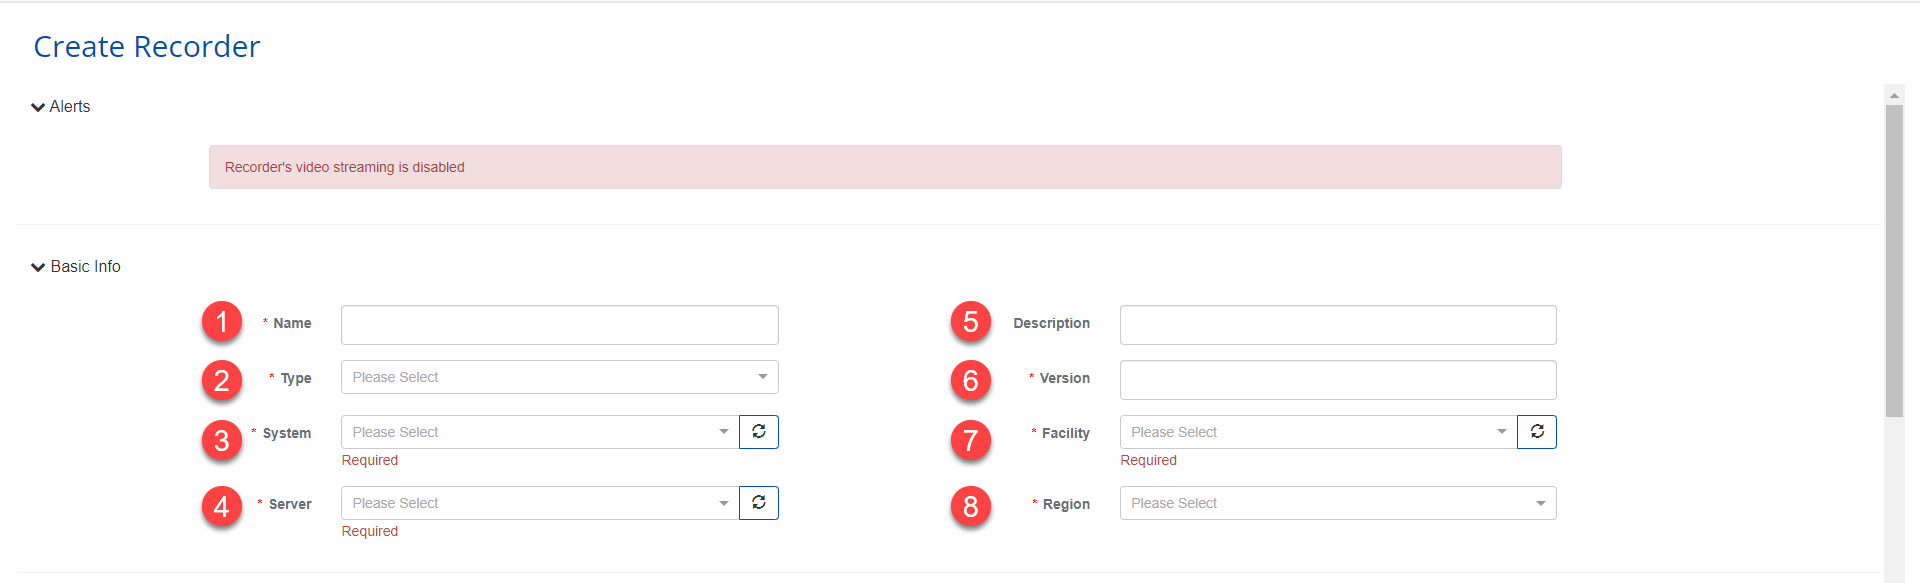
Once the recorder create/edit page appears, the following fields need to be updated:
- Name. It is advised to use the same name as the recorder name.
- Type. Select the NVR software type from the following options:
- Avigilon
- ExacqVision
- Milestone XProtect
- Salient CompleteView
- System. Select the system in which the recorder is being created.
- Server. Select the server for this recorder. It is advised to use the same name as the recorder name.
- Description. This is not mandatory, but you can add a description as a placeholder.
- Version. Enter the version number of the NVR software used for this recorder.
- Facility. Select the facility in which the recorder is being created.
- Region. Select a region from the list below. It is advised to select the region that is closest to the location of the NVR.
- KO1 (Korea)
- US1 (East)
- US2 (East)
- US West 3
- US West 4 (Beta)
NVR Settings and LVSM Settings
We then populate the NVR Settings fields so that the recorder page can connect to it.
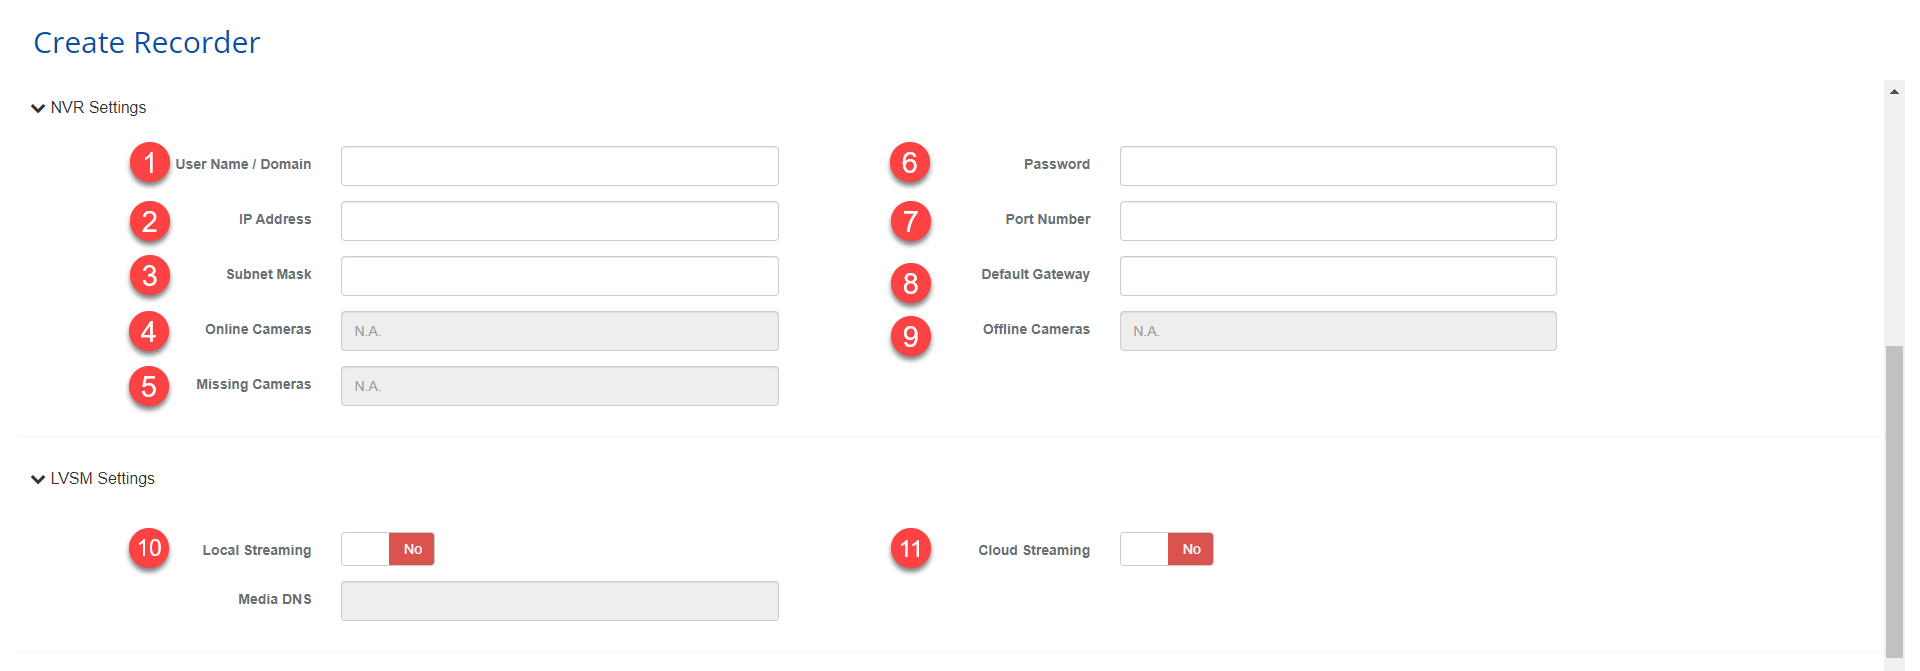
- User Name / Domain. Enter the NVR software login ID.
- For example, the default login ID for Milestone used by BluB0X is "blub0x".
- IP Address. Enter the IP address of the NVR.
- Subnet Mask. This field is not mandatory. It will be automatically updated in future versions of the recorder.
- Online Cameras. This field is automatically populated and will show the list of cameras that are online in BluSKY.
- Missing Cameras. This field is automatically populated and will show if there are any cameras in the NVR that have not been added to BluSKY.
- Password. Enter the NVR software password.
- To get the NVR software password please call support at 844-425-8209 Ext 2, 9am-8pm EST.
- Port Number. Enter the port number based on the NVR software used:
| NVR Software | Type | Port Number |
|---|---|---|
| Milestone | mip | 80 |
| Salient | cv | 4502 |
| ExacqVision | exacq | 22609 |
| Avigilon | avigilon | 8443 |
- Default Gateway. This field is not mandatory. It will be automatically updated in future versions of the recorder.
- Offline Cameras. This field is automatically populated and will show cameras that are offline in BluSKY. This could indicate that the LVSM is not properly configured and needs to be investigated.
- Local Streaming. This togglable setting allows for local streaming when enabled. The Media DNS field below it should be populated following the format "hostname.blub0x.security.com".
- For example, if the host name is "demo125" then the Media DNS is "demo125.blub0xsecurity.com".
- Cloud Streaming. This togglable setting allows for cloud streaming when enabled.
Local Media Server & Additional Settings
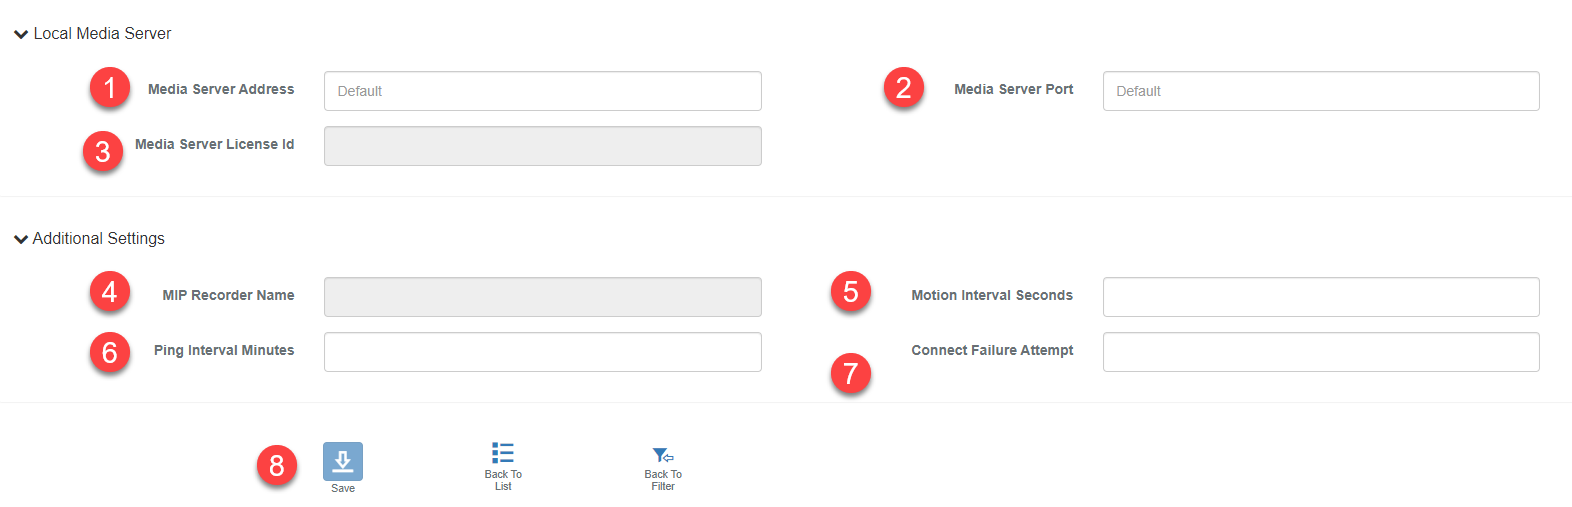
The following fields can be either default or mandatory. Default fields will be automatically updated by the recorder, while mandatory fields must be filled out by the user.
- Media Server Address. Default.
- Media Server Port. Default.
- Media Server License Id. Default.
- MIP Recorder Name. Mandatory; the MIP recorder's name should match the specific NVR's name.
- Motion Interval Seconds. Default.
- Ping Interval Minutes. Default.
- Connect Failure Attempt. Default.
Clicking the Save button will create the recorder.
Installation of LVSM Software on the NVR
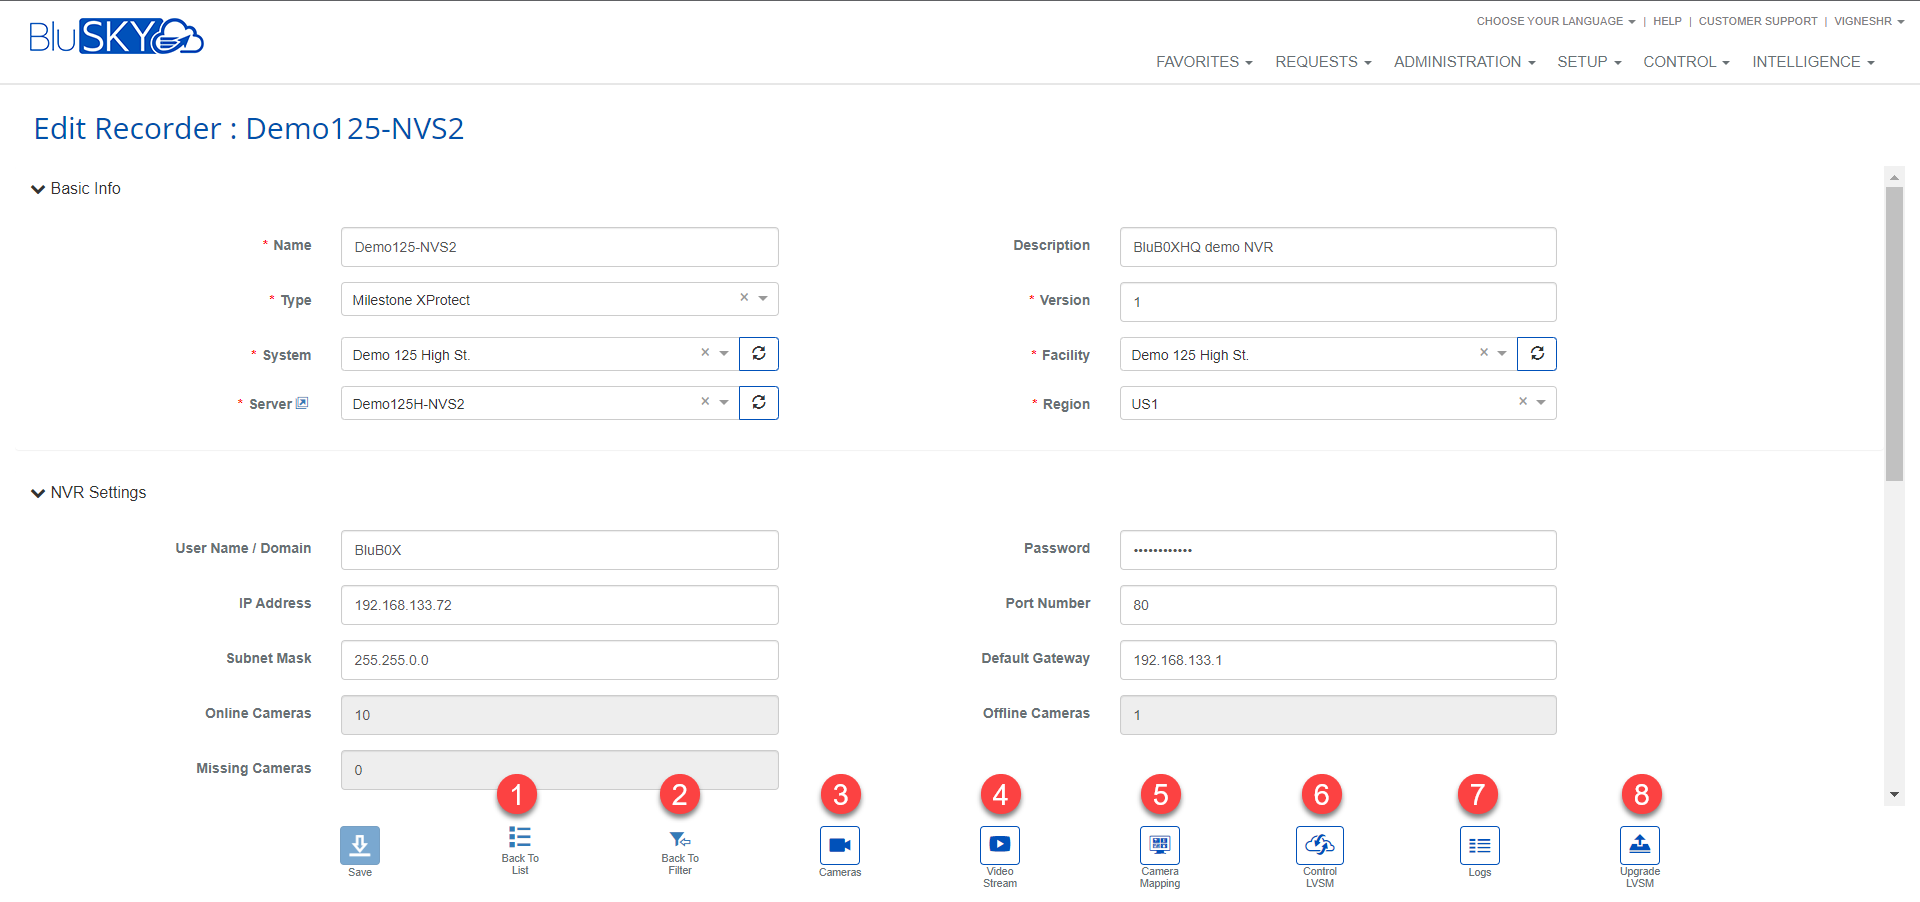
Once the Recorder page has been created, select the recorder and select the Edit button. Then click the Upgrade LVSM button to start the LVSM software installation process on the NVR.
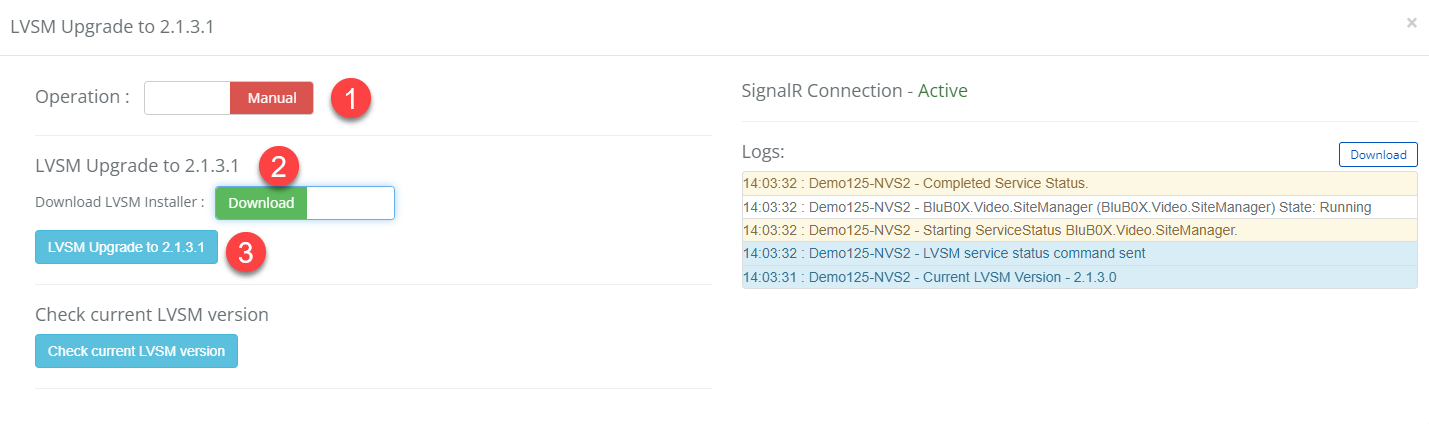
- Operation. Set this togglable setting to Manual.
- LVSM Upgrade to x.x.x.x. Set this togglable setting to Download.
- Note: x.x.x.x represents the current version number of the most recent LVSM upgrade available. In this example, it is 2.1.3.1.
- Click the LVSM Upgrade to x.x.x.x. button to download the installer.
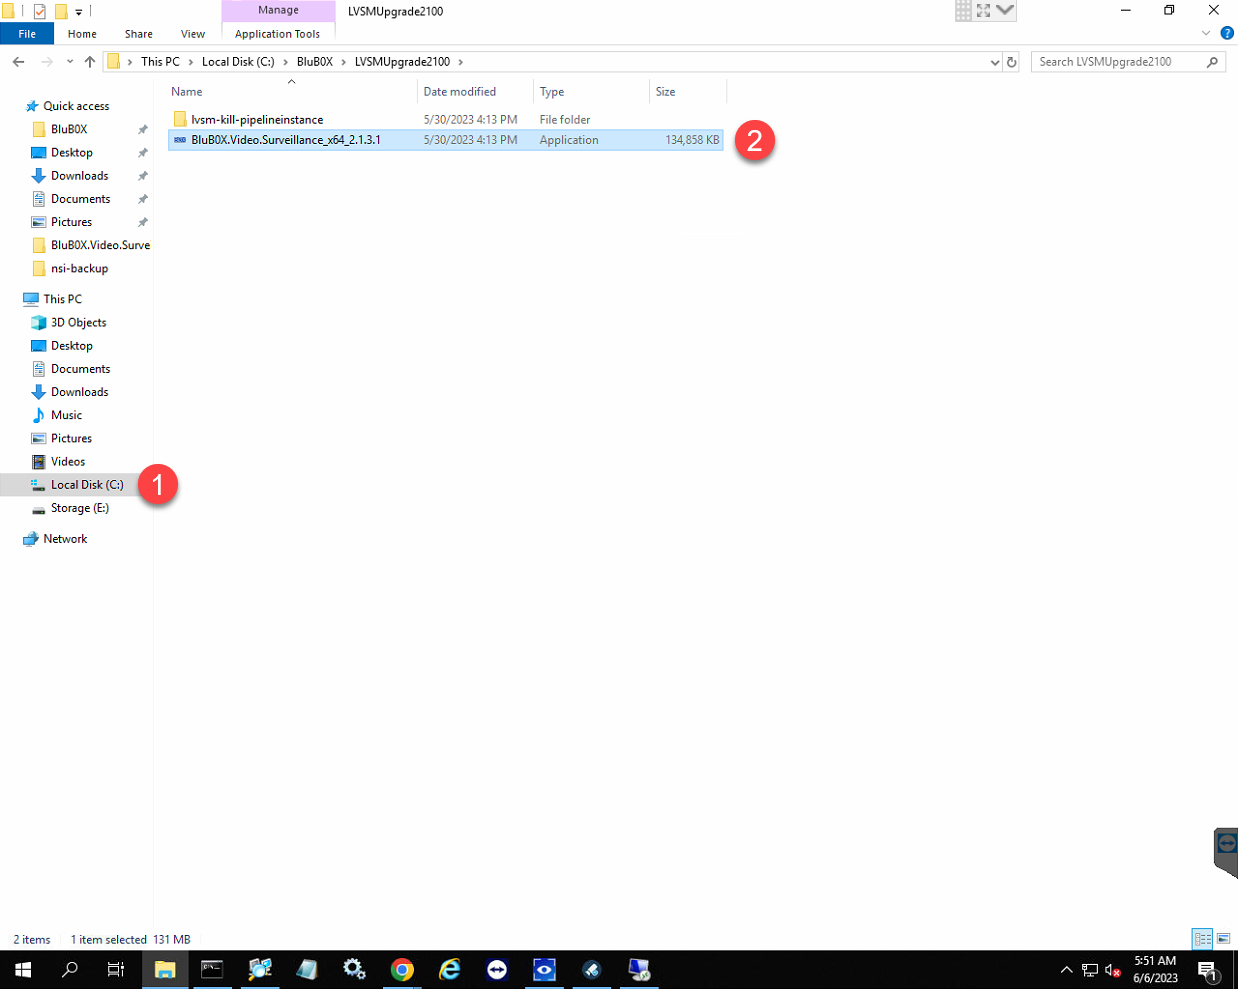
To verify if the file has been downloaded, connect to the NVR through TeamViewer.
- Go to "C:\BluB0X" to check if a file with the name "LVSMUpgrade*" was recently downloaded.
- Note: * represents one or more numbers in the file name that may change between LVSM version numbers.
- Inside the folder, verify that the installer application exists.
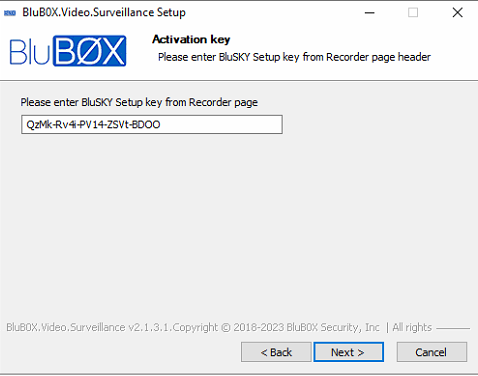
Run the application as an administrator to start the installation process. After clicking the Next button, you will be taken to a page where the BluSKY Setup key is requested. This key can be found on the Recorder page - copy and paste it into the installer's field, then proceed with the installation.
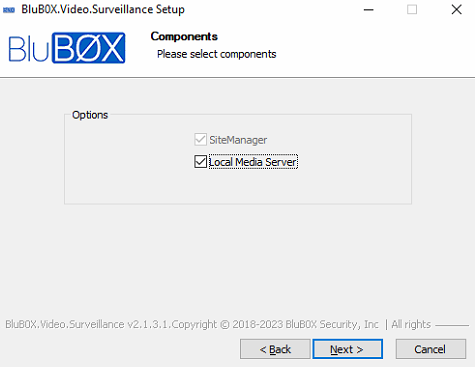
On the next screen, ensure the Local Media Server option is checked before clicking the Next button.
Once these steps are done, the application will request to install EvoStream, Visual Studio 2015, and Node Media Client. Additionally, it will also request for a salient client service, which can be ignored if it is not a salient NVR. After these installations are completed:
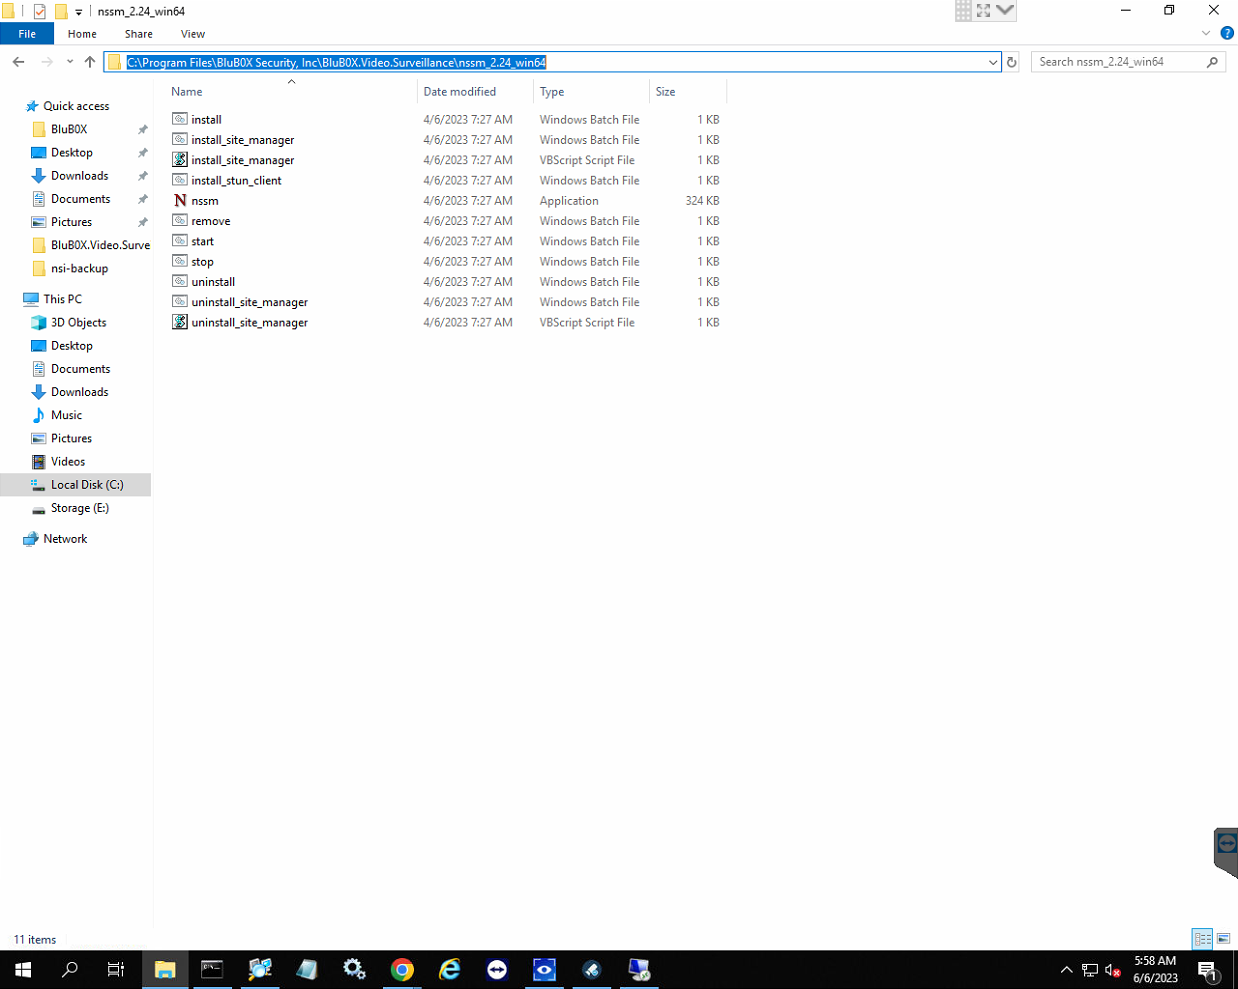
- Go to "C:\Program Files\BluB0X Security, Inc\BluB0X.Video.Surveillance\nssm_2.24_win64"
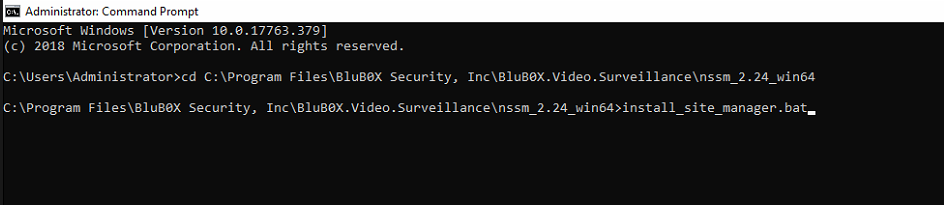
- Highlight and copy the directory's path, then open the Command Prompt as an administrator.
- In the Command Prompt, type "cd " and then paste the directory's path before executing this line. This command changes the directory we are working in.
- After the directory is changed, type "install_site_manager.bat" and execute this line to install the site manager.
- Once the installation is complete, open the Services page and ensure the site manager is enabled.

Repeat these 5 steps for EvoStream as well, but instead:
- Replace "C:\Program Files\BluB0X Security, Inc\BluB0X.Video.Surveillance\nssm_2.24_win64" with "C:\EvoStream\services\ems"
- Replace "install_site_manager.bat" with "create.bat"
Once both these services are enabled, follow these steps:
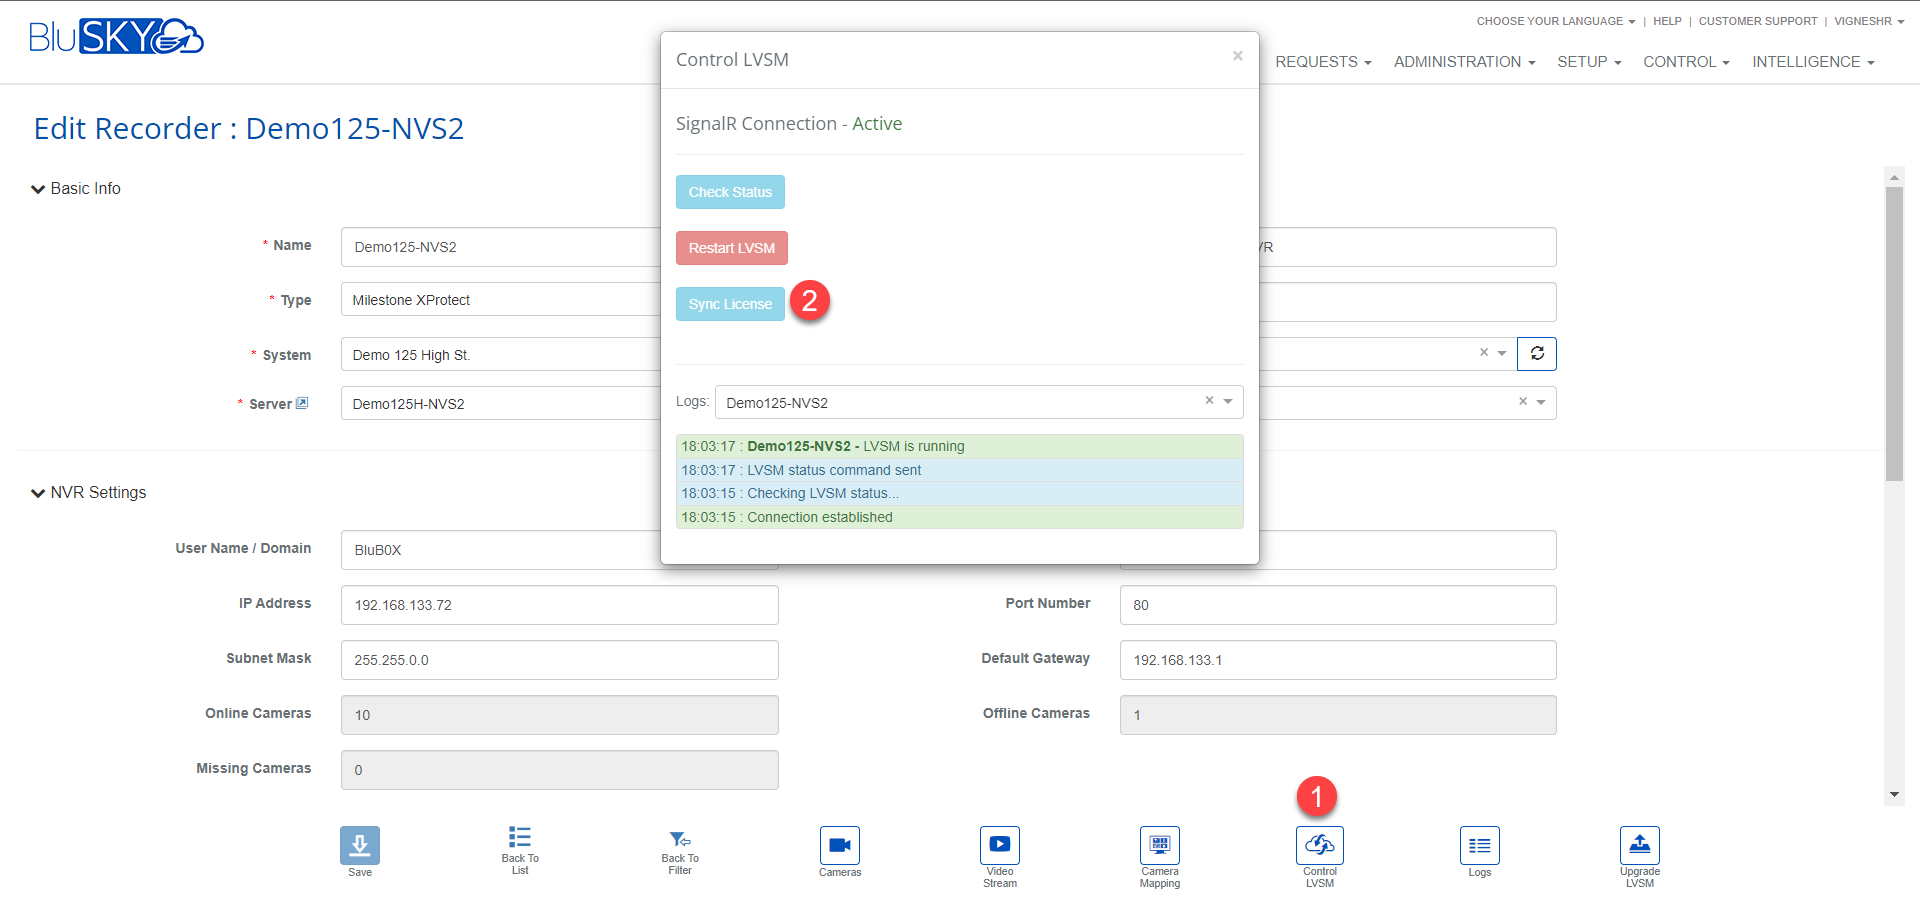
- Go back to the recorder page and select the Control LVSM button.
- Select the Sync License button. A confirmation will be displayed on the screen.
- Note: If the EvoStream service does not automatically restart, do a manual restart of it.